Applications/Software
This includes information about other applications and software that A-State uses in various different areas on campus.
- A-State Software Downloads
- Adobe Creative Cloud
- Request Adobe Access for Faculty or Staff Accounts
- Student Account
- How to Setup Adobe Creative Cloud
- Proofpoint Spam Management
- About Proofpoint
- Does Proofpoint Protect Against Dangerous URLs?
- Spam Quarantine
- End User Digest
- Safe / Blocked Senders List
- How to Set Up and Use Remote Desktop
- Webex
- Bomgar (BeyondTrust Remote Support) iOS/Android Mobile Setup
A-State Software Downloads
Arkansas State University provides access to a variety of licensed software to support academic and administrative needs. This article outlines the available software for download, compatible platforms, and the download links for each.
Microsoft 365
-
Platforms: Windows, Mac
-
Description: Microsoft Office suite including Word, Excel, PowerPoint, OneDrive, Outlook and more.
-
Download Link: https://www.office.com
-
Respondus LockDown Browser
-
Platforms: Windows, Mac
-
Description: A secure browser used to take tests in Canvas. Prevents printing, copying, accessing other applications, or visiting other websites during a test.
Microsoft Visual Studio Pro
-
Platforms: Windows, Mac
-
Description: An integrated development environment (IDE) for writing code in multiple programming languages.
-
Download Link: https://visualstudio.microsoft.com/vs/professional/
-
VPN GlobalProtect (Palo Alto)
-
Platforms: Windows, Mac
-
Description: Allows secure remote access to A-State systems and internal resources.
-
Download Link: https://globalprotect.astate.edu/
-
STATA
-
Platforms: Windows, Mac
-
Description: Statistical software used for data analysis, manipulation, and graphics.
-
Download Link: STATA
-
Minitab
-
Platforms: Windows, Mac
-
Description: Statistical analysis software for quality improvement and education.
-
Download Link: MiniTab
-
Mathematica (Wolfram)
-
Platforms: Windows, Mac
-
Description: A technical computing system used in many scientific, engineering, mathematical, and computing fields.
-
Download Link: Mathematica
-
SPSS
-
Platforms: Windows, Mac
-
Description: Software package used for interactive, or batched, statistical analysis.
-
Download Link: SPSS
-
For further assistance, contact the ITS Help Desk at 870-972-3933 or stop by IT Support Services (itsupportservices@astate.edu). It is located on the bottom floor of the Dean B. Ellis Library, Room 149.
Adobe Creative Cloud
Request Adobe Access for Faculty or Staff Accounts
In order to request access to Adobe Creative Cloud, you will need to create a Helpdesk Ticket so the request can be reviewed and validated. Please follow the steps below to accomplish this.
1. Go to pack.AState.edu.
2. Enter your full A-State email address and password and click Login.
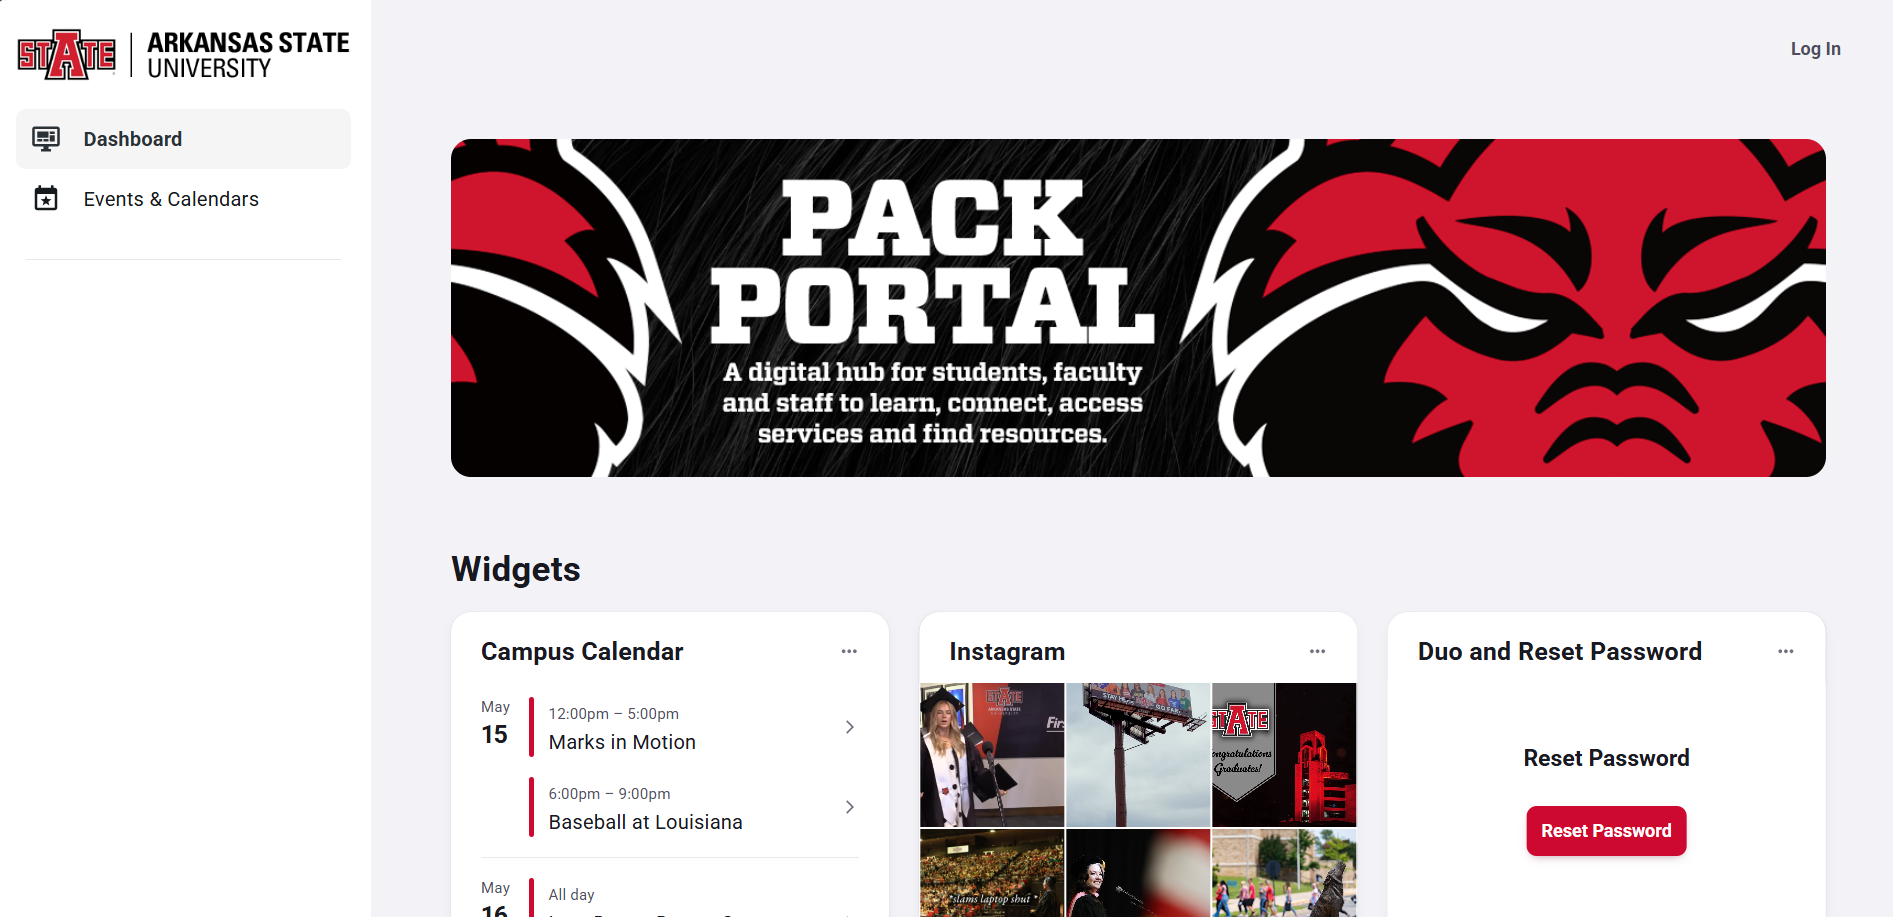
2. Authenticate using Microsoft Authenticator.
3. Locate Tools on the left then click on ITS Helpdesk.
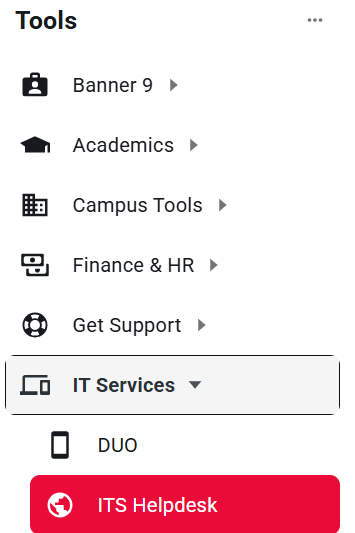
4. Click on Sign In located at the top right of the screen. 
5. Enter your full A-State email address and password and click Login.
6. Click Get Started.

7. Under Service Catalog, click Information Technology Services.
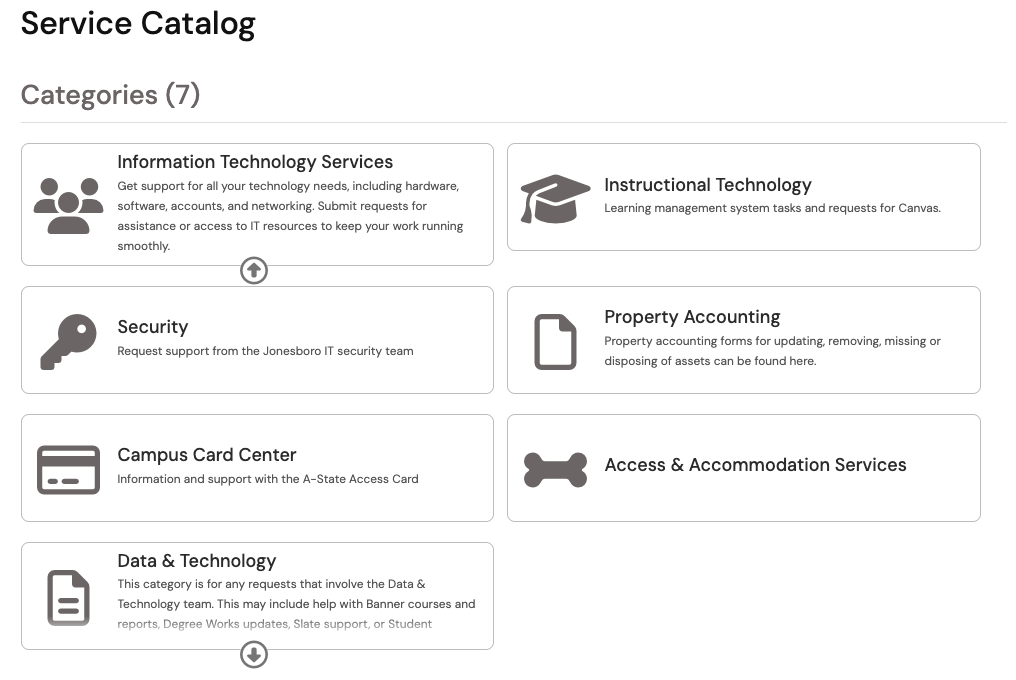 8. Choose Approved Software License Request.

9. Click Submit a Request.

10. In the "Which approved software do you need access to?" section, choose “Adobe Access.” Once all the required fields have been filled out, click Submit.
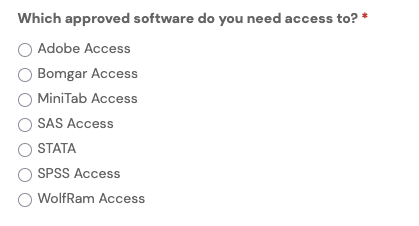
Someone from ITS will email you with instructions on how to access your Adobe Creative Cloud account.
For further assistance, contact the ITS Help Desk at 870-972-3933 or stop by IT Support Services (itsupportservices@astate.edu). It is located on the bottom floor of the Dean B. Ellis Library, Room 149.
Student Account
Students should have access to the Creative Cloud products when working in classrooms and computer labs across campus. Please check with the ITS administrators for the computers in an area to see which devices have the products installed.
If you are in a class requiring Adobe Creative Cloud then the professor of the class will need to request an account on your behalf. Once approved, you will receive an email with instructions for setting up your account. When your account has been created, you will have access to Adobe Creative Cloud.
If students don't have access to on campus classrooms or labs with the Creative Cloud products installed, there are several free Adobe apps linked below that they can use.
Adobe Scan
Download: Adobe Scan for Android | iOS (Free)
Adobe Fill & Sign
Download: Adobe Fill & Sign for Android | iOS (Free)
Adobe Spark Post
Download: Adobe Spark Post for Android | iOS (Free, subscription available)
Adobe Capture CC
Download: Adobe Capture CC for Android | iOS (Free)
Adobe Premiere Rush
Download: Adobe Premiere Rush for Android | iOS (Free, subscription available)
Adobe Photoshop Mix
Download: Adobe Photoshop Mix for Android | iOS (Free)
Adobe Photoshop Fix
Download: Adobe Photoshop Fix for Android | iOS (Free)
How to Setup Adobe Creative Cloud
Please follow the instructions below to enable access to Creative Cloud Desktop Apps on your personal device.
1. Visit https://creativecloud.adobe.com and use your A-State email address to begin the sign in process. You may need to Create an account. 
2. Once you create your account, it will ask you to select which account you are wanting to sign into. You will need to select the Company or School Account option.

3. You will be asked to Verify your Identity. You do this by pressing Continue and then typing in the Verification Code that will be sent to your A-State email address.

4. From here, you will be asked to enter in your password for this account, if you do not remember your password, click the Reset your password hyperlink and you will be sent an email to your A-State student mail with a Reset Password link.
5. Once you have reset your password or successfully signed in, you should be taken to the Adobe Creative Cloud Home page. From here, you should click on the Apps buttons on the top left hand corner of the home page to take you to the Applications page where you will be able to see all of the applications you will be able to download and install onto your device.

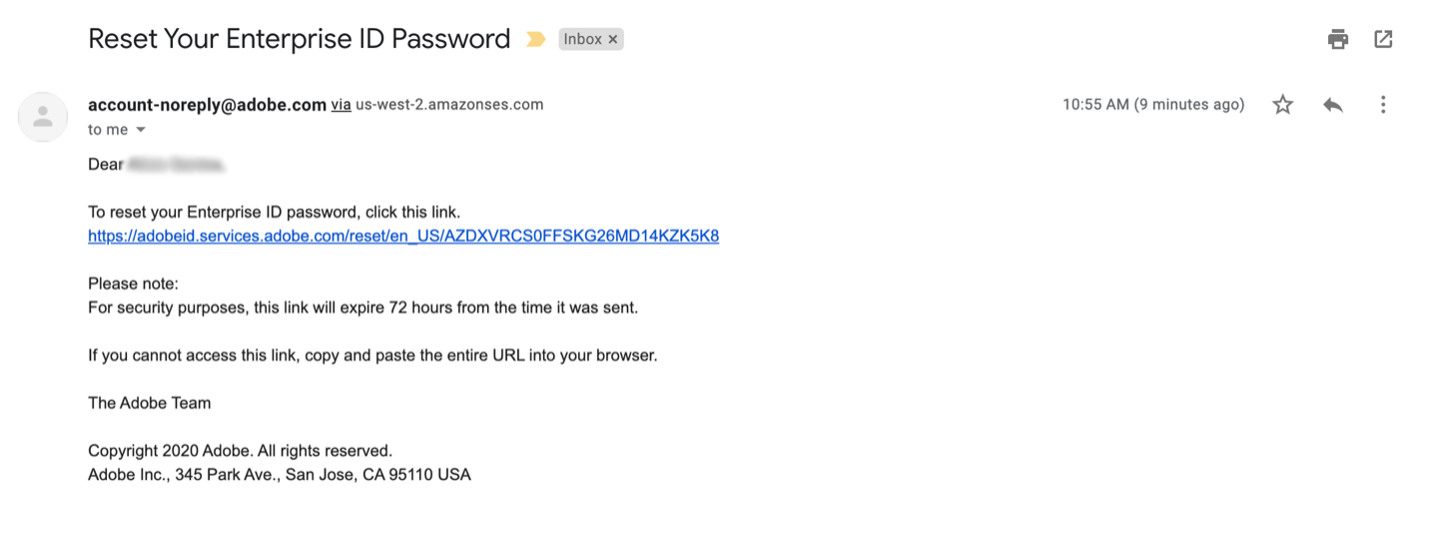
6. Lastly, to have complete confirmation that this process has been successful, you should receive an email from Adobe that looks similar to this stating that you will now have access to all of the Adobe Creative Cloud applications for a limited time 
*DISCLAIMER*: Only students who are registered in classes for the current semester that require the use of these Adobe Creative Cloud applications will be able to have access to this subscription.
For more information on how to download or install apps, see Download and Install Creative Cloud apps.
For Higher Education students to continue developing skills, Adobe offers free “Daily Creative Challenges”. These are guided projects where participants receive creative prompts and connect with pros, mentors, and other students for feedback and support. Click on the app name to learn more: Photoshop, XD and Illustrator. Also, for inspiration and over-the-shoulder learning, watch pros share their creative process on Adobe Live daily at www.behance.net/adobelive.
For faculty seeking to engage students during campus closures, Adobe has curated resources to help them discover inspiring projects, best practices, and new ideas so they can continue to drive valuable learning in virtual environments. For more information on Adobe’s distance learning resources, please click here.
Please visit this HelpX page if you have questions.
For further assistance, contact the ITS Help Desk at 870-972-3933 or stop by IT Support Services (itsupportservices@astate.edu). It is located on the bottom floor of the Dean B. Ellis Library, Room 149.
Proofpoint Spam Management
These FAQs explain our Proofpoint spam filtering system and how we process emails that originate from outside the college.
It will answer common questions about the tools that you can use to manage your personal spam account and quarantine.
About Proofpoint
What is the Proofpoint spam management system and why do we use it? The Proofpoint spam management system is an
email filtering tool. To protect A-State from virus attacks and to protect you from receiving hundreds of spam messages, all
incoming email is filtered by Proofpoint, which is an anti-spam and anti-virus product.
How does email filtering work? All incoming email is filtered by a server. Messages that contain a virus, or spam, or
inappropriate content can either be deleted or "scored." In the case of spam, the message score indicates the probability that the message is spam --- so a message scoring 100 would have 100% chance of being spam (definite spam) and a message scoring 0 would have 0% chance of being spam (legitimate correspondence). Messages scoring high enough to probably be spam are quarantined, and messages scoring below 50 are sent directly to your inbox.
Does Proofpoint Protect Against Dangerous URLs?
Yes, the new Proofpoint spam service will help protect you from specific threats that are distributed via email, including phishing and targeted attacks. Proofpoint's URL Defense protects you and A-State's network resources by blocking access to malicious websites. Links in all email messages are evaluated using a variety of sophisticated techniques to determine the likelihood that they lead back to phishing or malware websites.
If links can't be definitively classified as safe when the message is received, the URL is rewritten so that clicking it will cause URL Defense to evaluate the linked website a second time. If the link is safe, you will see no difference. If it is malicious, you will see a notification in your browser like the following:

Spam Quarantine
What is the Quarantine?
The Quarantine is a location on our Proofpoint server where email messages that are suspected to be spam are stored temporarily so that they can be reviewed and retrieved if necessary.
System administrators have the ability to search for messages on a user's behalf. You may also review and take action on your own quarantined email through the use of the End User Digest.
Messages that are not released from the Quarantine are automatically deleted after a designated period of time.
How do I access the Quarantine?
You can access your spam management account and Quarantine at proofpoint.astate.edu.
Log in with your A-State email address and password.
Can I access the antispam quarantine remotely?
Yes, you can access the system from anywhere.
How do I view messages that have been caught by the email filter and are in the Quarantine?
Log into proofpoint.astate.edu with your A-State email address and password.
Select Quarantine on the left side to view your messages in the Quarantine. This page displays messages addressed to you that were classified as spam and are sitting in the Quarantine.
I see an email in the Quarantine that is not spam. How do I release it to my inbox?
You will receive a spam End User Digest email listing all emails that have been quarantined by the spam filter. In addition, you can always log into proofpoint.astate.edu with your A-State email address and password and select Quarantine to check for emails that have been caught.
End User Digest
What is the End User Digest?
If email messages addressed to you were sent to the Quarantine, you will receive an email with the subject line End User Digest, in your mailbox. The Digest provides you with a list of the messages addressed to you that are stored in the quarantine. You can look at the message subject headers to determine their content and decide what actions you want to apply to the messages.
How do I use the digest?
The Digest will provide you with a list of all of the spam that has been quarantined for your account since you received the last Digest update. You will see a list of these messages and columns that indicate the subject, sender, and time received for each email.
You will have three separate links available to you to complete an action on each email message:
- Release - releases the message from the Quarantine to your normal email inbox.
- Release and Allow Sender - releases the message from the Quarantine to your inbox and adds the sender to your personal Safe Senders list. All future email from this sender will not be checked for spam.
- Not Spam - reports that the message was a false positive (that is, it should not have been classified as spam). In this case, the system analyzes the data to ensure that similar messages are not caught as spam in the future.
Other links in the Digest provide additional functionality. These links are not related to individual quarantined messages. The
following links provide additional Digest management:
- Request New End User Digest - immediately generates a new Digest with up-to-the-minute information about quarantined messages. Note: this Digest will contain a list of all messages currently in the Quarantine, not just those received since the last scheduled Digest update.
- Request Safe/Blocked Senders list - sends you a list of all entries currently on your personal Safe and Blocked Senders List. This list of safe and blocked senders is different than any lists you have set up on your email client.
- Manage My Account - allows you to change account preferences, as well as actively manage your Safe Senders and Blocked Senders lists using a web interface.
How often will I receive an End User Digest?
By default, you will receive an End User Digest twice a day if messages have been placed into your Quarantine since the last digest was sent.
Safe / Blocked Senders List
What is a Safe Senders and Blocked Senders list?
There are two types of Safe Senders lists.
- Global Safe Senders List
- Personal Safe Senders List.
Both are simply lists of legitimate senders of email. The email administrator controls the Global Safe Senders List, which applies to everyone in the organization. You control your personal Safe Senders List to which you can add the addresses of people, organizations, and mailing lists from which you do want to receive mail.
If a sender's address is included in the Safe Senders List, the anti-spam system does not filter the message for spam. However, it still filters the message for a virus or inappropriate content.
There is also a Global Blocked Senders List and a personal Blocked Senders List. As with the Global Safe Senders List, the Global Blocked Senders List applies to everyone in the organization. These lists contain addresses of people, organizations, and mailing lists from which you do not want to receive "junk email."
How do I manually add Safe Senders and Blocked senders to the spam management system?
Log into proofpoint.astate.edu with your A-State email address and password. Select Lists on the left side to view your Safe Senders and Blocked Senders lists.
To add a Safe Sender to your list:
- Select Safe Senders List on the left side.
- Select New on the top of the page.
- Enter an email address (e.g., john.doe (at) example.com) into the field to permit all messages from this sender to be delivered. Optionally, enter an email domain (e.g., example.com) into the field to permit all messages from xyz.com to be delivered.
Note: Permitting all email from an entire domain is not recommended as this could increase the risk of spam or malicious email.
- Select Save.
Follow the same procedure to add entries to your Blocked Senders List.
Email sent from addresses or domains on the Safe Senders List will not be filtered for spam, but will be filtered for viruses.
How to Set Up and Use Remote Desktop
How to Set Up Remote Desktop
You will need to set up the PC you want to connect to so it allows remote connections.
1. Click the Start button.

2. Open Settings.
3. Click System.
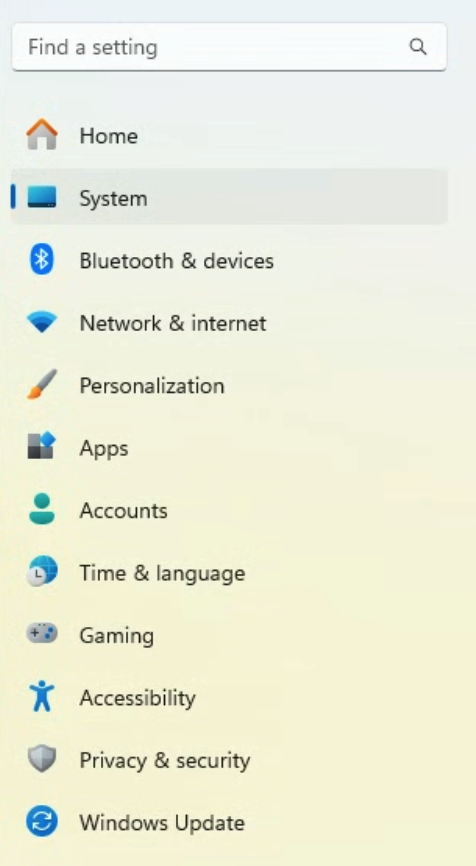
4. Under System, click Remote Desktop.

5. Set Remote Desktop to On.

6. Select Confirm.

Make note of the PC name under PC Name; you will need it to connect.
How to Use Remote Desktop
-
On your local Windows PC: In the search box on the taskbar, type Remote Desktop Connection, and then select Remote Desktop Connection. In Remote Desktop Connection, type the name of the PC you want to connect to (from Step 1), and then select Connect.
- On your macOS or iOS device:
1. Open Microsoft Remote Desktop (available for free from Microsoft Store and the Apple App Store).

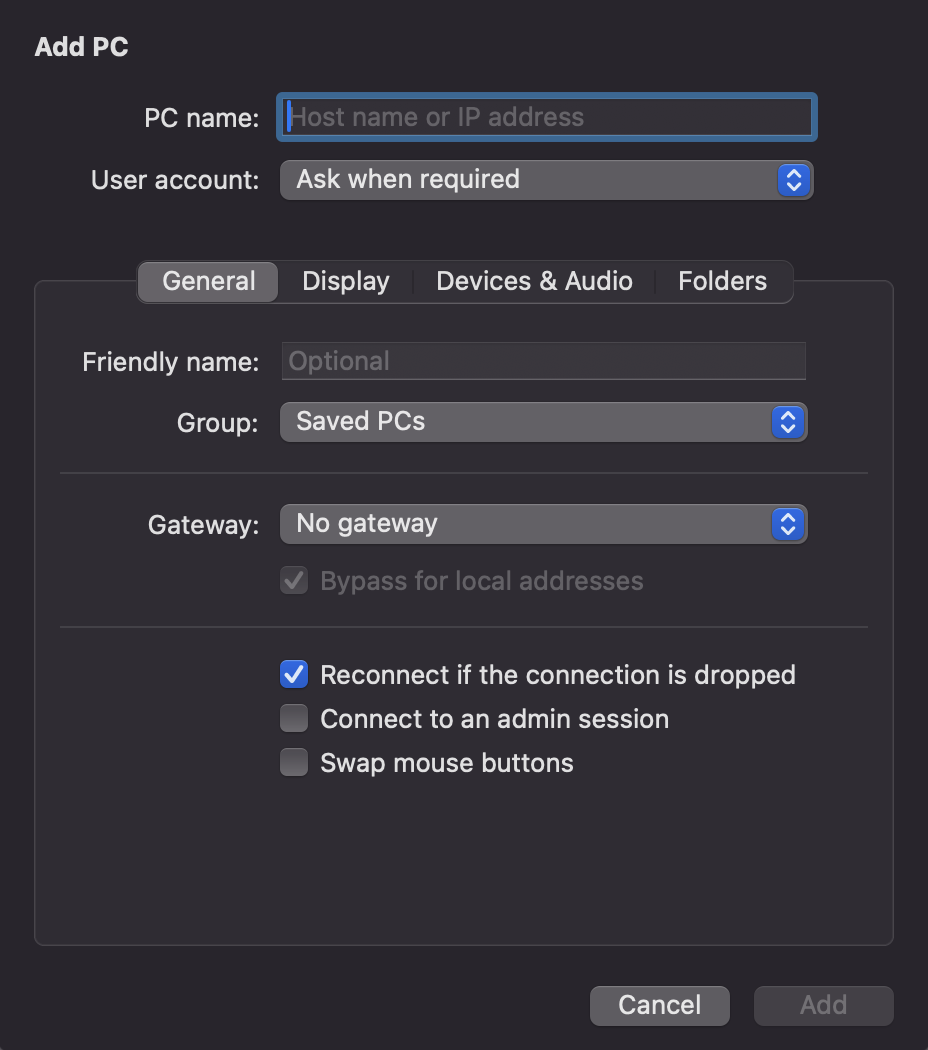
2. Click the arrow by the plus sign (+) and choose Add PC.
3. Add the name of the PC that you want to connect to (from Step 1).
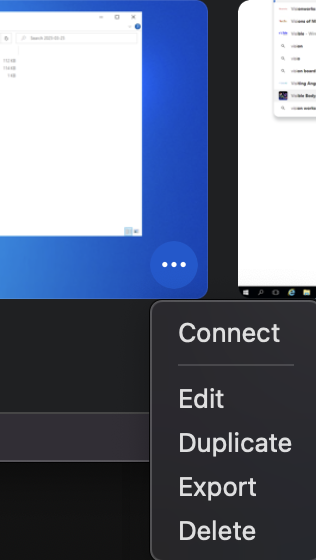
4. Select the remote PC name that you added and choose Connect.
5. When prompted, enter your Username and Password.


While a Remote Desktop server (as in, the PC that you are connecting to) needs to be running a Pro edition of Windows, a client machine (the device you are connecting from) can be running any edition of Windows (Pro or Home), or even a different operating system altogether.
Webex
As part of our Unified Communications systems, I.T. Services has purchased WebEx licensing for all faculty, staff, and students.
You can download the WebEx client for your PC or Mac by going here: https://webex.com/downloads .
On your PC or Mac, click on the link above and follow these steps to get started:
1. Click on the green download button appropriate for your computer
2. Once the file is downloaded, click on it to install WebEx
3. Once WebEx is installed, click on the icon to open
4. Click the sign in button and enter your full A-State email address
5. Enter your username and password in the login page
6. Accept the Duo push, and you are all set!
You can also use WebEx on your mobile device. Download the WebEx client in the Google Play for Android, or the App Store for iPhone or iPads. Then just follow the steps above to get started.
WebEx Calling
There are two types of calling available in WebEx:
1. WebEx calls – You can use your WebEx client to make voice and video calls to other WebEx users. This is very similar to a Skype call, you only need to know the users email address. To make a WebEx call, click on the phone icon on the left of the screen. In the box above the number pad, enter the email address of the person you would like to call. Remember, this only works when calling someone that is using WebEx.
2. Traditional phone calls – WebEx can be used as a softphone which means you can place and receive telephone calls using your WebEx client. WebEx uses the same extension as your desk phone, even when using WebEx on your mobile device. This is great for people working remotely. This feature isn’t available natively in WebEx and will need to be setup. Please contact I.T. Services for more info or to get calling setup on your WebEx account.
Bomgar (BeyondTrust Remote Support) iOS/Android Mobile Setup
This method will work for both mobile phones and tablets (either iOS or Android)
*Some devices may not support the BeyondTrust app*
iOS devices are limited to "View Only", while Android devices can be "View Only" and "Full Control"
*You may have to change your devices permissions for the BeyondTrust app in your device's system settings*
1. Open any web browser and go to connect.astate.edu , this will open the Support Portal and select the agent's name you are needing to remote into your device

2. The next screen will prompt you to install the free BeyondTrust Support application from your device's app store


3. After installing the app on your mobile device, you can proceed with either of these methods:
- OPTION 1: Go back to the Support Portal page and select "Start Session" (select Allow when prompted) or
- OPTION 2: Open the app itself and type connect.astate.edu in the Site Address field and the A-State agent can provide you with the Session Key
Option 1: Option 2:

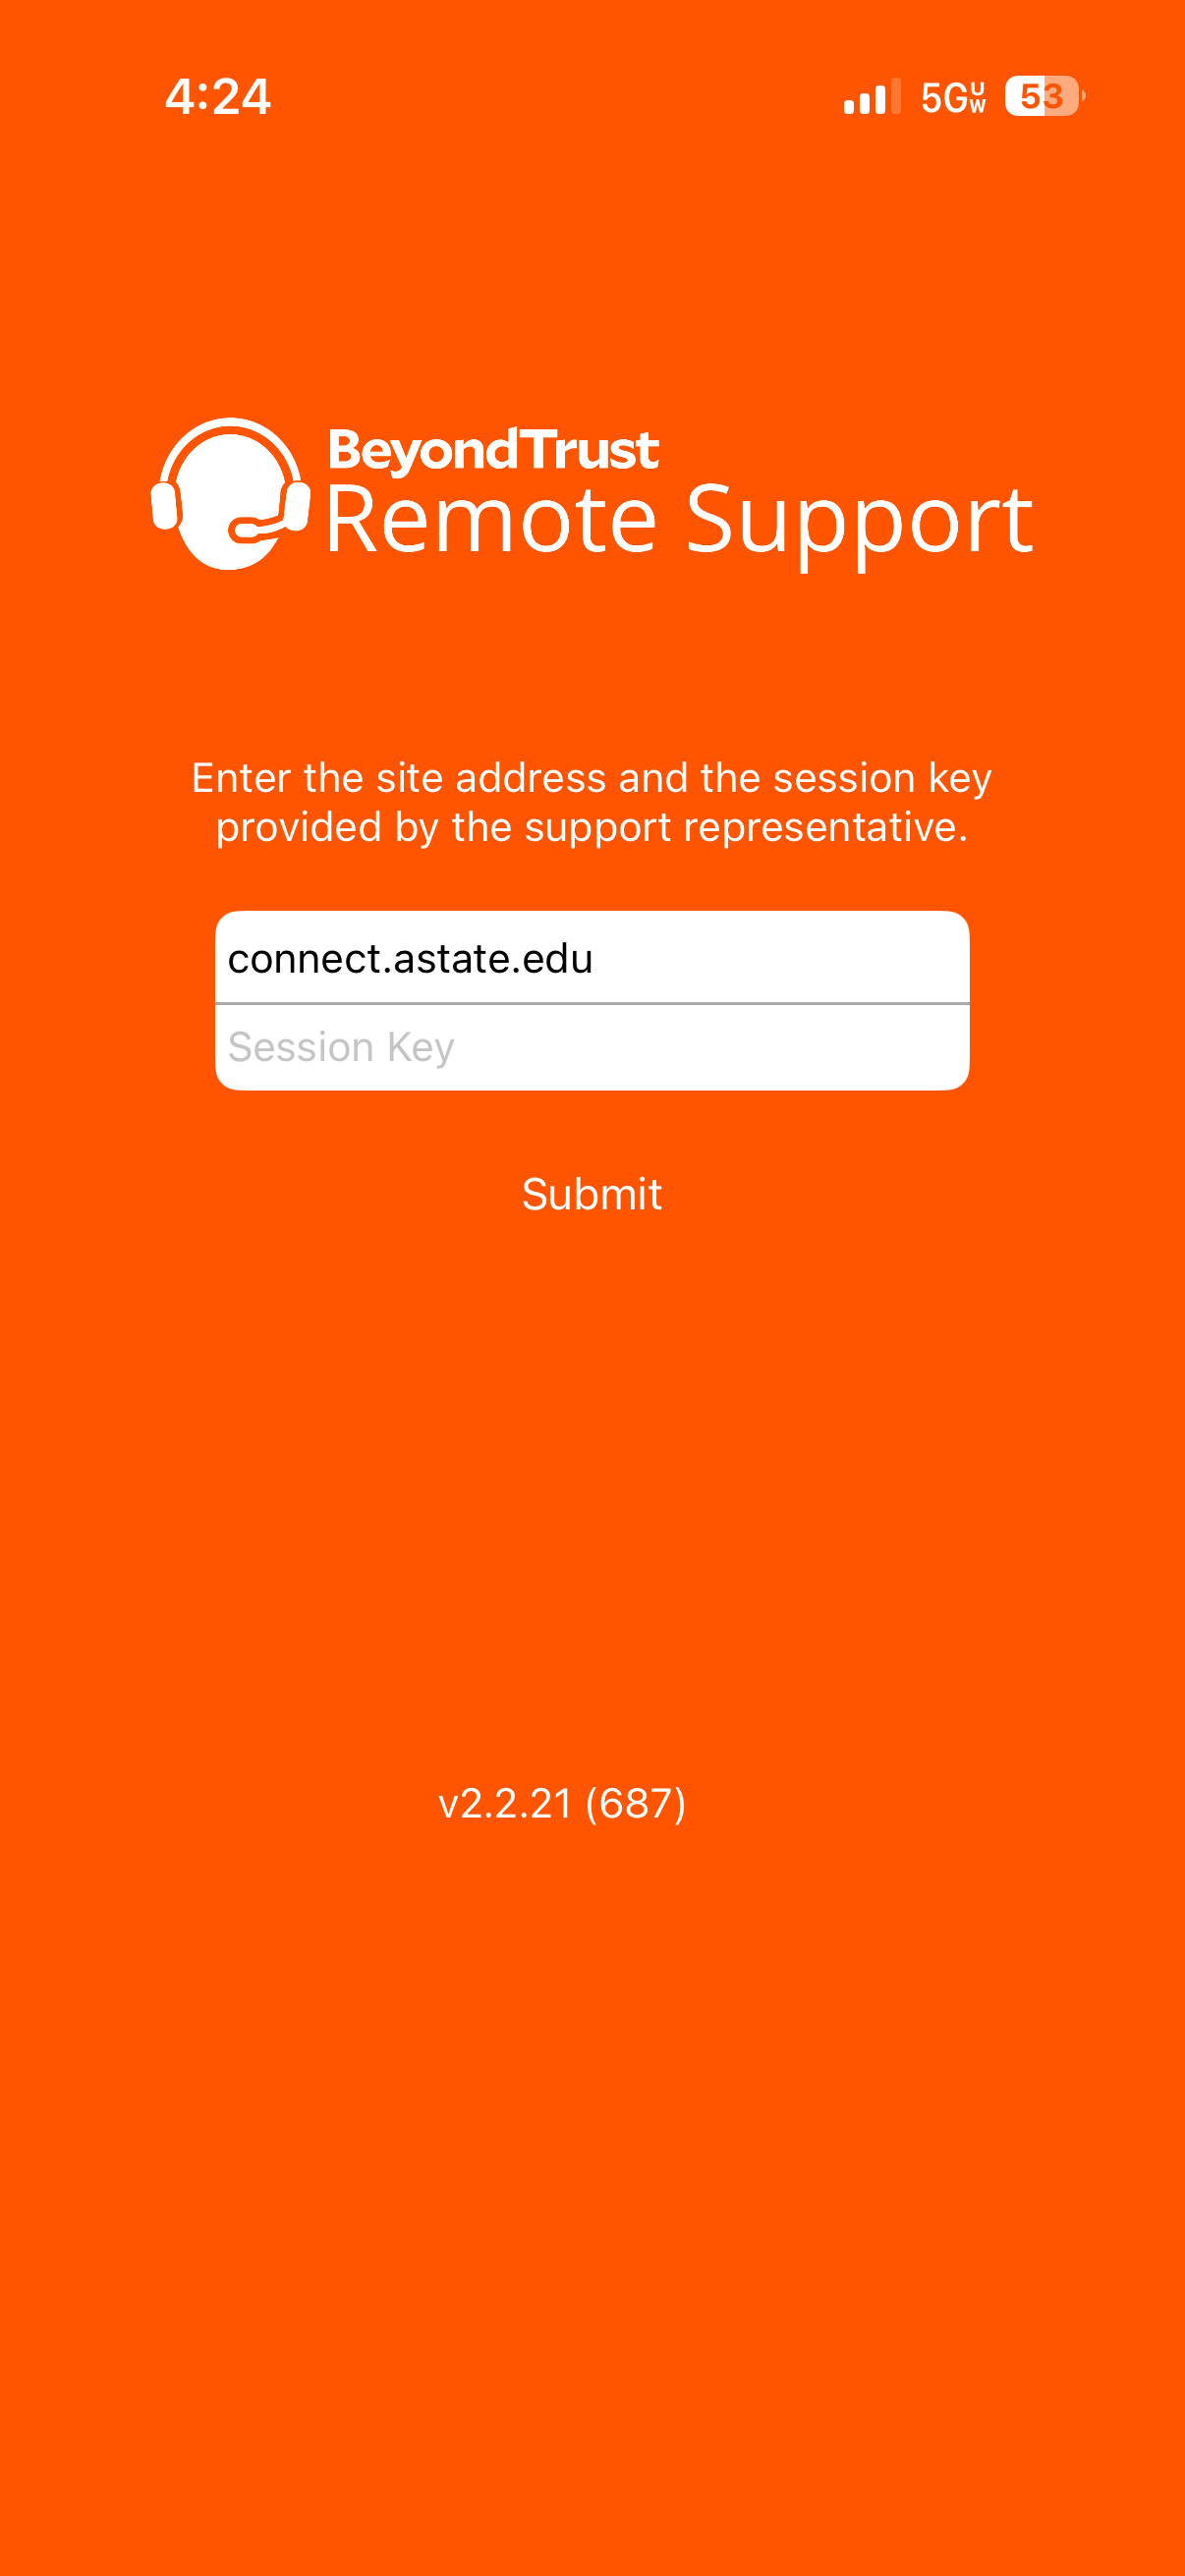
3. Either method will connect your device to the BeyondTrust chat portal, where the agent can remote in and see this screen:
- Select the circle icon at the top of the screen and then select Start Broadcast
- Please note, the agent will not be able to see anything other than the chat screen until you start the broadcast, if the circle icon is RED, the agent will be able to fully view your screen on your device
Not Sharing Sharing


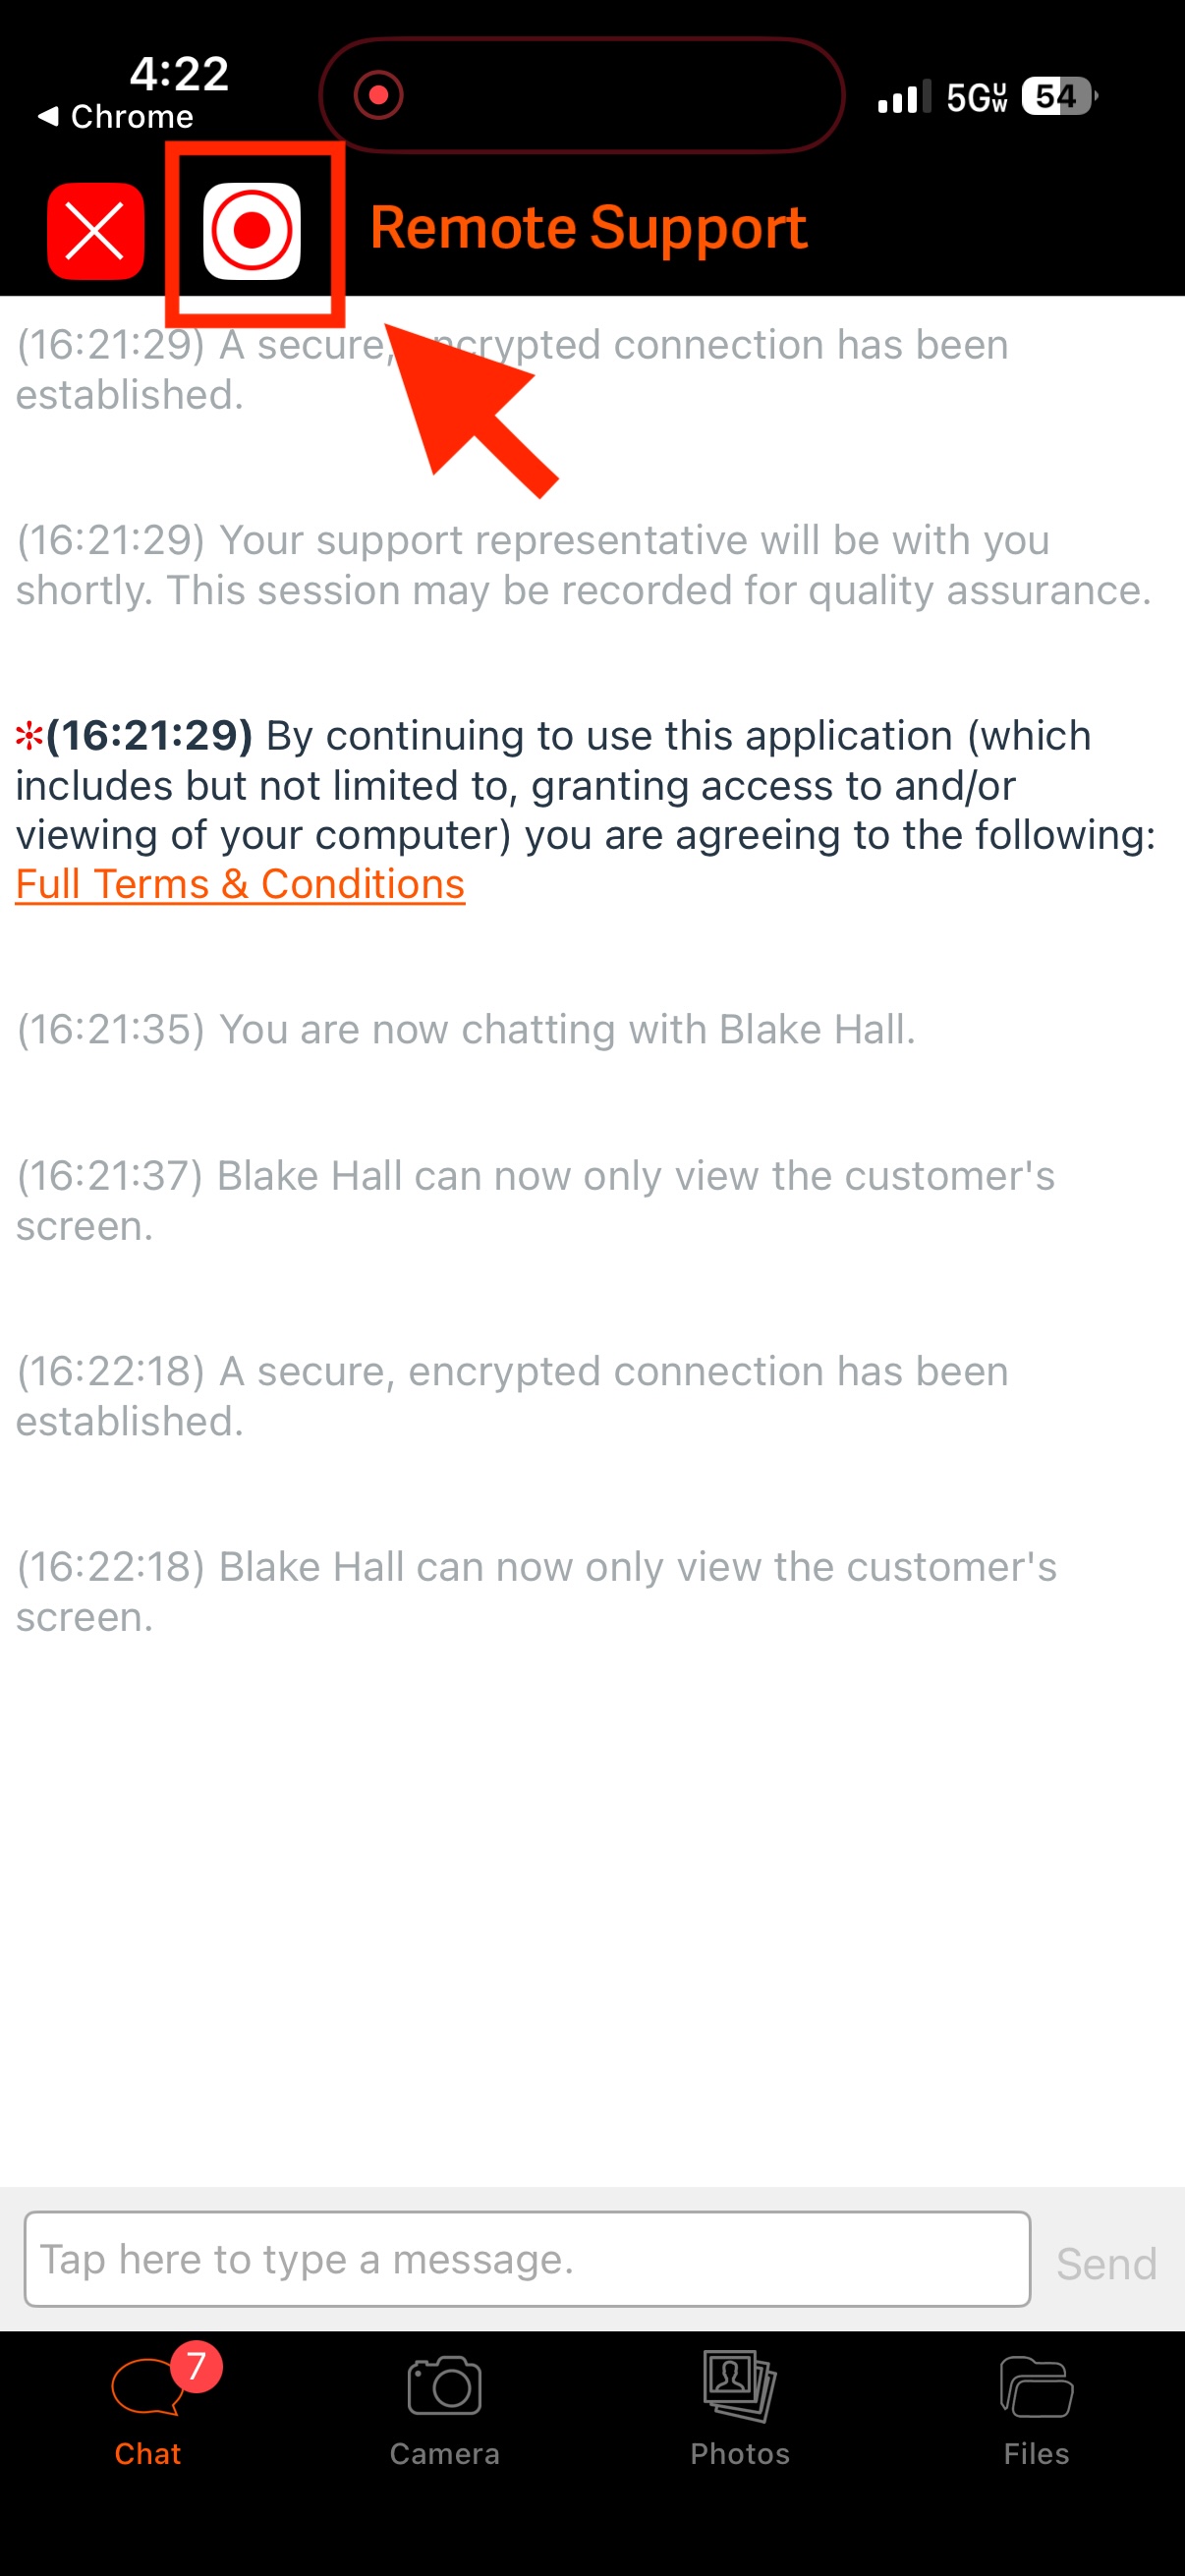
4. Once you are ready to end screen sharing, just tap the RED circle icon again and select Stop Broadcast

5. To completely end the session and remove access for the A-State agent, tap the "X" in the top left and select Yes, when it ask if you want to end the support session, you will receive a confirmation message when disconnected


For further assistance, contact the ITS Help Desk at 870-972-3933 or stop by IT Support Services (itsupportservices@astate.edu). It is located on the bottom floor of the Dean B. Ellis Library, Room 149.