Captioning with Adobe Premiere Pro
Auto Generating Captions with Premiere Pro
In this section we will show the basics with Adobe software on captioned video creation, as well as how to edit, and more importantly, save your work.
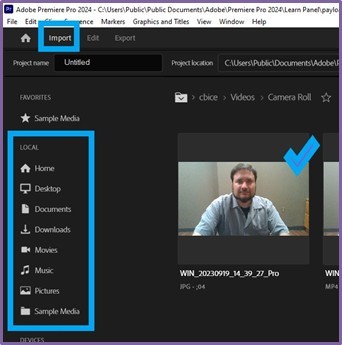
After starting Adobe Premiere Pro, import the video you are going to add captions to. Go to Import and select the file you want to start with.
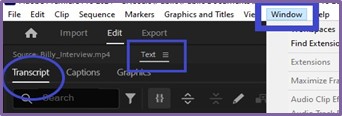
Access your audio layer by clicking on the Text tab. Make sure you are in the Transcript section. If the Text tab does not show up, click Window (next to Help) > Text. You will then be able to see the Text tab in the top left corner of the screen.
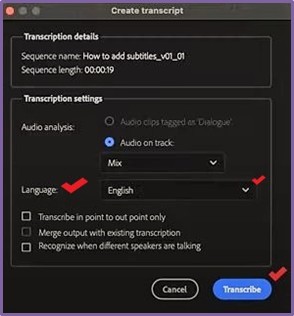
The Create Transcript window will pop up. Select your language and click Transcribe. Transcription times will vary depending on video length.
Select Create Captions and change the caption settings (maximum length of the characters, minimum duration, etc.) if necessary. Most people will leave the settings at default.
Click Create, and Premiere Pro will add and align the captions with the video's audio.
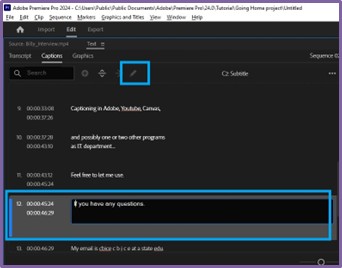
Now your captions are done, but reviewing auto-generated captions is necessary to ensure accuracy. Make sure you are in the Captions tab, and from here you can edit the captions, find/replace text, and navigate to specific portions of your video.
Saving Your Work
Using Adobe, there are different ways to save your work:
-
- As a project. This will be saved as an Adobe Premiere Pro file with the file extension .prproj (found at the end of your file name like .pdf, .doc, etc.).
- As a finalized video. This will save your original video with the newly added captions with the file extension .mp4.
It is highly recommended that you keep a current copy of the .prproj file even after you have a completed video. If you do not keep a copy of your .prproj file, you will not be able to edit the captions. You will have to start over with the caption-free video.
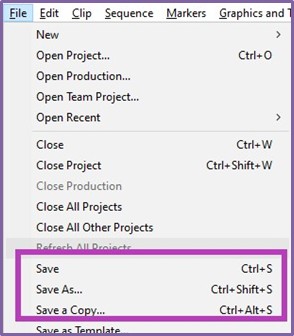
To save a copy of the project, you would follow the usual steps, just like saving a Word document or an Excel file.
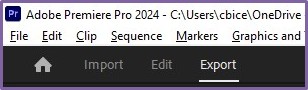
To save a copy of your finalized video, select the Export Tab (found next to where you imported the original file).
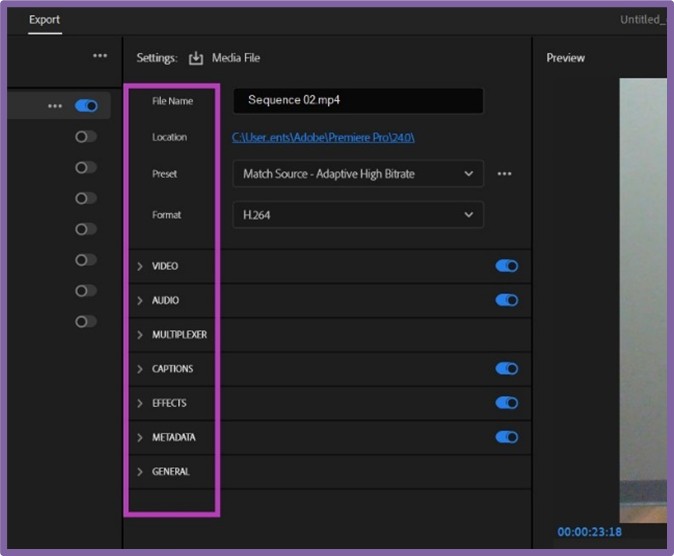
This will open a new screen (pictured below). On the left-hand side, you can see the options for video customization. Once you are satisfied, click the Export button found in the lower right-hand corner.
Remember to review your .mp4 file after completion to ensure accuracy of captions.
Keyboard Shortcuts
|
Function |
macOS |
Windows |
|
Create new captions track |
Opt + Cmd + A |
Ctrl + Alt + A |
|
Add a new caption segment at the play-head |
Opt + Cmd + C |
Ctrl + Alt + C |
|
Go to the previous caption segment in the timeline |
Opt + Cmd + Up |
Ctrl + Alt + Up |
|
Go to next caption segment in the timeline |
Opt + Cmd + Down |
Ctrl + Alt + Down |