# Canvas for Educators

A faculty-centered resource designed to help instructors use Canvas as a pedagogical tool for effective course design, delivery, and student engagement.  
  
Developed by the Center for Excellence in Teaching and Learning (CETL), this chapter focuses on teaching strategies that leverage Canvas’s features to support learning outcomes, foster interaction, and streamline course management.  
  
➤ Explore guides on embedding video, managing course access, designing assessments, and integrating tools like Kaltura, VoiceThread, and Respondus.  
➤ Learn how to use Canvas to build inclusive, accessible, and student-centered learning environments.

# About Learning Management Systems

<section id="bkmrk-a-learning-managemen"><article>Learning Management Systems (LMS) are secure online platforms used by institutions, educators, and students to manage course materials, facilitate communication, and support skill development and learning achievement. LMS platforms offer:

- Customizable tools for course creation and management
- Analytics and statistics for courses and users
- Internal communication features for collaboration and feedback

---

## What Can an LMS Do?

An LMS enhances teaching and learning by providing a flexible, interactive environment for:

- Delivering course materials
- Collecting and grading student submissions
- Sharing feedback and fostering engagement
- Supporting diverse teaching models and learning theories

LMS platforms are designed to be open, adaptable, and focused on student success.

---

## Which LMS Is Used at A-State?

**[![Canvas_Stacked_ByInstructure_Color_RGB.png](https://kb.astate.edu/uploads/images/gallery/2025-06/scaled-1680-/canvas-stacked-byinstructure-color-rgb.png)](https://kb.astate.edu/uploads/images/gallery/2025-06/canvas-stacked-byinstructure-color-rgb.png)**

**[Canvas LMS](https://www.instructure.com/higher-education/products/canvas/canvas-lms)** is the official Learning Management System at Arkansas State University. It provides:

- Tools for building and managing courses
- Analytics to track student progress and engagement
- Communication features for announcements, discussions, and messaging

➤ **See:** **[Canvas Basics Guide](https://community.canvaslms.com/t5/Canvas-Basics-Guide/What-is-Canvas/ta-p/45)** for an introduction to using Canvas at A-State.

</article></section>

# Getting Started

Wondering how to get started using Canvas? The information below will help.

## Canvas Account Creation Process

To get access to Canvas all new hires will first need to verify their A-State email account. About 24 hours after their email address is validated their Canvas account will be automatically created.

New faculty members should then be able to access some training resources and any class listed in Banner with them as the Instructor when they login to Canvas. New staff members are not automatically added to any courses or organizations. Their office needs to request that they be manually added to any resources they will need to manage.

> **Note:**Staff members are not automatically enrolled in any Canvas courses or organizations. Their supervisor or department must submit a Canvas Access Request to ITS for manual enrollment.

## Banner Integration with Canvas

Canvas access is tied to Banner. Instructors must be officially listed in Banner as the instructor of record before they can access their assigned courses in Canvas. If you do not see your course, confirm your assignment with your department and allow up to 24 hours for the system to sync.

## Browser Preference

For the best Canvas experience, users should access Canvas using a desktop or laptop computer. Canvas is browser based and can be access on a Windows or Mac computer with Internet access.

Use the **[Browser Checker](https://community.canvaslms.com/t5/Canvas-Basics-Guide/What-are-the-browser-and-computer-requirements-for-Instructure/ta-p/66)** to check that your browser is set up to use Canvas.

<div id="bkmrk-users-must-use-a-rec"><div>- Users must use a recommended and supported browser, such as Firefox or Chrome.
- JavaScript must be installed and enabled on browser.
- Popups must be enabled on the browser.

</div></div>[**Clearing your browser's cookies and cache**](https://kb.astate.edu/books/faq/page/how-to-clear-cookies-and-cache) clears up most website error messages and technical issues.

## Accessing Canvas

See the page in the ITS Canvas book on **[How to Log Into Canvas](https://kb.astate.edu/books/canvas/page/how-to-log-into-canvas).**

Canvas supports multiple user roles including Instructor, TA, Observer, and Designer. For more information on roles and permissions, <span style="color: #000000; font-family: 'Times New Roman'; font-size: medium; font-style: normal; font-variant-ligatures: normal; font-variant-caps: normal; font-weight: 400; letter-spacing: normal; orphans: 2; text-align: start; text-indent: 0px; text-transform: none; widows: 2; word-spacing: 0px; -webkit-text-stroke-width: 0px; white-space: normal; text-decoration-thickness: initial; text-decoration-style: initial; text-decoration-color: initial; display: inline !important; float: none;">see</span>: **[Managing Course Access in Canvas](https://kb.astate.edu/books/learning-technology/page/managing-course-access-in-canvas-enrollments-roles-and-requests)**

## Canvas Beginner Training

From the Help menu in Canvas you can access the **[Training Services Portal](https://training-portal-prod-pdx.insproserv.net/?canvas_domain=arkansasstateuniversity.instructure.com&sf_id=001A00000086eObIAI)** where you can find an self-paced on demand Canvas Basics course.

### [Canvas Basics](https://training-portal-prod-pdx.insproserv.net?offeringId=165)

"This comprehensive course is designed to familiarize you with the essential features and tools of the Canvas platform. This course will guide you through the fundamentals of Canvas, from setting up your user profile to creating content and assignments, as well as how to interact with your students. You'll learn how to leverage Canvas's powerful functionalities for a more effective and streamlined learning experience. By the end of this course, you will be well-prepared to utilize Canvas to its full potential. "

### Troubleshooting Dashboard Visibility

If your course does not appear on the Dashboard, check the **All Courses** list and ensure it is marked as a *Favorite*. Only favorited courses appear on the Dashboard.

Learn more: **[Finding and Organizing Courses](https://kb.astate.edu/books/learning-technology/page/finding-and-organizing-courses)**

## Contact Information - ITS Help Desk

For technical issues, Canvas access requests, and Banner-linked course support:  
Email: **<itshelpdesk@AState.edu>**  
Phone: **870-972-3933**  
Location: *Dean B. Ellis Library, Room 149*

# Managing Your Canvas Profile and Notification Settings

The default values for your Canvas Profile are imported from Banner. Employees requesting a name change will need to contact Human Resources at 870-972-3454. However, you should be able to freely edit the other fields in your Canvas profile. For instructions on how to add a profile picture, or add something to the Name Pronunciation field, see the following link to the Canvas Basics Guide.

**[How do I edit my profile in my user account?](https://community.canvaslms.com/t5/Canvas-Basics-Guide/How-do-I-edit-my-profile-in-my-user-account/ta-p/615501)**

## Change Default Contact Options

Canvas will default to your A-State email addresses for notifications, starting with a @smail.AState.edu account if it exists. You can add additional contact options to receive notifications and change the default email address. For instructions on how to update your contact options, see the following links to the Canvas Basics Guide.

**[How do I add contact methods to receive Canvas notifications?](https://community.canvaslms.com/t5/Canvas-Basics-Guide/How-do-I-add-contact-methods-to-receive-Canvas-notifications/ta-p/615331)**

**[How do I change my default email address in my user account?](https://community.canvaslms.com/t5/Canvas-Basics-Guide/How-do-I-change-my-default-email-address-in-my-user-account/ta-p/615314)**

## Notification Settings

Canvas includes a set of default notification settings you can receive for your courses. However, you can change the default settings by setting your notification settings. These settings only apply to you; they are not used to control how course updates are sent to other users. To learn more about your notification settings, see the following link to the Canvas Basics Guide.

**[How do I manage my Canvas notification settings?](https://community.canvaslms.com/t5/Canvas-Basics-Guide/How-do-I-manage-my-Canvas-notification-settings/ta-p/615326)**

Please note that while the default settings should be so that your students receive notifications of announcements immediately, they can edit their own notifications to not receive timely notifications about your course. If students claim to not be receiving notifications, they may need to check the notification settings they have enabled for your course.

# Finding and Organizing Courses

By default, the Dashboard and Courses links in the Global Navigation will display all courses in **active terms**. This includes:

- Credit-bearing courses in current or future terms
- Non-credit courses (e.g., development shells, organization shells) assigned to terms with no end date

Once you begin favoriting courses using the star icons in the **All Courses** list, only those favorited courses will appear on your Dashboard and in the Courses list. You will need to manually update your favorites each term to remove old courses and add new ones.

> **Note:** For users with the **Student** role, even favorited courses will be removed from the Dashboard after the course end date. This is based on either the **Term end date** (if using Term Participation) or the **Course end date** (if using Course Participation).

> **Tip:** Faculty should generally avoid favoriting courses unless they need a concluded course to remain visible for reference or follow-up. Favoriting can unintentionally hide active courses if not managed carefully.

---

## Dashboard

The Dashboard is your landing page in Canvas.

![](https://media.screensteps.com/image_assets/assets/003/836/288/medium/7ae59fd8-0d9e-490c-a661-7755e69d9542.png)

Our dashboard defaults to the Card View, but you can switch that to a Recent Activity View instead.

![](https://media.screensteps.com/image_assets/assets/004/615/083/original/01f54a38-eb8d-42c8-877c-894134c89aa0.png)

To learn more, see the Canvas Instructor Guide: **[How do I use the Dashboard as an instructor?](https://community.canvaslms.com/t5/Instructor-Guide/How-do-I-use-the-Dashboard-as-an-instructor/ta-p/815)**

If you need, you can use the Move option in the Options menu for the Course Cards to organize your courses. You can also drag and drop the Course Cards to rearrange them.

![](https://media.screensteps.com/image_assets/assets/002/903/142/original/bb2bf1d4-7d27-453e-961d-6209cedefb69.png)

To learn more, see the Canvas Basics Guide: **[How do I view my favorite courses in the Card View Dashboard?](https://community.canvaslms.com/t5/Canvas-Basics-Guide/How-do-I-view-my-courses-in-the-Card-View-Dashboard/ta-p/618765)**

---

## Courses

<iframe allowfullscreen="allowfullscreen" frameborder="0" height="400px" sandbox="allow-popups allow-popups-to-escape-sandbox allow-scripts allow-forms allow-same-origin allow-presentation" src="https://embed.app.guidde.com/playbooks/qYvjsSr9PGaef62UXduych" title="How do I view all my Canvas courses as a student?" width="700px"></iframe>

00:07: How do I view all my canvas courses as a student? 00:11: In global navigation, click the courses link. 00:13: Then click the all courses link. 00:17: Courses are organized into all courses past enrollments, future 00:21: enrollments and groups. 00:24: Courses can be sorted by favorite status name nickname 00:28: term enrollment status and publish status by selecting. 00:32: The sort icon in the header groups are sorted alphabetically by 00:36: group name. 00:38: If Allowed by your institution, you can do the institutions public course 00:42: index in a catalog format by clicking the browse more courses button. 00:47: All courses are courses that are part of the current semester or term. 00:50: However, depending on access settings, for a course, 00:54: my course is can also display courses that have not yet started or unpublished. 01:00: Active courses that are available to you are listed in blue text, these 01:04: courses have been published and include a link to the course to open 01:08: a course, click the name of the course. 01:11: Courses that are within the current term dates but are not yet available are listed in Black 01:15: text. These courses have not been published and no link is available. 01:20: You can also view any nicknames you have created for courses. 01:24: Is a course, includes a term date. The term date displays. 01:29: Each course includes your role in the course. 01:31: Your Role can be student teacher, ta Observer 01:35: designer or a custom roll created by your Institution. 01:40: Any all courses section. You can customize the courses list and Mark courses 01:44: as favorites. Favorite courses display in the card view dashboard. 01:50: You can change the order that courses are listed by clicking the sort icon in the header. 01:54: The column currently use for sorting displays either the ascending 01:58: or descending icon to indicate the sort order. 02:02: Courses under the past enrollments heading our courses that have concluded, but are still available 02:06: as a read-only archive course. 02:08: You can do course, material and grades but can no longer participate 02:12: in the course. 02:14: Future enrollments are courses. That will be made available as part of an upcoming term 02:18: or specific course start date. Future courses may be published or 02:22: unpublished. However, some institutions May restrict you from being 02:26: published courses before the start date. 02:28: If a future course, includes a link. 02:31: You can do course content but cannot fully participate in the course until 02:35: the start date. Participation include submitting, assignments and 02:39: replying to discussions. It's a future course, does not include 02:44: a link. The course, cannot be viewed until the start date. 02:49: If you are enrolled in groups, the group section displays any groups within 02:53: your current courses. You can do, all your groups in your groups list. 02:58: To view a group home page, click the group named link. 03:03: You can locate your course, ID number at the end of your course URL. 03:08: This guy covered how to view all my canvas courses as a student.

### All Courses

In Global Navigation, click the **Courses** link \[1\], then click the **All Courses** link \[2\].

<div id="bkmrk--5">![Open Courses](https://media.screensteps.com/image_assets/assets/009/051/087/original/98e292ca-8eed-44d0-b16b-0dfb4c0f40a2.png)</div><div id="bkmrk--6"><div><div>[ ![View Courses](https://media.screensteps.com/image_assets/assets/008/404/761/medium/b8ce74ad-0354-496c-adf0-3eea9d7c2ce5.png) ](https://media.screensteps.com/image_assets/assets/008/404/761/original/b8ce74ad-0354-496c-adf0-3eea9d7c2ce5.png)</div></div></div>Courses are organized into All Courses \[1\], Past Enrollments \[2\], Future Enrollments \[3\], and Groups \[4\].

Courses can be sorted by Favorite status, Name, Nickname, Term, enrollment status, and Published status by selecting the **Sort** icon in the header \[5\]. Groups are sorted alphabetically by group name.

If allowed by your institution, you can **[view the institution's public course index ](https://community.canvaslms.com/t5/Canvas-Basics-Guide/How-do-I-view-my-institution-s-Public-Course-Index/ta-p/618757)**in a catalog format by clicking the **Browse More Courses** button \[6\].

---

## Using Nicknames to Organize Courses

You can assign nicknames to your courses to make them easier to identify on the Dashboard. This is especially helpful if you teach multiple sections with similar names.

### Create Nickname

<div data-step-uuid="549a18b3-fa7c-4870-a889-651946de1ebd" id="bkmrk--8"><div data-step-uuid="549a18b3-fa7c-4870-a889-651946de1ebd"><div>![Manage Nickname](https://media.screensteps.com/image_assets/assets/008/776/051/original/d6971a04-e2e7-4343-9ff4-4b3e4e664bd1.png)</div><div><div></div></div></div></div>To add a nickname, click the **Options** icon \[1\], then enter the name in the **Nickname** field \[2\]. Click the **Apply** button \[3\].

To remove a nickname, open the card options and delete the nickname. The Nickname field will display the original name of the course. Then, click the Apply button.

> **Notes:**
> 
> - This change only affects your view and does not rename the course for students.
> - A course nickname does not affect the course code, which always displays on the course card for course reference.
> - Course nicknames appear in the Dashboard, Course Navigation Menu, course breadcrumbs, and notification emails. Nicknames do not display in the global Grades page and Dashboard sidebar elements such as the To Do list.
> - Course nicknames are limited to 59 characters.

<div data-step-uuid="549a18b3-fa7c-4870-a889-651946de1ebd" id="bkmrk--9"><div data-step-uuid="549a18b3-fa7c-4870-a889-651946de1ebd"><div data-step-uuid="0c629462-d2bd-4707-b1c1-8a3d6acd188e"></div></div></div>#### View Original Name

<div data-step-uuid="549a18b3-fa7c-4870-a889-651946de1ebd" id="bkmrk--10"><div data-step-uuid="549a18b3-fa7c-4870-a889-651946de1ebd"><div data-step-uuid="0c629462-d2bd-4707-b1c1-8a3d6acd188e"><div>![View Original Name](https://media.screensteps.com/image_assets/assets/008/776/053/original/764925a2-3159-4ba3-ae87-3772e0490cb8.png)</div><div><div></div></div></div></div></div>If you added a nickname but need to know the original name of the course, hover the cursor over the nickname \[1\]; view the original course name in the tooltip hover text \[2\].

---

## Troubleshooting Dashboard Visibility

If a course disappears from your Dashboard after a role or enrollment change, check the **All Courses** list and re-favorite it. Only favorited courses appear on the Dashboard. If you are marking courses as favorites, you will need to manually update which courses are favorited every term to remove past terms from your list and add the new courses.

### Banner Sync Delays

Changes in instructor assignments may take up to 24 hours to reflect in Canvas. If your course is missing, verify your Banner assignment and check again later.

> **Note:** Courses must be published before students can access them. If your course is listed but not visible to students, check the course’s publication status.

---

## Learn More

- **[Getting Started](https://kb.astate.edu/books/learning-technology/page/getting-started)**
- **[Managing Course Access in Canvas](https://kb.astate.edu/books/learning-technology/page/managing-course-access-in-canvas-enrollments-roles-and-requests)**
- [**How do I change the start and end dates for a course?**](https://kb.astate.edu/books/learning-technology/page/how-do-i-change-the-start-and-end-dates-for-a-course-274)
- See the Canvas Basics Guides: 
    - **[How do I view all my Canvas courses?](https://community.canvaslms.com/t5/Canvas-Basics-Guide/How-do-I-view-all-my-Canvas-courses/ta-p/618766)**
    - **[How do I view my courses in the Card View Dashboard? ](https://community.canvaslms.com/t5/Canvas-Basics-Guide/How-do-I-view-my-courses-in-the-Card-View-Dashboard/ta-p/618765)**

# Course Identification

When requesting assistance with a Canvas course, it helps if you can accurately identify the exact course shell that you are working on.

## Types of Course Shells

All faculty should see three types of courses in their Course List and Dashboard: **Live Shells,** **Development Shells, and Organizations**.

### Live Shells

Live shells are created by ITS using the course enrollments from Banner. These shells will have Course Codes that include the **Course Prefix, Number, and the Banner Course Reference Number (CRN)**. The CRN is composed of a five-digit number that begins with the first digit of the term prefix, 10 for spring, 30 for summer, and 60 for fall, and the term code after the period. The term code is composed of the current year and term prefix. These shells are typically created 3-4 weeks before the start of a term. E.g., 60102.202160 would be the CRN for a class from the Fall 2021 term.

### Development Shells

All new faculty are given a few Development shells to build out course materials. These shells will have a Course ID that is composed of your A-State ID number, a period, and a number indicating the order the course was created. These shells are not attached to a course in Banner and are available at all times. You can work in these shells at any time and then copy the materials into the live shells every semester once they are created by ITS.

### Organizations

Organizations are an ideal place to connect with other users who share interests or extracurricular activities, as they behave like courses and contain tools that enable participants to communicate efficiently. The Organization Leaders can post information, have discussions, and share documents with the enrolled participants.

As these shells are manually created as needed, the IDs assigned to them can vary widely. But they will typically start with ORG, followed by an abbreviation to identify the office that requested the organization, and a number.

These shells can be created by any of the Canvas support offices. If you would like to create an organization for everyone with a specific degree code in Banner, the degree code and course ID will need to be sent to the ITS Help Desk to enable an automated enrollment script.

## How to Identify a Course Shell

There are three things you need to know to help identify your courses: The Course Code, the Course ID, and the Subaccount.

### Course Codes

You can identify which is which by going to the settings of your course, which is always at the end of the Course Navigation menu, and looking for the **Course Code** field. The Course Code will also be in the **[Course Breadcrumb menu;](https://community.canvaslms.com/t5/Observer-Guide/How-do-I-use-the-Course-Home-Page-as-an-observer/ta-p/463734)** clicking it will always return you to Home in the Course Navigation.

[![Course Code.png](https://kb.astate.edu/uploads/images/gallery/2025-06/scaled-1680-/course-code.png)](https://kb.astate.edu/uploads/images/gallery/2025-06/course-code.png)

### Course IDs

While the Course Codes are generated by the course information from Banner, Canvas also has its internal way of identifying courses, the Course ID. This ID can be helpful to know when you want to cross-list classes, as this is not an editable field and will be unique for every shell. To find the Course ID, you have to find the number that is after the word courses in the browser address bar while in the course.

[![Canvas Course ID.png](https://kb.astate.edu/uploads/images/gallery/2025-06/scaled-1680-/canvas-course-id.png)](https://kb.astate.edu/uploads/images/gallery/2025-06/canvas-course-id.png)

### Subaccounts

The final thing to know to help identify courses is which Subaccount the course is in. ITS has set up subaccounts within our Canvas instance for each department. This allows them to deploy department-specific integrations with publishers or other third-party tools, as well as making some administration and report processes simpler. This is important to know because some things can't go across subaccounts, and we may need to know your subaccount to find your course when helping troubleshoot issues with you. You can find the subaccount by going to the settings of your course, which is always at the end of the Course Navigation menu, and looking for the **Subaccount** field.

[![Subaccount.png](https://kb.astate.edu/uploads/images/gallery/2025-06/scaled-1680-/subaccount.png)](https://kb.astate.edu/uploads/images/gallery/2025-06/subaccount.png)

# Templates and Canvas Commons

Commons is a learning object repository that enables educators to find, import, and share resources. A digital library full of educational content, Commons allows Canvas users to share learning resources with other users as well as import learning resources into a Canvas course.

#### About Canvas Commons

In Global Navigation, click the **Commons** link.

![Open Commons](https://media.screensteps.com/image_assets/assets/002/009/890/original/8129845f-1426-4d20-8cc4-947bb2591178.png)

To learn more about Canvas Commons, see the Canvas Community site: [How do I use Commons?](https://community.canvaslms.com/t5/Canvas-Commons/How-do-I-use-Commons/ta-p/1795)

#### About Course Templates

While we are no longer preloading templates into course shells, we do have templates available in the Commons for faculty to import into their courses. We currently have a Generic Template that can be used for any course as well as a few that contain the assessment materials for specific courses. To find these templates, you will want to use the "Shared With" filter to select **Arkansas State University**. That will limit your options to just the materials available to those who teach for our university.

[![CommonsFilters.png](https://kb.astate.edu/uploads/images/gallery/2025-07/scaled-1680-/commonsfilters.png)](https://kb.astate.edu/uploads/images/gallery/2025-07/commonsfilters.png)

Clicking on the title of the template you would like to use will then take you to the Course Preview where you can use the **Import/Download** button to select the course to copy the template to. You may need to use the Import into Canvas box to search for your course names. When you find the course or courses that you would like to add the template to, check the boxes for them and then click **Import into Course**.

[![CommonsImport.png](https://kb.astate.edu/uploads/images/gallery/2025-07/scaled-1680-/commonsimport.png)](https://kb.astate.edu/uploads/images/gallery/2025-07/commonsimport.png)

# DesignPLUS for Canvas

## What Is DesignPLUS?

**DesignPLUS** is a suite of tools that integrates directly with Canvas and helps instructors create visually engaging, organized, and interactive course content without needing to write HTML or CSS.

<iframe allow="accelerometer; autoplay; clipboard-write; encrypted-media; gyroscope; picture-in-picture; web-share" allowfullscreen="allowfullscreen" frameborder="0" height="315" src="https://www.youtube.com/embed/zfO3UwQRAec?si=kSldA0KxwZ_7MaoL" title="YouTube video player" width="560"></iframe>

At Arkansas State University, DesignPLUS is available to all instructors but is **optional**. Courses can be built and taught successfully using Canvas alone. However, DesignPLUS can make it easier to create consistent course designs, improve content organization, support accessibility, and engage students through interactive learning activities.

<p class="callout info">**Note:** Many university course templates include DesignPLUS elements. You do not need to know how to create or edit DesignPLUS content to use these templates successfully.</p>

<div id="bkmrk--1">---

</div>## Getting Started with DesignPLUS

DesignPLUS works alongside Canvas's **Rich Content Editor (RCE)**, allowing instructors to create layouts, interactive activities, and visual content directly within Canvas pages, assignments, discussions, announcements, and other course materials.

If you are new to DesignPLUS, we recommend exploring the following resources:

<div id="bkmrk-what-is-the-rich-con">- **[What is the Rich Content Editor (RCE)](https://community.instructure.com/en/kb/articles/662769-what-is-the-rich-content-editor-rce)** (Canvas LMS Basics guide)
- [**DesignPLUS User Guide**](https://cidilabs.instructure.com/courses/6630) (self-paced training course)
- [**DesignPLUS Training Series**](https://videos.cidilabs.com/watch/o9HBLG34XSH8xL8oNmJpmr) (short instructional videos)

</div>## Opening the DesignPLUS Sidebar

To open the **DesignPLUS Sidebar** while editing content in Canvas:

<div id="bkmrk-click-the-red-rocket">- Click the **red rocketship icon** in the upper-right corner of the Rich Content Editor.

</div>[![DesignPLUS-Rocketship-Icon.png](https://kb.astate.edu/uploads/images/gallery/2026-07/scaled-1680-/designplus-rocketship-icon.png)](https://kb.astate.edu/uploads/images/gallery/2026-07/designplus-rocketship-icon.png)

**OR**

<div id="bkmrk-press-alt-%2B-shift-%2B-">- Press **Alt + Shift + D** (Option + Shift + D on a Mac) while the Rich Content Editor is open.

</div>[![DesignPLUS-Rocketship-Icon-Expanded.png](https://kb.astate.edu/uploads/images/gallery/2026-07/scaled-1680-/designplus-rocketship-icon-expanded.png)](https://kb.astate.edu/uploads/images/gallery/2026-07/designplus-rocketship-icon-expanded.png)

Once opened, the sidebar provides access to page layouts, interactive content, accessibility tools, and other DesignPLUS features.

<div id="bkmrk--4">---

</div>## Key Features of DesignPLUS

### 🎨 Create Professional Course Pages

DesignPLUS provides drag-and-drop elements that allow instructors to create attractive and consistent course pages without editing HTML.

Examples include:

<div id="bkmrk-banners-content-card">- Banners
- Content cards
- Callout boxes
- Icons
- Multi-column layouts
- Pre-built page sections

</div>These tools can help organize course materials and create a polished learning environment.

<div id="bkmrk--5">---

</div>### 📚 Organize Content

DesignPLUS includes several tools that help structure information and improve navigation.

Common organizational elements include:

<div id="bkmrk-accordion-dialog-box">- Accordion
- Dialog Box
- Expander
- Flip Cards
- Module List
- Popover
- Tabs
- Tooltip

</div>These elements can help break large amounts of information into manageable sections, reduce scrolling, and improve readability.

<div id="bkmrk--6">---

</div>### ✅ Add Interactive Learning Activities

DesignPLUS allows instructors to embed simple learning interactions directly within Canvas pages.

Available activities include:

<div id="bkmrk-fill-in-the-blank-fl">- Fill-in-the-Blank
- Flashcards
- Match Items
- Order Items
- Quick Check
- Select All
- Sort Items

</div>These activities can support:

<div id="bkmrk-retrieval-practice-s">- Retrieval practice
- Self-assessment
- Knowledge checks
- Vocabulary review
- Student engagement
- Formative assessment

</div>Because these interactions are embedded directly within the lesson content, students can check their understanding without leaving the page.

<p class="callout success">**Tip:** Consider placing knowledge checks throughout a lesson rather than only at the end. Frequent opportunities for practice can help students monitor their understanding as they learn.</p>

<div id="bkmrk--7">---

</div>### ♿ Support Accessibility

DesignPLUS includes an **Accessibility Checker** that reviews individual pages and identifies common accessibility concerns while content is being edited.

Common issues identified include:

<div id="bkmrk-missing-alternative-">- Missing alternative text
- Improper heading structure
- Table accessibility issues
- Color contrast concerns

</div>The Accessibility Checker is one component of a broader set of Cidi Labs tools available to instructors.

➤ See: **[Course Accessibility Tools and Support](https://kb.astate.edu/books/learning-technology/page/course-accessibility-tools-and-support)**

<div id="bkmrk--8">---

</div>### 🔄 Create Consistent Course Designs

DesignPLUS layouts and templates help instructors maintain a consistent visual structure throughout a course.

Consistency helps students:

<div id="bkmrk-navigate-course-mate">- Navigate course materials more easily
- Locate important information more quickly
- Understand course expectations
- Focus on learning rather than navigation

---

</div>## Best Practices

### ✅ Design for Learning First

Effective course design begins with clear learning objectives and well-organized content. DesignPLUS should support learning rather than simply enhance appearance.

### ✅ Use Headings Consistently

Use Canvas heading styles to organize content into logical sections. Consistent headings improve both readability and accessibility.

### ✅ Avoid Overloading Pages

Interactive activities and design elements can improve engagement, but too many on a single page may overwhelm students. Use them intentionally.

### ✅ Check Accessibility Early

Run the Accessibility Checker while building content rather than waiting until the page is complete.

### ✅ Preview Content in Student View

Always review pages from the student perspective to ensure that layouts, media, and interactive components display correctly.

<div id="bkmrk--9">---

</div>## Working with Existing DesignPLUS Elements

### 💡 Use the Breadcrumb Trail

When your cursor is placed inside a DesignPLUS element, the **Edit Current Element** tab displays a breadcrumb trail showing the nested elements surrounding your current location.

[![DesignPLUS-Menu-Breadcrumbs.png](https://kb.astate.edu/uploads/images/gallery/2026-07/scaled-1680-/designplus-menu-breadcrumbs.png)](https://kb.astate.edu/uploads/images/gallery/2026-07/designplus-menu-breadcrumbs.png)

Selecting the appropriate item in the breadcrumb trail helps ensure that edits and actions affect the intended element.

<div id="bkmrk--11">---

</div>### 💡 Create New Insertion Points

If you are having trouble placing a new DesignPLUS element exactly where you want it, open the **Edit Current Element** tab and use **Insert Paragraph Before** or **Insert Paragraph After**.

[![DesignPLUS-Menu-Insert-Paragraphs.png](https://kb.astate.edu/uploads/images/gallery/2026-07/scaled-1680-/designplus-menu-insert-paragraphs.png)](https://kb.astate.edu/uploads/images/gallery/2026-07/designplus-menu-insert-paragraphs.png)

These options create a new paragraph location before or after the selected element. You can then place your cursor in that new location and use **Add New Element** to insert a DesignPLUS component where you want it.

[![DesignPLUS-Menu-Add-New-Element.png](https://kb.astate.edu/uploads/images/gallery/2026-07/scaled-1680-/designplus-menu-add-new-element.png)](https://kb.astate.edu/uploads/images/gallery/2026-07/designplus-menu-add-new-element.png)

Many instructors find this workflow particularly helpful when editing existing pages that already contain several DesignPLUS elements.

<div id="bkmrk--14">---

</div>### 💡 Move Elements Up or Down

The **Move Text Up** and **Move Text Down** buttons can move an entire DesignPLUS element higher or lower on the page.

[![DesignPLUS-Menu-Move-Elements.png](https://kb.astate.edu/uploads/images/gallery/2026-07/scaled-1680-/designplus-menu-move-elements.png)](https://kb.astate.edu/uploads/images/gallery/2026-07/designplus-menu-move-elements.png)

These tools are useful when reorganizing content and often provide a quicker solution than rebuilding existing layouts.

<div id="bkmrk--16">---

</div>### 💡 Use Arrange Content for Complex Changes

The **Arrange Content** option is available from the three-dot menu within the **Edit Current Element** tab.

[![DesignPLUS-Menu-Arrange-Content.png](https://kb.astate.edu/uploads/images/gallery/2026-07/scaled-1680-/designplus-menu-arrange-content.png)](https://kb.astate.edu/uploads/images/gallery/2026-07/designplus-menu-arrange-content.png)

Arrange Content displays the page structure and allows elements to be manually reordered using drag-and-drop controls. This can be especially useful when working with pages that contain multiple nested DesignPLUS components.

[![DesignPLUS-Arrange-Content.png](https://kb.astate.edu/uploads/images/gallery/2026-07/scaled-1680-/designplus-arrange-content.png)](https://kb.astate.edu/uploads/images/gallery/2026-07/designplus-arrange-content.png)

<div id="bkmrk--19">---

</div>## Beyond Course Design

While many instructors initially use DesignPLUS to improve the appearance of Canvas pages, it can also support the development of rich, interactive learning materials.

By combining:

<div id="bkmrk-written-content-imag">- Written content
- Images and graphics
- Videos
- Accordions and tabs
- Flashcards
- Knowledge checks
- Matching activities
- Reflection prompts
- Other interactive elements

</div>instructors can build lessons that function similarly to digital textbooks or Open Educational Resources (OERs) directly within Canvas.

DesignPLUS makes it possible to transform Canvas pages from static content into interactive learning experiences where students read, practice, review, and assess their understanding within a single environment.

<div id="bkmrk--20">---

</div>## Need Help?

If you need assistance using DesignPLUS, developing Canvas content, or designing engaging learning experiences, contact your faculty support office:

### **Center for Excellence in Teaching and Learning (CETL)**

**Email:** <CETL@AState.edu>   
**Phone:** 870-972-2334  
**Location:** Dean B. Ellis Library, Suite 301

### **A-State Online Faculty Support**

Email: <span data-olk-copy-source="MessageBody"><facultysupport@astate.edu> </span>  
Phone: 870-680-8464

<p class="callout warning">Faculty teaching in fully online degree programs should also consult with their assigned course builder or the A-State Online Faculty Support team before making significant course design or structural changes. Online degree programs may have program-specific requirements, templates, or standards that should be maintained.</p>

## Related Content

➤ [Templates and Canvas Commons](https://kb.astate.edu/books/learning-technology/page/templates-and-canvas-commons)  
➤ [Course Accessibility Tools and Support](https://kb.astate.edu/books/learning-technology/page/course-accessibility-tools-and-support)  
➤ [Embedding Media in Classes](https://kb.astate.edu/books/learning-technology/page/embedding-media-in-classes)  
➤ [Integrating Video into Canvas Activities](https://kb.astate.edu/books/learning-technology/page/integrating-video-into-canvas-activities)  
➤[ Instructional Media from Public and Open Sources](https://kb.astate.edu/books/learning-technology/page/instructional-media-from-public-and-open-sources)  
➤ [Open Educational Resources (OER) &amp; Open Publishing](https://kb.astate.edu/books/open-educational-resources-oer-open-publishing)

# How do I publish a course?

If you have permission to publish your course, you can publish your course from the Dashboard, the Course Home Page sidebar, the Course Settings sidebar, or the [Course Setup Checklist](https://community.canvaslms.com/t5/Instructor-Guide/How-do-I-use-the-Course-Setup-Checklist/ta-p/1139).

**Notes:**

<div id="bkmrk-you-must-publish-a-c"><div>- You must publish a course before students can access it and its contents. Students cannot see unpublished courses and content.
- Publishing a course is a course permission. If you cannot publish your course, your institution has restricted this feature.
- Publishing your course will send invitations to any users who were manually added to your course. Users added via SIS import will not receive an invitation.
- Course invitations will not be sent until after the course start date. (The start date is commonly the term date, unless the term is being overridden by a specific course or section date in Course Settings.)
- If you are using a Free-for-Teacher account, you cannot publish a course until you have verified your email address.
- If your course has been published and includes grades, you cannot modify the course's published status.

</div></div>## Publish in Dashboard

<div data-step-uuid="3856d352-ed84-4354-9e08-5d696fa9cc7e" id="bkmrk-"><div data-step-uuid="3856d352-ed84-4354-9e08-5d696fa9cc7e"><div>[![Publish in Dashboard](https://media.screensteps.com/image_assets/assets/003/855/754/medium/953dc364-2978-456e-bc89-01425c516afc.png)](https://media.screensteps.com/image_assets/assets/003/855/754/original/953dc364-2978-456e-bc89-01425c516afc.png)</div><div><div></div></div></div></div>Locate the **Unpublished Courses** section in the Dashboard \[1\].

Find the course you want to publish and click the **Publish** button \[2\].

## Publish in Course

### Open Course

<div data-step-uuid="f4c3b901-317e-470a-b6e2-c70968af0341" id="bkmrk--0"><div data-step-uuid="f4c3b901-317e-470a-b6e2-c70968af0341"><div data-step-uuid="0869563c-1145-4820-aba4-1ee6a4a6615f"><div>![Open Course](https://media.screensteps.com/image_assets/assets/007/952/798/original/575b7320-541d-474b-92b4-9bf125955c20.png)</div><div><div></div></div></div></div></div>In Global Navigation, click the **Courses** link \[1\]. Your courses will be organized by published courses \[2\] and unpublished courses \[3\]. To open an unpublished course, click the name of the course \[4\].

### Publish Course

<div data-step-uuid="f4c3b901-317e-470a-b6e2-c70968af0341" id="bkmrk--1"><div data-step-uuid="f4c3b901-317e-470a-b6e2-c70968af0341"><div data-step-uuid="643bb8a6-19ce-4707-b8f5-c8bef8e7dec1"><div>![Publish Course](https://media.screensteps.com/image_assets/assets/008/576/673/original/791d61a1-733b-415b-a050-c3c3e7b5a9c7.png)</div><div><div></div></div></div></div></div>The course status displays in the Course Home Page sidebar and the [Course Settings sidebar](https://community.canvaslms.com/t5/Instructor-Guide/How-do-I-set-details-for-a-course/ta-p/1037).

To publish your course, click the Course Status dropdown menu \[1\]. Then click the **Publish** button \[2\].

**Note:** On smaller screens, the sidebar may display beneath other page content.

### View Confirmation

<div data-step-uuid="f4c3b901-317e-470a-b6e2-c70968af0341" id="bkmrk--2"><div data-step-uuid="f4c3b901-317e-470a-b6e2-c70968af0341"><div data-step-uuid="33FA9ABE-3E5D-4628-8493-236056731A3D"><div>![View Confirmation](https://media.screensteps.com/image_assets/assets/000/749/356/original/40138966-a621-4893-be17-1d299feb48c4.png)</div><div><div></div></div></div></div></div>A message will appear at the top of your screen confirming the publishing of your course.

### Unpublish Course

<div data-step-uuid="f4c3b901-317e-470a-b6e2-c70968af0341" id="bkmrk--3"><div data-step-uuid="f4c3b901-317e-470a-b6e2-c70968af0341"><div data-step-uuid="5add6b9c-9921-4a93-ad01-28517be4a4af"><div>![Unpublish Course](https://media.screensteps.com/image_assets/assets/008/576/675/original/c0d6e6c9-7759-44e6-8243-613ae7993a6c.png)</div><div><div></div></div></div></div></div>If you need to unpublish your course, click the Course Status dropdown menu \[1\]. Then click the **Unpublish** button \[2\]. Students who already received course invitations will not be able to access your course.

Once your course contains a graded submission, the course status will no longer display in the sidebar and you will no longer be able to unpublish your course.

\[Content retrieved from [https://community.canvaslms.com/t5/Instructor-Guide/How-do-I-publish-a-course/ta-p/1185](https://community.canvaslms.com/t5/Instructor-Guide/How-do-I-publish-a-course/ta-p/1185)\]

# How do I change the start and end dates for a course?

By default, you and your students can participate in courses within the term start and end dates set by ITS. When a Course is using the Term Dates, it will be locked to all users after the term end date. However, as an instructor, you may need to change the participation start and end dates for your course. Dates can be shorter than or overlap the term dates. For more information, view the interactive **[Student Course Visibility and Participation flowchart](https://community.canvaslms.com/t5/Canvas-Resource-Documents/Student-Course-Visibility-and-Participation-Flowchart/ta-p/387094).**

> **Use Case: Incomplete Grades**
> 
> If a student receives an Incomplete, you may need to reopen the course to allow continued access. Canvas locks courses after the term ends unless you change the **Participation** setting to *Course* and set a new **End Date**.
> 
> **Note:** If you cannot change the Participation setting, contact CETL for assistance.

## **About Course Access**

By default, courses will be created with dates for their term. You can set your own dates for access by changing from *Term* to *Course* Participation dates.

Before the start date, students can accept course invitations. Once the course is published, they can then access the course to look at the content, but they cannot fully participate until the start date that is set for the course. During the window from the start to the end date, students can submit assignments, post discussions, upload files, or take part in any other action-based task within a course. After the end date, the course is concluded and placed in a read-only state for all users.

> **Note:** You may want to leave the *Course* end date blank if you suspect a student may need an incomplete. This keeps the course open indefinitely to let them complete any incomplete work. It also ensures you can grade that work, as you can no longer submit grades after the end date.

### **Dashboard Considerations**

Canvas displays courses on the Dashboard based on their term status and whether the user has favorited any courses:

**If no courses are favorited**: The Dashboard will automatically show all courses in active terms. This includes credit-bearing courses in current or future terms, as well as things like development shells and organization shells that are assigned to terms with no end date.

**If any courses are favorited**: The Dashboard will only show those favorited courses. All other courses, even if active, will be hidden unless favorited.

> **Note:** For users with the Student role, even favorited courses will be removed from the Dashboard after the set end date. This will occur automatically:
> 
> - After the Term end date if the course uses Term Participation
> - After the Course end date if the instructor switches to Course Participation
> 
> Students cannot participate in the course after the end date, so the course is removed from their Dashboard.

> **Tip:** Faculty should generally avoid favoriting courses unless they need a concluded course to remain visible for reference or follow-up. Favoriting can unintentionally hide active courses if not managed carefully.

Learn more: **[Finding and Organizing Courses](https://kb.astate.edu/books/learning-technology/page/finding-and-organizing-courses)**

### **Restrict Course Access**

If you do not want students to view any content in the course until the course start date, Course Settings also allows you to restrict students from being able to access content. You can also choose to **[restrict all course access](https://community.canvaslms.com/t5/Instructor-Guide/How-do-I-restrict-student-access-to-a-course-before-or-after-the/ta-p/1269)** after the course has concluded.

> **Notes**:
> 
> - If you cannot change what is displayed in the Participation drop-down menu, your institution has restricted instructors from modifying course availability dates.
> - You can only change the course end date when your enrollment is active. Course dates cannot be changed once your enrollment has concluded for the course.

## **How to Change the Course Dates**

### **Open Settings**

<div data-step-uuid="99487D80-698E-0139-6545-12F2183ABDFB" id="bkmrk-"><div data-step-uuid="99487D80-698E-0139-6545-12F2183ABDFB"><div>![Open Settings](https://media.screensteps.com/image_assets/assets/008/643/163/original/0d1850d9-40be-4fcd-9cd5-9bed32a853cb.png)</div><div><div></div></div></div></div>In Course Navigation, click the **Settings** link.

### **Open Course Details**

<div data-step-uuid="9948D140-698E-0139-6548-12F2183ABDFB" id="bkmrk--0"><div data-step-uuid="9948D140-698E-0139-6548-12F2183ABDFB"><div>![Open Course Details](https://media.screensteps.com/image_assets/assets/008/176/139/original/838f73e1-12b3-4572-9166-ec879236ee07.png)</div><div><div></div></div></div></div>Click the **Course Details** tab.

### **View Term Participation Dates**

<div data-step-uuid="994924A0-698E-0139-654B-12F2183ABDFB" id="bkmrk--1"><div data-step-uuid="994924A0-698E-0139-654B-12F2183ABDFB"><div>[![View Term Participation Dates](https://media.screensteps.com/image_assets/assets/007/672/793/medium/23500fa9-0eb3-4738-94ad-de02e83e46f5.png)](https://media.screensteps.com/image_assets/assets/007/672/793/original/23500fa9-0eb3-4738-94ad-de02e83e46f5.png)</div><div><div></div></div></div></div>When ITS creates <span class="markq20330x8w" data-markjs="true" data-ogab="" data-ogac="" data-ogsb="" data-ogsc="">course</span>s, they are assigned to use the Term Participation\[2\]. Courses using Term participation are set to follow the term start and end dates set for your entire institution \[3\].

If the Term option is selected in the Participation drop-down menu, you can view the term start and end dates \[3\]. Term dates can only be modified by a Canvas admin. After the <span class="markqwhz9yhcv" data-markjs="true" data-ogab="" data-ogac="" data-ogsb="" data-ogsc="">end</span> <span class="marka9s66kww0" data-markjs="true" data-ogab="" data-ogac="" data-ogsb="" data-ogsc="">date</span>, the <span class="markq20330x8w" data-markjs="true" data-ogab="" data-ogac="" data-ogsb="" data-ogsc="">course</span> is locked into a read-only state for both the students and instructors. Any changes to the course dates, for example if a student receives an incomplete for the course, will need to be made before the End date when the course is locked.

To allow a student to continue participating in the course past the end date, or for you to continue grading students' submissions past the end date, the Participation will need to be changed from Term to <span class="markq20330x8w" data-markjs="true" data-ogab="" data-ogac="" data-ogsb="" data-ogsc="">Course</span>. Once the <span class="markq20330x8w" data-markjs="true" data-ogab="" data-ogac="" data-ogsb="" data-ogsc="">course</span> is switched to <span class="markq20330x8w" data-markjs="true" data-ogab="" data-ogac="" data-ogsb="" data-ogsc="">Course</span> Participation, you can set a new <span class="markqwhz9yhcv" data-markjs="true" data-ogab="" data-ogac="" data-ogsb="" data-ogsc="">End</span> <span class="marka9s66kww0" data-markjs="true" data-ogab="" data-ogac="" data-ogsb="" data-ogsc="">date</span>. If the End date has already passed, instructors will need a Canvas Administrator to change the course dates for them.

> **Notes:**
> 
> - If the course is assigned to the Default Term and participation dates are set to follow term dates, or if no Course End date is set, students can participate in the course indefinitely.
> - When setting a start and end date for a course, instructors can view local and course time zones set for the course \[4\] and the local time for the user \[5\].

### **Set Course Participation Dates**

<div data-step-uuid="ef229e27-c152-4bd8-89ea-c1ae09e492ae" id="bkmrk--2"><div data-step-uuid="ef229e27-c152-4bd8-89ea-c1ae09e492ae"><div>![Set Course Participation Dates](https://media.screensteps.com/image_assets/assets/004/285/167/original/391a48ba-ca10-4ec9-9ca7-65c8c574b8c4.png)</div><div><div></div></div></div></div>To set different participation start and end dates for your course, click the **Participation** drop-down menu \[1\] and select the **Course** option \[2\].

> **Important:** If you do not see the option to change what is displayed in the Participation drop-down menu \[3\], your account may not have permission to modify course dates. Contact CETL or the ITS Help Desk for assistance.

> **Note:** Changing to Term dates will clear any Course dates and restore the official university set Term dates.

#### **Set Start Date**

<div data-step-uuid="99497EC0-698E-0139-654E-12F2183ABDFB" id="bkmrk--3"><div data-step-uuid="99497EC0-698E-0139-654E-12F2183ABDFB"><div>![Set Start Date](https://media.screensteps.com/image_assets/assets/005/249/419/original/707ab120-9a76-4960-a7bb-4dff9266977e.png)</div><div><div></div></div></div></div>To select the start date, click the **Start** calendar icon \[1\]. Then select a new start date for the course \[2\].

#### **Set End Date**

<div data-step-uuid="9949DF80-698E-0139-6551-12F2183ABDFB" id="bkmrk--4"><div data-step-uuid="9949DF80-698E-0139-6551-12F2183ABDFB"><div>![Set End Date](https://media.screensteps.com/image_assets/assets/005/249/421/original/76a9afef-c675-4d72-9512-390453f25c9d.png)</div><div><div></div></div></div></div>To select the end date, click the **End** calendar icon \[1\]. Then select a new end date for the course \[2\].

<div data-step-uuid="9949DF80-698E-0139-6551-12F2183ABDFB" id="bkmrk--5"><div data-step-uuid="9949DF80-698E-0139-6551-12F2183ABDFB"><div><div></div></div><div>![Set End Date](https://media.screensteps.com/image_assets/assets/005/249/423/original/e11799a9-af50-4bf1-a3a3-34ebd1a09860.png)</div><div><div></div></div></div></div>If your end date time is midnight, a warning message displays notifying you that the date before the set end date will be the last participation day in the course. For instance, if the course were set to end January 13, the last full participation date for the course would be January 12.

> **Notes**:
> 
> - Students can only participate in the course between the course dates, and the course will be in a read-only state outside the course dates.
> - Changing the End date to reopen a course will reopen it for everyone enrolled in the course.
> - Course participation dates only affect student and observer roles; all other roles default to term access dates.
> - End dates occur at precisely the minute they are set. For example, a course with an end time at 11:59pm will end at 11:59:00.
> - Students will not receive notifications for course announcements prior to the course start date.

<div id="bkmrk--6"></div>> **Tip:**
> 
> To allow only specific students to submit work after the course end date, use the *Assign To* feature in Canvas assignments to set custom availability and due dates for individual students.
> 
> By setting Additional Assign To blocks, you can leave the original dates set for Everyone Else. The new blocks will then only provide the new access dates to the students allowed to submit their incomplete work. See the guides for**[ assigning an assignment to individuals](https://kb.astate.edu/books/canvas-instructor-how-tos/page/how-do-i-assign-an-assignment-to-everyone-individual-students-or-sections)** for instructions on how to give an individual different dates from the rest of the class.

<div data-step-uuid="9949DF80-698E-0139-6551-12F2183ABDFB" id="bkmrk--7"><div data-step-uuid="9949DF80-698E-0139-6551-12F2183ABDFB"><div>![](https://media.screensteps.com/image_assets/assets/008/670/053/original/f4ab40eb-74d7-4565-b59c-7e965769791f.png)</div><div><div></div></div></div></div>If the selected date for the End date occurs before the Start date, a warning message displays.

### **Restrict Course Access**

<div data-step-uuid="994A7730-698E-0139-6556-12F2183ABDFB" id="bkmrk--8"><div>![Restrict Course Access](https://media.screensteps.com/image_assets/assets/005/249/425/original/fb25b4d4-9c64-4c39-b94c-a5ec504b16ba.png)</div></div>You may also be able to **[change student access settings](https://community.canvaslms.com/t5/Instructor-Guide/How-do-I-restrict-student-access-to-a-course-before-or-after-the/ta-p/1269)** to allow or restrict students from viewing your course before the start date or after end date. When selected, the course is inaccessible outside course dates. If course dates are blank, students can participate in the course indefinitely.

> **Note:** If you cannot manage the settings to restrict students from viewing course content, your institution has not enabled this feature.

### **Update Course Details**

<div data-step-uuid="994ADB10-698E-0139-6559-12F2183ABDFB" id="bkmrk--9"><div data-step-uuid="994ADB10-698E-0139-6559-12F2183ABDFB"><div>![Update Course Details](https://media.screensteps.com/image_assets/assets/000/790/649/original/2fa32743-66da-41e9-8fcb-6c2ab87960a6.png)</div><div><div></div></div></div></div>Click the **Update Course Details** button.

\[Content retrieved from [https://community.canvaslms.com/t5/Instructor-Guide/How-do-I-change-the-start-and-end-dates-for-a-course/ta-p/452354](https://community.canvaslms.com/t5/Instructor-Guide/How-do-I-change-the-start-and-end-dates-for-a-course/ta-p/452354)\]

# How do I assign an assignment to everyone, individual students, or sections?

By default, assignments you create in your course are assigned to everyone. You can specify a due date and availability dates that apply to everyone. You can also assign an assignment to an individual student or a course section.

You can also assign an assignment to a [course group](https://community.canvaslms.com/t5/Instructor-Guide/How-do-I-assign-an-assignment-to-a-course-group/ta-p/633).

When [Multiple Grading Periods](https://community.canvaslms.com/t5/Instructor-Guide/How-do-I-use-grading-periods-in-a-course/ta-p/1030) are enabled in a course, assignments are also respected against closed grading periods.

Only assigned students can view the assignment.

**Notes:**

<div id="bkmrk-if-multiple-due-date"><div>- If multiple due dates apply to a student, Canvas assigns the latest due date to the student. For example, if a student's individual due date is November 18 and the section due date is November 20, the student is assigned a due date of November 20.
- If you unassign a student or section to a differentiated assignment you have previously graded, the grade and submission are removed from the assignment. You can restore the submission by reassigning the assignment to the student.
- When using differentiated assignments with the [Gradebook](https://community.canvaslms.com/t5/Instructor-Guide/How-do-I-use-the-Gradebook/ta-p/701), the assignment appears as a column for all students, but grade cells are grayed out for students who have not been included in the assignment. Grades cannot be assigned for students who have not been included in the assignment, and assignments that are not assigned to a student are not factored into overall grades.

</div></div><div id="bkmrk-embed-this-video"><iframe allowfullscreen="allowfullscreen" data-mce-fragment="1" frameborder="0" height="400px" sandbox="allow-popups allow-popups-to-escape-sandbox allow-scripts allow-forms allow-same-origin allow-presentation" src="https://embed.app.guidde.com/playbooks/bndR428K1HGPbEQRmgMM4a" title="How do I assign an assignment to everyone, individual students, or sections?" width="700px"></iframe>

<button class="embed-button">Embed this Video</button></div>## Open Assignments

[![image-1770744407165.webp](https://kb.astate.edu/uploads/images/gallery/2026-02/scaled-1680-/image-1770744407165.webp)](https://kb.astate.edu/uploads/images/gallery/2026-02/image-1770744407165.webp)

<div data-step-uuid="f6c75a6f-5e78-436b-99db-90e81f243adc" id="bkmrk-in-course-navigation"><div data-step-uuid="f6c75a6f-5e78-436b-99db-90e81f243adc"><div>In Course Navigation, click the **Assignments** link.</div></div></div>## Add Assignment

[![image-1770744417720.webp](https://kb.astate.edu/uploads/images/gallery/2026-02/scaled-1680-/image-1770744417720.webp)](https://kb.astate.edu/uploads/images/gallery/2026-02/image-1770744417720.webp)

<div data-step-uuid="fc926e15-8be7-4b0b-ac54-8a4241784df4" id="bkmrk-click-the-add-assign"><div data-step-uuid="fc926e15-8be7-4b0b-ac54-8a4241784df4"><div>Click the **Add Assignment** button.</div></div></div>## Add Assignment Details

[![image-1770744431369.webp](https://kb.astate.edu/uploads/images/gallery/2026-02/scaled-1680-/image-1770744431369.webp)](https://kb.astate.edu/uploads/images/gallery/2026-02/image-1770744431369.webp)

<div data-step-uuid="b9f2c8af-9427-48a1-b96f-505623eff5da" id="bkmrk-add-details-to-the-a"><div data-step-uuid="b9f2c8af-9427-48a1-b96f-505623eff5da"><div><div>Add [details to the assignment](https://community.canvaslms.com/t5/Instructor-Guide/How-do-I-add-or-edit-details-in-an-assignment/ta-p/971).</div></div></div></div>## Assign Access

[![image-1770744443752.webp](https://kb.astate.edu/uploads/images/gallery/2026-02/scaled-1680-/image-1770744443752.webp)](https://kb.astate.edu/uploads/images/gallery/2026-02/image-1770744443752.webp)

<div data-step-uuid="1fd37f86-5dbe-4e17-a911-baf58ece6791" id="bkmrk-in-the-assign-access"><div data-step-uuid="1fd37f86-5dbe-4e17-a911-baf58ece6791"><div>In the Assign Access section, you can manage assignees [1], the due date [2], and availability dates [3]. You can also add additional assignment details [4].</div></div></div>### Select Assignees

[![image-1770744455674.webp](https://kb.astate.edu/uploads/images/gallery/2026-02/scaled-1680-/image-1770744455674.webp)](https://kb.astate.edu/uploads/images/gallery/2026-02/image-1770744455674.webp)

<div data-step-uuid="1fd37f86-5dbe-4e17-a911-baf58ece6791" id="bkmrk-by-default%2C-assignme-0"><div data-step-uuid="1fd37f86-5dbe-4e17-a911-baf58ece6791"><div data-step-uuid="04da6579-8d7a-41fa-93c9-49a750d8386d"><div><div>By default, assignments are assigned to everyone in the course. However, you can differentiate the assignments.</div></div></div></div></div>To assign an assignment to an individual student, section, or Mastery Path, remove Everyone by clicking the **Remove** icon \[1\].

To change the assignees, click the **Assign To** field. Then, select one or more assignees. You can assign to a course section \[2\] or an individual student \[3\].

**Notes:**

<div data-step-uuid="1fd37f86-5dbe-4e17-a911-baf58ece6791" id="bkmrk-you-can-include-more"><div data-step-uuid="1fd37f86-5dbe-4e17-a911-baf58ece6791"><div data-step-uuid="04da6579-8d7a-41fa-93c9-49a750d8386d"><div><div>- You can include more than one student or section in the To field as long as the students are to be assigned the same due and availability dates.
- If your course is using Mastery Paths, you do not have to manually assign assignments to individual students. Learn how to assign an assignment using [Mastery Paths](https://community.canvaslms.com/t5/Instructor-Guide/How-do-I-assign-a-conditional-assignment-for-students-to/ta-p/1025).
- If you unassign a student or section to a differentiated assignment you have previously graded, the grade and submission are removed from the assignment. You can restore the submission by reassigning the assignment to the student.
- You can also assign an assignment to a [course group](https://community.canvaslms.com/t5/Instructor-Guide/How-do-I-assign-an-assignment-to-a-course-group/ta-p/633).

</div></div><div data-step-uuid="a7be6647-318b-4afb-81ce-aaf051fde17f"></div></div></div></div>#### Find Student or Section

[![image-1770744468249.webp](https://kb.astate.edu/uploads/images/gallery/2026-02/scaled-1680-/image-1770744468249.webp)](https://kb.astate.edu/uploads/images/gallery/2026-02/image-1770744468249.webp)

<div data-step-uuid="1fd37f86-5dbe-4e17-a911-baf58ece6791" id="bkmrk-to-find-a-student-or"><div data-step-uuid="1fd37f86-5dbe-4e17-a911-baf58ece6791"><div data-step-uuid="04da6579-8d7a-41fa-93c9-49a750d8386d"><div data-step-uuid="a7be6647-318b-4afb-81ce-aaf051fde17f"><div>To find a student or section more easily, enter a few letters of the name [1] and select the name from a filtered list [2].</div></div></div></div></div>To remove an assignee, click the assignee **Remove** icon \[3\].

**Note:** The list is not scrollable.

## Enter Due and Availability Dates

[![image-1770744478761.webp](https://kb.astate.edu/uploads/images/gallery/2026-02/scaled-1680-/image-1770744478761.webp)](https://kb.astate.edu/uploads/images/gallery/2026-02/image-1770744478761.webp)

<div data-step-uuid="60b02338-b51a-4077-b878-cbe24f04732a" id="bkmrk-in-the-date-fields%2C-"><div data-step-uuid="60b02338-b51a-4077-b878-cbe24f04732a"><div>In the date fields, add your preferred date(s) with the following options:</div></div></div><div data-step-uuid="60b02338-b51a-4077-b878-cbe24f04732a" id="bkmrk-due-date%C2%A0%5B1%5D%3A-set-th"><div data-step-uuid="60b02338-b51a-4077-b878-cbe24f04732a"><div><div>- **Due Date** \[1\]: Set the date and time that the assignment is due. The due date is already populated for you if you [created an assignment shell](https://community.canvaslms.com/t5/Instructor-Guide/How-do-I-create-an-assignment-shell-in-an-assignment-group/ta-p/974), but you can change it if necessary.
- **Available From** \[2\]: Set the date and time when the assignment is unlocked and becomes available.
- **Until** \[3\]: Set the date and time when the assignment is locked and no longer available.

</div></div></div></div>**Notes:**

<div data-step-uuid="60b02338-b51a-4077-b878-cbe24f04732a" id="bkmrk-due-dates-assigned-t"><div><div>- Due dates assigned to specific students override group or section due dates.
- If you have set section override dates in your course, you may need to assign to a course section and set due and availability dates that fall within the section override dates.
- After you enter due dates or availability dates, Canvas displays the time zone date and time according to context. If you manage courses in a time zone other than your local time zone and create or edit a due date for an assignment, the course and local times are displayed for reference.

</div></div></div>## Add Additional Assignments

[![image-1770744490969.webp](https://kb.astate.edu/uploads/images/gallery/2026-02/scaled-1680-/image-1770744490969.webp)](https://kb.astate.edu/uploads/images/gallery/2026-02/image-1770744490969.webp)

<div data-step-uuid="a7eb3bd1-cdb0-447c-a65a-4f24a9f942e4" id="bkmrk-to-add-another-stude"><div data-step-uuid="a7eb3bd1-cdb0-447c-a65a-4f24a9f942e4"><div>To add another student or section with a different due date and availability dates, click the **Add Assign To** button. Then enter a new set of assignees, due dates, and availability dates.</div></div></div>### Remove Assignment

[![image-1770744499716.webp](https://kb.astate.edu/uploads/images/gallery/2026-02/scaled-1680-/image-1770744499716.webp)](https://kb.astate.edu/uploads/images/gallery/2026-02/image-1770744499716.webp)

<div data-step-uuid="a7eb3bd1-cdb0-447c-a65a-4f24a9f942e4" id="bkmrk-you-can-delete-entir"><div data-step-uuid="a7eb3bd1-cdb0-447c-a65a-4f24a9f942e4"><div data-step-uuid="70bc27f2-10dc-4274-9afc-942a347fb3f6"><div>You can delete entire assignments by clicking the **Remove** icon in the appropriate assignment section [1].</div></div></div></div>To remove the dates and times in the Due Date, Available from, or Until fields, click the **Clear** link \[2\].

## View Date Error

[![image-1770744512484.webp](https://kb.astate.edu/uploads/images/gallery/2026-02/scaled-1680-/image-1770744512484.webp)](https://kb.astate.edu/uploads/images/gallery/2026-02/image-1770744512484.webp)

<div data-step-uuid="03506ef6-f394-44b9-92e4-a3d704ba5fbb" id="bkmrk-if-you-enter-invalid"><div data-step-uuid="03506ef6-f394-44b9-92e4-a3d704ba5fbb"><div>If you enter invalid dates, Canvas displays error messages. Invalid entries include not unlocking the discussion before it is due, not placing the due date inside the range of availability dates, or assigning a date that is outside the course or term dates.</div></div></div>Correct the dates as needed.

**Notes:**

<div data-step-uuid="03506ef6-f394-44b9-92e4-a3d704ba5fbb" id="bkmrk-if-the-course-does-n"><div><div>- If the course does not include specified course start and end dates, Canvas validates the graded discussion against the term date set for the course.
- If your course is using Multiple Grading Periods, the Assign field validates the due date against the closed grading period and requires the discussion due date to be past the date of the closed grading period.

</div></div></div>## Save and Publish

[![image-1770744524803.webp](https://kb.astate.edu/uploads/images/gallery/2026-02/scaled-1680-/image-1770744524803.webp)](https://kb.astate.edu/uploads/images/gallery/2026-02/image-1770744524803.webp)

<div data-step-uuid="efbbf347-8496-44ae-aacf-2fe467c37af7" id="bkmrk-if-you-are-ready-to-"><div data-step-uuid="efbbf347-8496-44ae-aacf-2fe467c37af7"><div>If you are ready to publish the assignment, click the **Save &amp; Publish** button [1]. If you want to create a draft of your assignment and [publish](https://community.canvaslms.com/t5/Instructor-Guide/How-do-I-publish-or-unpublish-an-assignment-as-an-instructor/ta-p/585) it later, click the **Save** button [2].</div></div></div>## View Warning

[![image-1770744532394.webp](https://kb.astate.edu/uploads/images/gallery/2026-02/scaled-1680-/image-1770744532394.webp)](https://kb.astate.edu/uploads/images/gallery/2026-02/image-1770744532394.webp)

<div data-step-uuid="e485bdba-a329-4a8f-97c5-fa096b284c84" id="bkmrk-if-you-do-not-add-al"><div data-step-uuid="e485bdba-a329-4a8f-97c5-fa096b284c84"><div>If you do not add all students through course sections or individual assignments, a warning message displays.</div></div></div>If you don't want to add any others to the assignment, click the **Continue** button \[1\]. Alternatively, to go back and add additional sections or students, click the **Go Back** button \[2\].

**Note:** This warning message does not display if *Everyone, Everyone Else,* or all course sections or students in the course are assigned to the assignment.

## View Assignment Dates

[![image-1770744547628.webp](https://kb.astate.edu/uploads/images/gallery/2026-02/scaled-1680-/image-1770744547628.webp)](https://kb.astate.edu/uploads/images/gallery/2026-02/image-1770744547628.webp)

<div data-step-uuid="b8035b04-c37d-40ae-aa4d-6babc76ca3f9" id="bkmrk-view-the-assignees-a"><div data-step-uuid="b8035b04-c37d-40ae-aa4d-6babc76ca3f9"><div>View the assignees and dates assigned to the assignment [1].</div></div></div>To quickly view details or make changes to assignments, click the **Assign To** button \[2\].

## View Assignments Page

<div data-step-uuid="a3278495-a0bc-476a-9b95-10a88df54bf4" id="bkmrk--12"><div data-step-uuid="a3278495-a0bc-476a-9b95-10a88df54bf4"><div>[![image-1770744559754.webp](https://kb.astate.edu/uploads/images/gallery/2026-02/scaled-1680-/image-1770744559754.webp)](https://kb.astate.edu/uploads/images/gallery/2026-02/image-1770744559754.webp)</div></div></div>On the Assignments Index Page, a published assignment shows the assignment dates.

<div data-step-uuid="a3278495-a0bc-476a-9b95-10a88df54bf4" id="bkmrk-when-multiple-availa"><div data-step-uuid="a3278495-a0bc-476a-9b95-10a88df54bf4"><div data-step-uuid="a3278495-a0bc-476a-9b95-10a88df54bf4"><div><div>[![image-1770744568297.webp](https://kb.astate.edu/uploads/images/gallery/2026-02/scaled-1680-/image-1770744568297.webp)](https://kb.astate.edu/uploads/images/gallery/2026-02/image-1770744568297.webp)</div></div><div>When multiple availability dates or due dates exist, you can view details from the Assignments Page. Hover the cursor over the **Multiple Dates** link [1] and view the date details [2].</div><div></div></div></div></div>\[Content retrieved from[ https://community.canvaslms.com/t5/Instructor-Guide/How-do-I-assign-an-assignment-to-everyone-individual-students-or/ta-p/1191](https://community.instructure.com/en/kb/articles/660688-how-do-i-assign-an-assignment-to-everyone-individual-students-differentiated-tags-or-sections)\]

# Integrating Video into Canvas Activities

Using Kaltura makes it easy to embed videos for instructional purposes or to collect video submissions from students. This page explores how faculty can enhance student engagement and learning by integrating video into Canvas Assignments and Quizzes, as well as how to set up Kaltura Quizzes that report to the Canvas Gradebook. It also includes best practices for student submissions and alternative tools for video-based discussions.

## **Using Video in Canvas Assignments**

Faculty can embed Kaltura videos into assignment instructions or prompts using the Rich-Text Editor. This supports:

- **Instructional Videos**: Provide context, explain expectations, or demonstrate a process.
- **Question Prompts**: Include a video students must watch before answering a question (e.g., a short lecture clip, scenario, or demonstration).

**Student Submissions**:

- Kaltura is available in the **Text Entry** submission type and helps track when the video was uploaded to Kaltura.
- Students can record or upload videos as part of their assignment submission using:  
    
    - **Express Capture** (record directly in browser)
    - **Media Upload** (upload a pre-recorded video)

> **Best Practices for Student Video Submissions**
> 
> - Use the **Text Entry** submission type and remind students to use ****Kaltura ([![Screenshot of the Kaltura Icon in the Rich-Text Editor](https://kb.astate.edu/uploads/images/gallery/2025-08/scaled-1680-/image-1755207491506.jpg)](https://kb.astate.edu/uploads/images/gallery/2025-08/image-1755207491506.jpg)**)** from the tools in the Rich-Text Editor.
> - Encourage students to use **Express Capture** for quick responses or **Media Upload** for polished presentations.
> - Remind students to **title their videos clearly** and **check playback** before submitting.

---

## **Using Video in Canvas Quizzes**

Kaltura videos can be embedded into quiz questions to support:

- **Listening or viewing comprehension**
- **Scenario-based analysis**
- **Demonstration critique**

Use the **Rich-Text Editor** in quiz questions to embed media. Combine with multiple-choice, short answer, or essay formats.

> Keep videos short (under 5 minutes) to maintain focus and reduce loading issues.

---

## **Creating and Using Kaltura Quizzes**

Kaltura Quizzes embed questions directly into a video and can report scores to the Canvas Gradebook.

**To create a Kaltura Quiz**:

- Go to **My Media** in Canvas
- Click **Edit** on a video and launch the **Quiz Editor**
- Insert questions and configure settings: 
    - Enable **Gradebook Integration**
    - Choose scoring and feedback options

**Embedding in Canvas**:

- Use the **Kaltura Embed Tool** in an Assignment or Page
- Select the quiz version of the video
- Use the **External Tool** submission type for grade passback

> **Important**: For the Quiz score to be added to your Canavas Grades, you must create a Canvas assignment using the External Tool submission type.
> 
> **[Create a video quiz assignment in Canvas](https://knowledge.kaltura.com/help/canvas-persona-guides-kaltura-video-quiz-canvas-gradebook-user-guide)** – Step-by-step walkthrough with screenshots.

---

## **Video-Based Discussions with VoiceThread**

For threaded video conversations, **VoiceThread** is recommended. It supports video, audio, and text comments with peer replies.

**Use Cases**:

- **Language practice**
- **Peer review**
- **Collaborative storytelling**

VoiceThread integrates with Canvas and supports grading.

---

## **Accessibility and Best Practices**

- Caption all instructional videos using Kaltura’s auto-captioning and editing tools
- Encourage students to speak clearly and avoid background noise
- Provide transcripts or alternative formats when needed

# Embedding Media in Classes

This page provides guidance on how to embed video, image, and mixed media content from public and open sources directly into Canvas. Embedding media can enhance student engagement, streamline access, and support diverse instructional strategies.

---

## **Embedding Video Content**

Most video platforms offer embed codes or direct integration with Canvas. For platform-specific instructions and media sources, see the Instructional Media from Public and Open Sources page.

### **Using the Rich Content Editor**

1. <div data-step-uuid="F8D059C0-FCF6-0138-F88D-12F2183ABDFB"><div data-step-uuid="F8D059C0-FCF6-0138-F88D-12F2183ABDFB"><div>[ ![Open Rich Content Editor](https://media.screensteps.com/image_assets/assets/009/467/869/medium/300afc38-f4cb-4f2b-8905-39cd4371e2e0.png) ](https://media.screensteps.com/image_assets/assets/009/467/869/original/300afc38-f4cb-4f2b-8905-39cd4371e2e0.png)</div><div><div></div></div></div></div>Open the Rich Content Editor using one of the Canvas features that support the Editor.
    
    **Note:** The Rich Content Editor supports keyboard shortcuts. To view the Keyboard Shortcuts menu, click the Keyboard icon or press **ALT+F8** (PC keyboard) or **Option+F8** (Mac keyboard).
    
    #### **Open Embed from Toolbar**
    
    <div data-step-uuid="F8D0A4F0-FCF6-0138-F890-12F2183ABDFB"><div data-step-uuid="F8D0A4F0-FCF6-0138-F890-12F2183ABDFB"><div>![Open Embed Tool from Toolbar](https://media.screensteps.com/image_assets/assets/008/793/343/original/b210349a-f579-4d7a-a8f9-b9b6ff1ee180.png)</div><div><div></div></div></div></div>To embed media from the toolbar, click the **Embed** icon \[1\].
    
    To view the Embed icon, you may have to click the **Options** icon \[2\].
    
    #### **Open Media Upload Tool from the Menubar**
    
    <div data-step-uuid="F8D0A4F0-FCF6-0138-F890-12F2183ABDFB"><div data-step-uuid="F8D0A4F0-FCF6-0138-F890-12F2183ABDFB"><div data-step-uuid="F8D0F080-FCF6-0138-F893-12F2183ABDFB"><div>![Open Media Upload Tool from Menubar](https://media.screensteps.com/image_assets/assets/003/853/739/original/42a6cdcf-4e8b-4cf7-8f33-cf7c7aee4ffd.png)</div><div><div></div></div></div></div></div>You can also embed media using the menubar in the Rich Content Editor. The menubar displays the title of Rich Content Editor tools and may be preferable for those using keyboard navigation.
    
    To embed media using the menubar, click the **Insert** menu \[1\] and select the **Embed** option \[2\].
    
    #### **Enter Embed Code**
    
    <div data-step-uuid="F8D12F10-FCF6-0138-F896-12F2183ABDFB"><div data-step-uuid="F8D12F10-FCF6-0138-F896-12F2183ABDFB"><div>![Enter Embed Code](https://media.screensteps.com/image_assets/assets/003/878/582/original/8804c70c-0cdb-4d06-92ef-94a72347fd07.png)</div><div><div></div></div></div></div>Paste the code in the **Embed Code** field \[1\]. Then click the **Submit** button \[2\].
    
    #### **Embed Media**
    
    <div data-step-uuid="F8D17CB0-FCF6-0138-F899-12F2183ABDFB"><div data-step-uuid="F8D17CB0-FCF6-0138-F899-12F2183ABDFB"><div>![Embed Media](https://media.screensteps.com/image_assets/assets/003/039/225/original/48e3eaa2-df83-4320-afbd-3c559ff7f8f8.png)</div><div><div></div></div></div></div>Click the **Submit** button.

See **[How do I embed media from an external source in the Rich Content Editor?](https://community.canvaslms.com/t5/Canvas-Basics-Guide/How-do-I-embed-media-from-an-external-source-in-the-Rich-Content/ta-p/618217)** from the Canvas Basics Guide.

### **Using the Apps Icon**

Use these integrated apps to embed or link content directly into your course without needing embed codes. To embed app content in the Rich Content Editor, click to place your cursor in the location in the Rich Content Editor where you want the app content to appear.

#### **Open Apps**

<div data-step-uuid="77bc4660-110d-4291-a23d-9ae2ec7b2d7d" id="bkmrk--0"><div data-step-uuid="77bc4660-110d-4291-a23d-9ae2ec7b2d7d"><div>![Open Apps](https://media.screensteps.com/image_assets/assets/003/853/151/original/00cff77a-df77-4574-9cb5-0fa853744e80.png)</div><div><div></div></div></div></div>You can view a list of external tools from the menubar. Click the **Tools** link \[1\]. Navigate to the **Apps** option \[2\], then select the **View All** option \[3\].

Alternatively, you can view your apps from the toolbar. In the toolbar, click the **App** icon \[4\].

**Note:** To view the App icon, you may have to click the **Options** icon \[5\].

#### **View Recently Used Apps**

<div data-step-uuid="77bc4660-110d-4291-a23d-9ae2ec7b2d7d" id="bkmrk--1"><div data-step-uuid="77bc4660-110d-4291-a23d-9ae2ec7b2d7d"><div data-step-uuid="527f7a31-d952-4965-805b-5b1583d25afd"><div>![View Recently Used Apps](https://media.screensteps.com/image_assets/assets/004/079/614/original/893092ad-e907-4d5b-8be6-e453a49c2ca9.png)</div><div><div></div></div></div></div></div>If you have previously used an external app from the Rich Content Editor, you can quickly open recently used apps.

To view recently used apps, click the **App** icon \[1\]. Then select the app you want to open \[2\].

To view all apps, click the **View All** link \[3\].

#### **Select the App**

These include:

- **Video Tools**: Kaltura, Vimeo, YouTube, Screencast-O-Matic, VoiceThread
- **Content Libraries**: Canvas Commons, FlatWorld, SAGE Vantage, Pearson, Macmillan Learning
- **File and Media Tools**: Dropbox, Google Apps, Microsoft Office 365
- **Design Tools**: Lucid, Cidi Labs Upload/Embed Image tool
- **Interactive Tools**: Nearpod, Wiley

Use the app to search for and select content to link to or embed. External app settings and options may vary by app.

See **[How do I select content from an external app in the Rich Content Editor? ](https://community.canvaslms.com/t5/Canvas-Basics-Guide/How-do-I-select-content-from-an-external-app-in-the-Rich-Content/ta-p/618219)** from the Canvas Basics Guide.

---

## **Embedding Images**

### **Using the Rich Content Editor**

1. Click the **Image icon** in the editor.
2. Choose **Upload Image** to select a file from your computer or **User Image** to select a file already uploaded to Canvas.
3. Add **alt text** for accessibility.
4. Resize or align as needed.

See **[How do I upload and embed an image in the Rich Content Editor?](https://community.canvaslms.com/t5/Canvas-Basics-Guide/How-do-I-upload-and-embed-an-image-in-the-Rich-Content-Editor/ta-p/618228)** from the Canvas Basics Guide.

See the **[WebAIM article on Alternative Text](https://webaim.org/techniques/alttext/)** for guidance on how to make alt text truly accessible.

---

## **Best Practices for Accessibility**

Ensuring media is accessible helps all students engage with course content effectively.

- Always include **captions** or **transcripts** for video content.
- Use **alt text** for all images. 
    - See **[How do I manage alt text and display options for images embedded in the Rich Content Editor?](https://community.canvaslms.com/t5/Canvas-Basics-Guide/How-do-I-manage-alt-text-and-display-options-for-images-embedded/ta-p/618226)** from the Canvas Basics Guide.
- Avoid autoplay features unless pedagogically necessary.
- Test embedded content on mobile and screen readers.

### **Accessibility Tools in Canvas**

- **Canvas Accessibility Checker**  
    Use the built-in Accessibility Checker in the Rich Content Editor to identify and fix common issues like missing alt text, low contrast, and heading structure.
    
    
    - See **[How do I use the Accessibility Checker in the Rich Content Editor?](https://community.canvaslms.com/t5/Canvas-Basics-Guide/How-do-I-use-the-Accessibility-Checker-in-the-Rich-Content/ta-p/618238)** from the Canvas Basics Guide.
- **UDOIT (Universal Design Online Content Inspection Tool)**  
    A-State has integrated UDOIT from Cidi Labs into Canvas. This tool scans entire courses for accessibility issues and provides actionable feedback to improve content.
    
    
    - **[Learn more at UDOIT by Cidi Labs](https://cidilabs.instructure.com/courses/6621?__hstc=221276231.0167e914efeb0a0f8c5b02d1d8ff6ef2.1751982884297.1751982884297.1755040301703.2&__hssc=221276231.1.1755040301703&__hsfp=1713868179)**

---

## **Request Assistance**

If you need help embedding media or selecting appropriate resources, contact your faculty support office:

### **Center for Excellence in Teaching and Learning (CETL)**

Email: **<CETL@AState.edu>**  
Phone: 870-972-2334  
Location: Dean B. Ellis Library, Suite 301

### **A-State Online Faculty Support**

Email: **<aos@astate.edu>**  
Phone: 870-680-8464  
Location: International Programs Building

# Instructional Media from Public and Open Sources

This page lists freely available media sources that can be used to supplement course content. These resources include video, image, and mixed media collections that are open license or publicly accessible. Faculty can use these tools to enrich instruction, provide diverse perspectives, and support student engagement.

---

## **Video Resources**

[**Internet Archive** ](https://archive.org/)<span data-huuid="5914697514360949276">–</span> The largest collection of open-license audio, video, and text available on the internet.

**[PBS ](https://www.pbs.org/)**<span data-huuid="5914697514360949276">–</span> Clips and full episodes from over twenty of PBS's best series.

**[The History Channel](https://www.history.com/)**<span data-huuid="5914697514360949276"> – </span>Clips, chapters, and episodes from 60+ different shows from The History Channel.

**[Annenberg Media](https://www.learner.org/)**<span data-huuid="5914697514360949276"> – </span>Over 100 educational series available for free viewing online.

**[Library of Congress: Digital Collections](https://www.loc.gov/collections/)**<span data-huuid="5914697514360949276"> – </span>A selection of digitized content from the Library of Congress.

**[TED](https://www.ted.com/)**<span data-huuid="5914697514360949276"> – </span>TED is a global set of conferences under the slogan "Ideas Worth Spreading". You can read or watch presentation videos regarding several topics such as technology, design, science, business, global issues, and many more.

**[Khan Academy](https://www.khanacademy.org/)**<span data-huuid="5914697514360949276"> – </span>Free world-class education for anyone anywhere, with an extensive library of content including interactive challenges, assessments, and videos.

**[LinkedIn Learning](https://www.linkedin.com/learning/)**<span data-huuid="5914697514360949276"> – </span>Helps anyone learn business, software, technology, and creative skills to achieve personal and professional goals.

[**Coursera**](https://www.coursera.org/programs/career-academy-for-faculty-staff-2ggvh?authProvider=astate&utm_campaign=orgId%3Ac0S49VVcTiaropcm13QP2Q%3BuserId%3A43784644%3BSECOND_ENROLLMENT_TRIGGER%3Bdate%3A2025-05-21&utm_medium=email&utm_source=other) – Offers access to university-level courses and video lectures. A-State’s Canvas integration allows faculty to embed and link Coursera content directly into their courses.

---

## **Image Resources**

**[Every Stock Photo](https://www.everystockphoto.com/)**<span data-huuid="5914697514360949276"> – </span>A searchable catalog of thousands of public domain and open-license images.

[**Adobe Stock**](https://stock.adobe.com) – High-quality images, graphics, and templates available through A-State’s Creative Cloud account.

[**A-State PhotoShelter**](https://astate.photoshelter.com) – A-State’s official photo archive, offering campus-related imagery for instructional and promotional use.

---

## **Mixed Media and Licensing Resources**

**[Creative Commons](https://creativecommons.org/)**<span data-huuid="5914697514360949276"> – </span>Creative Commons is a nonprofit organization that enables the sharing and use of creativity and knowledge through free legal tools.

---

## **Embedding and Accessibility Tips**

- Many of these platforms (e.g., TED, Khan Academy, YouTube) allow embedding directly into Canvas using the Rich Content Editor. 
    - See the **[Embedding Media in Classes](https://kb.astate.edu/books/learning-technology/chapter/learning-management-system-canvas)** page for assistance with this issue.
- Always check for **captions** or **transcripts** before assigning external video content to ensure accessibility.
- When linking to external resources, provide a brief description and context for students.
- Use open-license or public domain content whenever possible to avoid copyright issues. 
    - See the **[Copyright and Fair Use Guidance for Faculty ](https://kb.astate.edu/books/campus-resources/page/copyright-and-fair-use-guidance-for-faculty)**page for questions about these issues.

---

## **Request Assistance**

For help embedding media in Canvas or selecting appropriate instructional resources, contact your faculty support office:

### **Center for Excellence in Teaching and Learning (CETL)**

Email: **<CETL@AState.edu>**  
Phone: 870-972-2334  
Location: Dean B. Ellis Library, Suite 301

### **A-State Online Faculty Support**

Email: **<aos@astate.edu>**  
Phone: 870-680-8464  
Location: International Programs Building

# How do I add an image to a course card in the Dashboard?

If your institution allows, you can upload an image to display behind the course card in the **[Canvas Dashboard](https://community.canvaslms.com/t5/Publisher-Test-Nathan/How-do-I-use-the-Dashboard-as-an-instructor/ta-p/644812).** Accepted images include JPG, JPEG, GIF, and PNG files.

To assist with creating Banners for your courses, you can reference the **[Create Canvas cards with PowerPoint](https://www.howtocanvas.com/create-amazing-pages-in-canvas/course-cards)** article on the **[How To Canvas](https://www.howtocanvas.com/)** site. Or, if you already have an image you would like to use and just need to make some adjustments to be sure that it appears as intended, you can use online resources like **[Adobe Creative Cloud Express](https://www.adobe.com/express/feature/image/resize?sdid=V6NZKPT6&mv=search&ef_id=CjwKCAiAh_GNBhAHEiwAjOh3ZNkeAwm6rGWWjm85YW3SlHRFaWG9kuYPJTo_OrRCL7J041bIboSGZxoCVoUQAvD_BwE:G:s&s_kwcid=AL!3085!3!569631844924!p!!g!!change%20image%20size!15566817537!133997437111)** to change an existing image to fit the requirements for a Course Image. This uses a simplified web version of Photoshop that is included with our Campus license for Adobe Creative Cloud.

When added to a course, images display behind a **[color overlay](https://community.canvaslms.com/t5/Instructor-Guide/How-do-I-view-my-favorite-courses-in-the-Card-View-Dashboard-as/ta-p/803)** in the course card. The overlay color is a user setting defined individually by each user in the Dashboard. Although the color overlay can be completely removed by a user, best practice is to use an image that can display well behind a variety of colors.

**Note:** Course card images are categorized as decorative images for screen readers and are set at a size of 262 pixels by 146 pixels.

## Open Course Settings

<div data-step-uuid="d8115170-a4ee-46a3-863e-23a2852024db" id="bkmrk-"><div data-step-uuid="d8115170-a4ee-46a3-863e-23a2852024db"><div>![Open Course Settings](https://media.screensteps.com/image_assets/assets/003/031/264/original/21148d45-250b-4f89-b759-83d566dba8dc.png)</div><div><div></div></div></div></div>In Course Navigation, click the **Settings** link.

## Open Course Details

<div data-step-uuid="8fa44139-5a11-4632-a33f-a0a2d0f68d37" id="bkmrk--0"><div data-step-uuid="8fa44139-5a11-4632-a33f-a0a2d0f68d37"><div>![Open Course Details](https://media.screensteps.com/image_assets/assets/008/176/139/original/838f73e1-12b3-4572-9166-ec879236ee07.png)</div><div><div></div></div></div></div>Click the **Course Details** tab.

## Choose Image

<div data-step-uuid="996ea0d0-b591-4d00-9657-f2087032c054" id="bkmrk--1"><div data-step-uuid="996ea0d0-b591-4d00-9657-f2087032c054"><div>![Choose Image](https://media.screensteps.com/image_assets/assets/000/790/565/original/0d2a459a-f1a0-4b6c-86d2-584d6ba6751e.png)</div><div><div></div></div></div></div>Click the **Choose Image** button.

## Upload File

<div data-step-uuid="6a720efe-4542-47d6-8bba-a9e2f469fde9" id="bkmrk--2"><div data-step-uuid="6a720efe-4542-47d6-8bba-a9e2f469fde9"><div>[![Upload File](https://media.screensteps.com/image_assets/assets/006/126/330/medium/667ecf73-0d75-48f0-af37-8c7b50ca7035.png)](https://media.screensteps.com/image_assets/assets/006/126/330/original/667ecf73-0d75-48f0-af37-8c7b50ca7035.png)</div><div><div></div></div></div></div>To upload your own image, drag and drop your image into the **Upload Image** section. Or, to browse your computer and locate an image, click the **Upload Image** section.

Images will automatically upload, but larger images may take a few seconds to process. The image will be centered and resized to fit the course card, which is set at a width of 262 pixels and a height of 146 pixels.

**Note**: Images larger than 10MB will not display correctly.

## View Image

<div data-step-uuid="a4e85d5b-2a42-4cf5-8bb3-48eb3782b3dc" id="bkmrk--3"><div data-step-uuid="a4e85d5b-2a42-4cf5-8bb3-48eb3782b3dc"><div>![View Image](https://media.screensteps.com/image_assets/assets/006/087/443/original/550663ce-a86d-4e4b-be04-8d6b1fd0f74c.png)</div><div><div></div></div></div></div>View the image as it will be shown in the Dashboard course card.

## Manage Image

<div data-step-uuid="4be9a6b4-cc16-4938-aa02-219ee3c398b0" id="bkmrk--4"><div data-step-uuid="4be9a6b4-cc16-4938-aa02-219ee3c398b0"><div>![Manage Image](https://media.screensteps.com/image_assets/assets/006/087/445/original/bf945ff5-0028-4791-838e-f3716b534405.png)</div><div><div></div></div></div></div>To manage the image, click the **Options** icon \[1\]. To change the image and select a new one, click the **Choose image** option \[2\]. To remove the image completely, click the **Remove image** option \[3\].

## Update Course Details

<div data-step-uuid="e3c56d43-d22a-4f91-a11e-f161c3da7a5c" id="bkmrk--5"><div data-step-uuid="e3c56d43-d22a-4f91-a11e-f161c3da7a5c"><div>![Update Course Details](https://media.screensteps.com/image_assets/assets/000/790/561/original/0018127f-c2fd-4f3f-95bf-188c8b0524cb.png)</div><div><div></div></div></div></div>Click the **Update Course Details** button.

\[Content retrieved from [https://community.canvaslms.com/t5/Instructor-Guide/How-do-I-add-an-image-to-a-course-card-in-the-Dashboard/ta-p/624](https://community.canvaslms.com/t5/Instructor-Guide/How-do-I-add-an-image-to-a-course-card-in-the-Dashboard/ta-p/624)\]

# Reusing Course Materials

## Canvas Course Import

You can copy course content, such as assignments, modules, pages, and discussions, from Canvas courses into other courses.

### Internal Copy

You only have access to copy content from courses in which you are enrolled as a user with instructor permissions. See the section on External copies for reusing content from other instructors.

For instructions on copying a course, see the Canvas Instructor Guide: **[How do I copy content from another Canvas course using the Course Import tool?](https://community.canvaslms.com/t5/Instructor-Guide/How-do-I-copy-content-from-another-Canvas-course-using-the/ta-p/1012)**

#### **Notes:**

<div id="bkmrk-course-imports-may-n">- Course imports may not include all content. For more details, please see the **[import content section](https://community.canvaslms.com/docs/DOC-10713)** in the Canvas Basics Guide.
- Importing a course more than once may have unintended consequences. If you import content into a new course, edit the content in the new course, and later import the previous content again, the imported content will override the existing content.
- If you copy all content or include course settings in selected content, the grade posting policy from the original course will override the grade posting policy in the new course. The participation dates from the original course will override the participation dates in the new course. Additionally, imported assignments will retain their assignment posting policy and participation dates from the original course.
- Content linked through external third-party tools, Kaltura, Pearson, McGraw-Hill, Respondus LockDown Exams, may not be copied to the new course. The links may still point to the previous course and need to be replaced to prevent students in the new course from getting error messages about not having access to the content.

</div>### External Copy

If you are not copying between your own courses, you can use the following options instead.

#### Send To

To send content you've created to another course or instructor, see the Instructor Guide: **[How do I send a module to another instructor](https://community.canvaslms.com/t5/Instructor-Guide/How-do-I-send-a-module-to-another-instructor/ta-p/398244)**. To help manage any content shared with you in this way, see the Instructor Guide: **[How do I manage content shared to me from other users](https://community.canvaslms.com/t5/Instructor-Guide/How-do-I-manage-content-shared-to-me-from-other-users/ta-p/913)**.

#### Commons

Using the Canvas Commons will create an eternal copy that can be used by any faculty member who needs a good starting point for their course builds. You can even restrict the Commons course to only A-State users if necessary.

- **[How do I use Commons](https://community.canvaslms.com/t5/Canvas-Commons/How-do-I-use-Commons/ta-p/1795)**
- **[How do I share a course to Commons](https://community.canvaslms.com/t5/Canvas-Commons/How-do-I-share-a-course-to-Commons/ta-p/1793)**
- **[How do I import and view a Commons resources in Canvas](https://community.canvaslms.com/t5/Canvas-Commons/How-do-I-import-and-view-a-Commons-resource-in-Canvas/ta-p/1808)**

#### Export/Import

If you need to share an entire course, and do not want to add the content to the Commons, you can use the following instructions to download a zip file that can be used to share course materials.

- **[How do I export a Canvas course](https://community.canvaslms.com/t5/Instructor-Guide/How-do-I-export-a-Canvas-course/ta-p/785)**
- **[How do I import a Canvas course export package](https://community.canvaslms.com/t5/Instructor-Guide/How-do-I-import-a-Canvas-course-export-package/ta-p/795)**

<div id="bkmrk-"></div><div id="bkmrk--0"></div>##### Blackboard Content

Much like with the importing of a Canvas course export package, you can also use the **[Canvas Course Import Tool](https://community.canvaslms.com/t5/Canvas-Basics-Guide/What-is-the-Course-Import-Tool/ta-p/21)** to import an export package from Blackboard. When using the tool to import Blackboard content, select ***Blackboard 6/7/8/9 export .zip file*** from the ***Content Type*** dropdown menu. Then browse to locate the file saved on your computer. To learn more about importing these packages, **[see the Canvas help site](https://community.canvaslms.com/t5/Canvas-Basics-Guide/What-is-the-Course-Import-Tool/ta-p/21)**.

You can retrieve these Blackboard export files for Archived courses from Spring 2019 and earlier from our **[Blackboard Utility Package](https://webapp.astate.edu/blackboard/)**. Blackboard Classes from Summer 2019 to Summer 2023 are instead located in the **[K16 Archive Platform (Blackboard)](https://arkansas-state-archive.k16.io/login)**. Instructions for using the Blackboard Utility Package are located below, but please contact one of the Canvas support offices for assistance with the K16 Archive Platform.

[![ArchivedCourses.PNG](https://kb.astate.edu/uploads/images/gallery/2025-08/scaled-1680-/archivedcourses.PNG)](https://kb.astate.edu/uploads/images/gallery/2025-08/archivedcourses.PNG)

When you select Archived Courses in the right menu, you should see a list of past courses. By clicking the listed Course ID, you can download a package file that contains all the content from the old course.

[![DownloadArchives.PNG](https://kb.astate.edu/uploads/images/gallery/2025-08/scaled-1680-/downloadarchives.PNG)](https://kb.astate.edu/uploads/images/gallery/2025-08/downloadarchives.PNG)

Classes restored through this import process will only contain the materials used to teach the class. They do not contain student work or grades from the past class. If you have any issues with the Blackboard Utility Package or need grades and student work from one of these Archived classes, please **[open a ticket with the ITS HelpDesk](https://services.asusystem.edu/TDClient/35/astate/Requests/ServiceCatalog?CategoryID=16).**

## Import Issue - File Storage Quota Exceeded

ITS has set a course size limit of 2 GB. This limit was set to keep us within the storage space we are allotted. If you try to add content to a course that would exceed this limit, you will receive a "file storage quota exceeded" error message.

[![image-1754337670019.png](https://kb.astate.edu/uploads/images/gallery/2025-08/scaled-1680-/image-1754337670019.png)](https://kb.astate.edu/uploads/images/gallery/2025-08/image-1754337670019.png)To fix this issue in Canvas, first check the Files area of the course are attempting to import.

You can then view your user quota and what percentage of that quota has been used \[2\]. To learn how to manage course files, see the Canvas Instructor Guide: **[How do I view course files?](https://community.canvaslms.com/t5/Canvas-Basics-Guide/How-do-I-view-course-files/ta-p/617226)**.

[![image-1754337715014.png](https://kb.astate.edu/uploads/images/gallery/2025-08/scaled-1680-/image-1754337715014.png)](https://kb.astate.edu/uploads/images/gallery/2025-08/image-1754337715014.png)

If you want to see the files for all your courses, click the **All My Files** link.

If you get this error, you will need to go through these files to remove any duplicated material or resources that are not used. Any videos stored here should be moved to **[Kaltura](https://kb.astate.edu/books/canvas/page/how-to-upload-and-share-video-in-kaltura)**, as that is our video management service. Videos stored in Kaltura can be linked to your class without using any of your allotted space. Once you have freed up enough space here you should be able to create a new export that is under the 2 GB limit.

# Managing Course Access in Canvas: Enrollments, Roles, and Requests

This page provides guidance on how enrollments are managed in Canvas, including automatic integration with Banner, adding assistants, managing access in development and organization shells, and understanding user roles like Observer.

---

## Course Enrollments

For all **credit-bearing courses**, Canvas enrollments are automatically synced from **Banner**, our Student Information System (SIS):

- **Students** are enrolled based on their course registration.
- **Instructors of Record** are assigned based on Banner data.

Changes made in Banner—such as course adds, drops, or instructor assignments—are reflected in Canvas within approximately **24 hours**. This ensures that Canvas rosters remain accurate and up to date.

### Handling Incompletes and Course Extensions

To allow students with Incomplete grades to finish coursework, instructors can extend course access by changing the **Participation** setting from *Term* to *Course* and setting a new **End Date**.

> **Note:** Not all instructors have permission to change Participation settings. If you do not see this option, contact CETL or ITS for assistance.

### Learn more:

- **[Getting Started](https://kb.astate.edu/books/learning-technology/page/getting-started)** - Canvas Account Creation Process
- [**How Do I Change the Start and End Dates for a Course**](https://kb.astate.edu/books/learning-technology/page/how-do-i-change-the-start-and-end-dates-for-a-course-274)

---

## Adding Teaching or Academic Assistants

Instructors **cannot manually add users** to credit-bearing courses in Canvas. To add a **Teaching Assistant (TA)** or **Academic Assistant**:

- Submit a request using the **following form**:  
    **[Request for GA / Tutor Role Access in Canvas](https://powerforms.docusign.net/3733e76d-1e31-4ced-a72b-f4f3b2f128ac?env=na4&acct=3c1f2a5c-b08a-4b15-adf6-74545e8e88f9&accountId=3c1f2a5c-b08a-4b15-adf6-74545e8e88f9)** <p class="callout danger">FERPA Training is REQUIRED before access to student information can be granted. Please make sure your TA has completed their FERPA training BEFORE submitting this form. </p>
- When submitting a Canvas access request, you will need the following:
    
    
    - Student Information 
        - Name
        - Email
        - ID Number
        - Department
    - Course Information 
        - Term and Year
        - Subject
        - Course Number
        - Section Number
        - CRN
        - Course Title
- The form will then need to be digitally signed by the Student, Instructor, HR, and ITS.

<p class="callout warning">**Important:**  
TAs and Academic Assistants added through this process are granted **read-only access** to the course for grading purposes. They **cannot edit course content**.  
If someone needs editing permissions, they should be listed in **Banner as an instructor**.</p>

---

## Development and Test Shells

Instructors may have access to **development or test shells** for building and testing course content. These shells are not tied to Banner and have different permissions:

- The **Instructor role** in these shells **cannot add users**.
- To add someone to a development shell, email our office with: 
    - The **Canvas course ID**
    - The **A-State ID** of the person to be added
    - **Requested role** (Instructor, TA, Observer, etc.)

---

## Organizations and Leader Role

Canvas also supports **Organization shells**, which are used for non-credit groups, departmental resources, or student organizations.

- Instructors can be assigned the **Leader role** in these shells.
- Leaders **can add students or participants** directly to the organization shell.
- This allows flexibility for managing membership and participation.

To learn how to add users to an organization shell, refer to the official Canvas guide:  
[**How do I add users to a course?**](https://community.canvaslms.com/t5/Instructor-Guide/How-do-I-add-users-to-a-course/ta-p/1119)

---

## Observer Role

Instructors may notice users in their course with the **Observer** role. This role is primarily used by the **Athletics Department** to monitor the academic progress of student-athletes.

Observers can:

- View course content
- Monitor assignment submissions and grades
- Track student participation

They **cannot interact** with course content or participate in discussions.

For more details, see:  
**[What is the Observer role?](https://community.canvaslms.com/t5/Canvas-Basics-Guide/What-is-the-Observer-role/ta-p/4)**

---

## Contact Information

### Center for Excellence in Teaching and Learning (CETL)

For support with pedagogy, course design, development/test, and organization shells:  
Email: **<CETL@AState.edu>**  
Phone: **870-972-2334**  
Location: *Dean B. Ellis Library, Suite 301*

### ITS Help Desk

For Canvas access issues, technical support, and Banner-linked course enrollments:  
Email: **<itshelpdesk@AState.edu>**  
Phone: **870-972-3933**  
Location: *Dean B. Ellis Library, Room 149*A-State Online Faculty Support

### A-State Online (AOS) Faculty Support

For technical and pedagogical support for fully online degree programs:  
Email: **<aos@astate.edu>**  
Phone: **870-680-8464**  
Location: *International Programs Building*

# How do I cross-list (merge) a section in a course as an instructor?

Cross-listing allows you to move section enrollments from individual courses and combine them into one course. This feature is helpful for instructors who teach several sections of the same course and only want to manage course data in one location. Instructors can allow students to view users in other sections or [limit them to only view users in the same section](https://community.canvaslms.com/t5/Instructor-Guide/How-do-I-limit-a-user-to-only-interact-with-other-users-in-the/ta-p/1211). Section names do not change when they are cross-listed; the section is just moved to another course.

Cross-listing should be done while courses are unpublished. Coursework is retained with the course, not with the section enrollments, so if a published course is cross-listed, all cross-listed enrollments will lose any associated assignment submissions and grades.

## First Steps

You must be enrolled in both courses to crosslist a section. You then must know the name or the course ID of the parent, or main, course into which you are cross-listing all the other sections. Using a course ID is better than the name to ensure you are cross-listing a section into the correct course. You can find the course ID by opening the course and viewing the number at the end of the browser URL (e.g., account.instructure.com/courses/XXXXXX).

Sections can only be in one course at a time. Once a section is cross-listed, you can re-cross-list the section into another course if necessary.

**Note:**

<div id="bkmrk-if-you-cross-listed-">- If you cross-listed the courses in the wrong order and lost access to the course that had your content, we can de-cross-list the courses for you. Please send us an email with the information in the section on **[Identifying Courses](https://kb.astate.edu/books/learning-technology/page/course-identification)** so we can find your incorrectly cross-listed course.

</div><div id="bkmrk-"><iframe allowfullscreen="allowfullscreen" frameborder="0" height="400px" sandbox="allow-popups allow-popups-to-escape-sandbox allow-scripts allow-forms allow-same-origin allow-presentation" src="https://embed.app.guidde.com/playbooks/gBFS73PBWT4R9vToTREtVg" title="How do I cross-list a section in a course as an instructor?" width="700px"></iframe>

</div>## Start in the Donor Course

<div data-step-uuid="41c6a12e-6c4e-439e-bd65-b27134df1adc" id="bkmrk--0"><div data-step-uuid="41c6a12e-6c4e-439e-bd65-b27134df1adc"><div>![Open Course](https://media.screensteps.com/image_assets/assets/007/949/748/original/94d8bd33-50a4-4385-9895-8fae6a9287e1.png)</div><div><div>  
</div></div></div></div>In Global Navigation, click the **Courses** link \[1\], then click the child course link \[2\].

**Note:** This course will be removed from your Dashboard and Course list when the enrollments are sent to the parent course identified in the previous section.

## Open Course Settings

<div data-step-uuid="9240C98C-24A9-4332-8D97-A62D4A1E2478" id="bkmrk--1"><div data-step-uuid="9240C98C-24A9-4332-8D97-A62D4A1E2478"><div>![Open Course Settings](https://media.screensteps.com/image_assets/assets/002/759/172/original/c31d3251-45e1-4876-a2f6-e30d06dcd265.png)</div><div><div>  
</div></div></div></div>In Course Navigation, click the **Settings** link.

## Open Sections

<div data-step-uuid="7396E681-0030-49C9-A8C7-F649A3C9CCEF" id="bkmrk--2"><div data-step-uuid="7396E681-0030-49C9-A8C7-F649A3C9CCEF"><div>![Open Sections](https://media.screensteps.com/image_assets/assets/008/333/631/original/open-sections.png)</div><div><div>  
</div></div></div></div>Click the **Sections** tab.

## Open Section

<div data-step-uuid="EA804450-6D4D-45CB-B059-09E2ED75B8A7" id="bkmrk--3"><div data-step-uuid="EA804450-6D4D-45CB-B059-09E2ED75B8A7"><div>![](https://media.screensteps.com/image_assets/assets/009/084/698/original/4b42285e-a4d8-48e5-a4df-07ae3f563236.png)</div><div><div>  
</div></div></div></div>Click the section name link of the section you want to cross-list \[1\].

**Notes:**

<div data-step-uuid="EA804450-6D4D-45CB-B059-09E2ED75B8A7" id="bkmrk-you-can-view-a-cross"><div><div>- You can view a cross-listed course's originating course \[2\].
- When course sections are cross-listed, the original section remains visible but is set to read-only in the original course \[3\].

</div></div></div>## Cross-List Section

<div data-step-uuid="4387DBE8-E890-4F07-908F-C3A2F2272565" id="bkmrk--4"><div data-step-uuid="4387DBE8-E890-4F07-908F-C3A2F2272565"><div>![Cross-List Section](https://media.screensteps.com/image_assets/assets/008/333/833/original/72bb3e64-b6a5-4500-aa89-ba96c38c22a2.png)</div><div><div>  
</div></div></div></div>Click the **Cross-List this Section** button.

## Search for Course

<div data-step-uuid="3B30D2D5-AC94-4B13-A118-AE193300F709" id="bkmrk--5"><div data-step-uuid="3B30D2D5-AC94-4B13-A118-AE193300F709"><div>![Search for Course](https://media.screensteps.com/image_assets/assets/000/789/069/original/270cecee-14ec-49a5-8d0b-2fa383204b8f.png)</div><div><div>  
</div></div></div></div>In the **Search for Course** field \[1\], enter the name of the course or SIS ID into which you are cross-listing (the parent course). You can also enter the ID number for the course in the Or Enter the Course’s ID field \[2\].

**Note:** Enter the name or course ID of the parent, or main, course into which you are cross-listing all other sections or courses.

### Cross-List this Section

<div data-step-uuid="3B30D2D5-AC94-4B13-A118-AE193300F709" id="bkmrk--6"><div data-step-uuid="3B30D2D5-AC94-4B13-A118-AE193300F709"><div data-step-uuid="3d405bcf-b63d-4f74-9ad6-d694b5fbdce1"><div>![Cross-List this Section](https://media.screensteps.com/image_assets/assets/008/333/835/original/98f990bc-a5fb-4db3-b1a2-621632c2625f.png)</div><div><div>  
</div></div></div></div></div>Confirm you have selected the correct course \[1\]. Click the **Cross-List This Section** button \[2\].

## Confirm Cross-Listing

<div data-step-uuid="C18C1F89-E9FE-47C3-9F96-4BA55039A98E" id="bkmrk--7"><div data-step-uuid="C18C1F89-E9FE-47C3-9F96-4BA55039A98E"><div>[![Confirm Cross-Listing](https://media.screensteps.com/image_assets/assets/002/759/170/medium/4bc7b4bd-78e7-4f1a-94dc-56d7bb6758f3.png)](https://media.screensteps.com/image_assets/assets/002/759/170/original/4bc7b4bd-78e7-4f1a-94dc-56d7bb6758f3.png)</div><div><div>  
</div></div></div></div>The cross-listed section now appears in the new course. The breadcrumbs display the new course code.

## Re-Cross-List Section

<div data-step-uuid="04e1e531-7050-4526-9047-7962dc14603e" id="bkmrk--8"><div data-step-uuid="04e1e531-7050-4526-9047-7962dc14603e"><div>![Re-Cross-List Section](https://media.screensteps.com/image_assets/assets/000/789/071/original/9f65bb31-6c5c-4ca0-a244-776d78af316a.png)</div><div><div>  
</div></div></div></div>Sections can only be in one course at a time. If you need to cross-list the section into a different course, click the **Re-Cross-List this Section** button.

\[Content retrieved from [https://community.canvaslms.com/t5/Instructor-Guide/How-do-I-cross-list-a-section-in-a-course-as-an-instructor/ta-p/1261](https://community.canvaslms.com/t5/Instructor-Guide/How-do-I-cross-list-a-section-in-a-course-as-an-instructor/ta-p/1261)\]

## Recorded Walkthrough

<iframe allow="autoplay *; fullscreen *; encrypted-media *" allowfullscreen="allowfullscreen" class="kmsembed" frameborder="0" height="402" id="bkmrk--10" sandbox="allow-downloads allow-forms allow-same-origin allow-scripts allow-top-navigation allow-pointer-lock allow-popups allow-modals allow-orientation-lock allow-popups-to-escape-sandbox allow-presentation allow-top-navigation-by-user-activation" src="https://astate.mediaspace.kaltura.com/embed/secure/iframe/entryId/1_kme4tc1d/uiConfId/42346681/st/0" title="How to Merge Sections (Crosslisting)" width="608"></iframe>

# Course Accessibility Tools and Support

Ensuring that all students have equitable access to course materials and learning experiences is a vital part of inclusive teaching. This page provides guidance and resources to help faculty address common accessibility questions and implement best practices in their courses. Whether you're working in Canvas, using video content, or supporting students with accommodations, we’re here to help.

## Accessibility Best Practices

<div id="bkmrk-creating-accessible-">Creating accessible courses supports student success, promotes equity, and helps ensure instructional materials are usable by all learners. This section highlights key accessibility best practices shared during a joint CETL, AOS Faculty Support, and Access &amp; Accommodations Services session held on March 12, 2026. Topics include using Canvas accessibility tools, the Cidi Labs accessibility suite (UDOIT, UFixIt, and TidyUP), and strategies for reviewing and improving video captions in Kaltura. The recorded session below provides practical guidance faculty can apply to improve course accessibility.</div><iframe allowfullscreen="allowfullscreen" frameborder="0" height="402" id="bkmrk--3" sandbox="allow-downloads allow-forms allow-same-origin allow-scripts allow-top-navigation allow-pointer-lock allow-popups allow-modals allow-orientation-lock allow-popups-to-escape-sandbox allow-presentation allow-top-navigation-by-user-activation" src="https://cdnapisec.kaltura.com/p/2389961/sp/238996100/embedIframeJs/uiconf_id/42346671/partner_id/2389961?iframeembed=true&playerId=kaltura_player&entry_id=1_99wx824q&flashvars%5BstreamerType%5D=auto&flashvars%5BlocalizationCode%5D=en&flashvars%5BsideBarContainer.plugin%5D=true&flashvars%5BsideBarContainer.position%5D=left&flashvars%5BsideBarContainer.clickToClose%5D=true&flashvars%5Bchapters.plugin%5D=true&flashvars%5Bchapters.layout%5D=vertical&flashvars%5Bchapters.thumbnailRotator%5D=false&flashvars%5BstreamSelector.plugin%5D=true&flashvars%5BEmbedPlayer.SpinnerTarget%5D=videoHolder&flashvars%5BdualScreen.plugin%5D=true&flashvars%5Bhotspots.plugin%5D=1&flashvars%5BKaltura.addCrossoriginToIframe%5D=true&&wid=1_60l4rho8" title="WCAG 2.1 Regulations" width="608"></iframe>

---

## **Accessibility Tools Available in Canvas**

Arkansas State provides several tools that can help instructors identify accessibility issues, improve course content, and maintain high-quality Canvas courses. These tools complement the accessibility features already built into Canvas.

### 🚀 **DesignPLUS Accessibility Checker**

The DesignPLUS Accessibility Checker reviews individual pages and identifies common accessibility concerns while you are editing content.

Common issues identified include:

<div id="bkmrk-missing-alternative-">- Missing alternative text
- Improper heading structure
- Table accessibility issues
- Color contrast concerns

</div>To learn more see the Accessibility and Usability Tools section of the **[DesignPLUS User Guide](https://cidilabs.instructure.com/courses/6630/pages/accessibility-and-usability-overview)**.

### 🔍 **UDOIT Advantage**

UDOIT (Universal Design Online Inspection Tool) scans an entire Canvas course and identifies accessibility issues across pages, assignments, discussions, quizzes, and files. Then UFixIt helps guide you through the items identified by UDOIT to help resolve certain accessibility issues. In many cases UFixIt can automate or drastically simplify the correction process, reducing the amount of manual editing required.

Together they can help instructors:

<div id="bkmrk-locate-accessibility">- Locate accessibility issues quickly
- Prioritize issues by severity
- Review accessibility concerns course-wide
- Improve compliance with accessibility standards

</div>To learn more see the **[UDOIT User Guide.](https://cidilabs.instructure.com/courses/6621)**

### 🗂️ **TidyUP**

TidyUP helps instructors manage course content and files.

Common uses include:

<div id="bkmrk-identifying-unused-f">- Identifying unused files
- Locating duplicate content
- Finding outdated resources
- Improving overall course organization

</div>While TidyUP is primarily a course maintenance tool, it can also support accessibility efforts. All instructional materials in a course should be reviewed for accessibility. By helping identify unused, duplicate, or obsolete files, TidyUP can reduce the quantity of content that may need to be reviewed, updated, or remediated.

To learn more see the **[TidyUP User Guide.](https://cidilabs.instructure.com/courses/2854)**

---

## **Canvas Accessibility Features**

Canvas includes several tools to help faculty implement accommodations and manage course accessibility.

### **Availability Dates**

If you want to give them different start, stop, and due dates, you can use the Add button under the Assign To box. That will change the first box to be the dates assigned to everyone else and give you a second box to select individual students or groups. This new Assign To box will then let you give the selected students different availability dates from the rest of the class.

**[How do I assign a quiz to everyone, individual students, differentiation tags, or sections?](https://community.canvaslms.com/t5/Instructor-Guide/How-do-I-assign-a-quiz-to-everyone-individual-students/ta-p/714)**

Do Not change the single Assign To box to just have either a group or single student selected, as that will unassign it from the rest of the class. This will cause those submitted assignments to disappear from anyone who was removed from the Assign To Box. To restore their missing assignments, you just need to add back an Assign To box for Everyone Else, in addition to the other box for the students with an exception to their availability dates.

### **Extra Time or Attempts**

<span data-olk-copy-source="MessageBody">If you instead need to give one student a longer timer on the exam or extra attempts, you can use the Moderate option. The way you access the Moderate option is slightly different depending on whether you are using the Classic or New Quiz system. See the links to the Canvas Instructor Guide below for the instructions for the quiz type you are using.</span>

- **Classic Quizzes:** [](https://community.canvaslms.com/t5/Instructor-Guide/Once-I-publish-a-quiz-how-do-I-use-the-Moderate-Quiz-page/ta-p/761 "https://community.canvaslms.com/t5/Instructor-Guide/Once-I-publish-a-quiz-how-do-I-use-the-Moderate-Quiz-page/ta-p/761")
    - Moderate - **[Once I publish a quiz, how do I use the Moderate Quiz page?](https://community.canvaslms.com/t5/Instructor-Guide/Once-I-publish-a-quiz-how-do-I-use-the-Moderate-Quiz-page/ta-p/761 "https://community.canvaslms.com/t5/Instructor-Guide/Once-I-publish-a-quiz-how-do-I-use-the-Moderate-Quiz-page/ta-p/761")**
    - Extra Attempts - **[Once I publish a quiz, how can I give my students extra attempts?](https://community.canvaslms.com/t5/Instructor-Guide/Once-I-publish-a-quiz-how-can-I-give-my-students-extra-attempts/ta-p/1242)**
    - Extra Time - **[Once I publish a timed quiz, how can I give my students extra time?](https://community.canvaslms.com/t5/Instructor-Guide/Once-I-publish-a-timed-quiz-how-can-I-give-my-students-extra/ta-p/999)**
- **New Quizzes:** **[How do I moderate a student's quiz attempt in New Quizzes? ](https://community.canvaslms.com/t5/Instructor-Guide/How-do-I-moderate-a-student-s-quiz-attempt-in-New-Quizzes/ta-p/655 "https://community.canvaslms.com/t5/Instructor-Guide/How-do-I-moderate-a-student-s-quiz-attempt-in-New-Quizzes/ta-p/655")**

---

## **Captioning**

Providing captions for video content ensures accessibility for students who are deaf or hard of hearing and benefits all learners by supporting comprehension and retention.

The hope is that we don’t just meet the bare minimum compliance requirement but set a standard beyond our legal obligation. Below, you will find important information as it relates to the captioning process.

- [Captioning Procedure](https://kb.astate.edu/books/captioning-transcription/page/summary-file-download "Captioning Procedure")
- [Captioning Guide](https://kb.astate.edu/books/captioning-transcription/chapter/captioning-guide "AAS Captioning Guide")
- [Transcription Guide](https://kb.astate.edu/books/captioning-transcription/chapter/transcription "AAS Transcription Guide")

**Accuracy Requirement**: Best practices suggest that captions should be at least 99% accurate to fully meet accessibility standards (Web Content Accessibility Guidelines (WCAG) 2.1, Success Criterion 1.2.2). While machine-generated captions can provide a starting point, it is crucial to **review and correct** them to ensure they are accurate and complete. Captions must accurately represent all spoken content, including dialogue, non-verbal sounds (such as music or sound effects), and any relevant background speech.

**University Policy**: The **Key Provisions of Captioning &amp; Accessibility Operating Procedure** outlines the university's official stance on captioning and accessibility. For the full policy, see **[Key Provisions of Captioning &amp; Accessibility Operating Procedure](https://kb.astate.edu/books/captioning-transcription/page/key-provisions).**

**For more detailed information on best practices for captioning and university requirements, please visit the page on [Captioning from Access &amp; Accommodation Services](https://kb.astate.edu/books/captioning-transcription).**

### **Kaltura Captioning**

Kaltura offers **automated captions** for uploaded videos. These captions are generated using speech recognition and may require editing for accuracy.

**How to Edit Captions**: To correct the captions for the videos you upload to Kaltura, follow the instructions below:

- **[Upload and manage captions](https://knowledge.kaltura.com/help/upload-and-manage-captions)**
- **[Create captions manually](https://knowledge.kaltura.com/help/create-captions-manually)**
- **[Edit captions](https://knowledge.kaltura.com/help/editing-captions-reach-v2)**

- **Viewing and Editing Captions:**  
    After uploading a video, automated captions will appear within a few hours. You can edit these captions directly in Kaltura’s caption editor to correct errors and improve clarity.
- **Best Practices:**  
    Review captions for accuracy, especially for technical terms or names. Consider adding punctuation and speaker identification for clarity.

### **Requests for Captioning Services**

If you have a minimum of sixty minutes of content (this can be 60 minutes across multiple videos), please use the following link to send a captioning services request to AAS:

[https://astate.qualtrics.com/jfe/form/SV\_3ZPz5lsnHEhj8KW](https://astate.qualtrics.com/jfe/form/SV_3ZPz5lsnHEhj8KW)

Content may be processed in-house or sent to a third-party captioning company for processing depending on length, language, volume of requests, etc. To ensure quality content is received on time, AAS requires all captioning requests be submitted two (**2**) weeks prior to the date it will be used.

**If your content does not meet the criteria above, you are responsible for making sure your content gets captioned.**

## **Contact Access &amp; Accommodations Services**

If you have questions about student accommodations, accessibility concerns, or need support implementing accommodations in your course, please reach out to the **Access &amp; Accommodations Services** office.

**Email:** <span class="contact">[dservices@AState.edu](mailto:dservices@astate.edu?subject=Contact%20From%20Website)</span>  
**Phone:** <span class="contact">870-972-3964</span>  
**Website:** [https://www.astate.edu/accessibility.html](https://www.astate.edu/accessibility.html)  
**Knowledge Base**: [https://kb.astate.edu/shelves/access-accommodation-services](https://kb.astate.edu/shelves/access-accommodation-services)

Or, please contact our Assistive Technology and Access Coordinator.

<div id="bkmrk-victoria-shann-%28she%2F"><div>Victoria Shann (she/her)</div><div>**Assistive Technology &amp; Access Coordinator**</div><div><div>**[vforster@AState.edu](mailto:vforster@astate.edu)**</div></div>Phone: 870-972-3964</div>Office: Reng Student Union, 2181

# General Support Resources

If you are having other issues that aren't mentioned above, these resources should help.

## General Website Issues - Clear Browser Cache

Browsers download many files from websites to speed up your experience and prevent wasting your bandwidth redownloading files you've accessed in the past. Occasionally, these files will get corrupted, which causes the website to no longer function as expected. You can resolve these issues by clearing the browser cache and forcing it to redownload those files. Instructions for clearing browser cache can be found on the **[ITS support page on Cache](https://kb.astate.edu/books/faq/page/how-to-clear-cookies-and-cache)**.

## LTI/Third-Party Integrations

Integrations are extension tools from third-party partners (vendors) that allow faculty to enhance their Canvas course and the student experience.

### Support with Third-Party Tools

Support for third-party partner tools is provided by the partner companies. Support contacts and information for commonly used tools are listed in the **[Third-Party Tools section of the ITS Canvas Support Knowledge Base](https://kb.astate.edu/books/canvas/chapter/third-party-tools)**.

### Request New Tool Integration

For integrations, you can easily submit this form ([Canvas Help service form](https://services.asusystem.edu/TDClient/35/astate/Requests/ServiceDet?ID=275)) under the type of Canvas request – choose Canvas Design for review. ITS requires the IT Security Questionnaire/Vendor HECVAT to be sent and approved by Security@astate.edu to proceed with setup. This will only be set up at specific times of the year to avoid issues. Please have all your information submitted so we can begin the process. June 1st- August 1st would be the timeframe; however, depending on the course, concessions will be made.

## On-Demand Training

Recordings of the in-person sessions that we have done are available through our **[Kaltura Canvas Training Resources](https://urldefense.com/v3/__https:/t.e2ma.net/click/ir2mmm/2qb9fs/u4spsed__;!!PirnAJVEmx4jpg!9iCnoh_ZFkfdxGhiuvLPbRPzac-qRwr2VAAnFA9BwyHamc6FVHJ4qduNt9_v1ijhYeCKvaJsUbSceOG0RJc%24)** for asynchronous viewing.

[![image-1754338447069.png](https://kb.astate.edu/uploads/images/gallery/2025-08/scaled-1680-/image-1754338447069.png)](https://kb.astate.edu/uploads/images/gallery/2025-08/image-1754338447069.png)

Search the list of **[Self-Paced Professional Development Courses](https://arkansasstateuniversity.instructure.com/search/all_courses)** developed for our Campus and available through our Canvas instance.

### Canvas Resources

Canvas has several resources available for faculty to review. These items are also all in the Help link found in everyone's **[Global Navigation Menu](https://community.canvaslms.com/t5/Instructor-Guide/How-do-I-use-the-Global-Navigation-Menu-as-an-instructor/ta-p/806)**. See the Canvas Basics Guide: **[How do I get Help with Canvas?](https://community.canvaslms.com/t5/Canvas-Basics-Guide/How-do-I-get-help-with-Canvas/ta-p/618758)**

#### **Features of the Help Menu**

- **[Search the Canvas Guides](https://community.canvaslms.com/t5/Canvas-LMS/ct-p/canvaslms?tab=recent)** Find information about features inside Canvas.
- <span class="fOyUs_bGBk fOyUs_desw bDzpk_bGBk bDzpk_oDLF bDzpk_fZWR bDzpk_qOas"><span class="fOyUs_bGBk dJCgj_bGBk"><span role="presentation">[**Ask the Community**](https://community.canvaslms.com/community/answers)</span></span></span>  
    Exchange ideas and solutions regarding Canvas functionality with Canvas experts and your Canvas peers.
- <span class="fOyUs_bGBk fOyUs_desw bDzpk_bGBk bDzpk_oDLF bDzpk_fZWR bDzpk_qOas"><span class="fOyUs_bGBk dJCgj_bGBk"><span role="presentation">[**Training Services Portal**](https://training-portal-prod-pdx.insproserv.net/?canvas_domain=arkansasstateuniversity.instructure.com&sf_id=001A00000086eObIAI)</span></span></span>  
    Access self-paced training resources on a variety of Canvas topics for instructors.
- [**Contact Canvas Support**](https://community.canvaslms.com/t5/Canvas-Basics-Guide/How-do-I-contact-Canvas-Support/ta-p/389767)  
    The Help link also includes a phone number and a link to a live chat for 24/7 support.

### In-Person Trainings

[**Check our Calendar**](https://calendar.astate.edu/cetl/month) often to enroll or look for various class offerings. Review the Daily Digest for new and upcoming sessions.

## Support Contacts

Information &amp; Technology Services provides support for technical issues. This would include issues with your username and password or DUO.

- Email: **<itshelpdesk@astate.edu>**
- Phone: <span class="contact">870-972-3933</span>

The **[Center for Excellence in Teaching and Learning](https://kb.astate.edu/books/about-cetl "Center for Excellence in Teaching and Learning")** staff provides pedagogy support and training for Faculty, including assistance with digitizing, updating, or creating course content in formats suitable for use in your Canvas courses.

- Email: **[CETL@AState.edu](mailto:cetl@astate.edu)**
- Phone: 870-972-2334

The A-State Online Faculty Support provides faculty support and training for the A-State Online Services programs.

- Email: **[AOS@astate.edu](mailto:AOS@astate.edu "Email AOS Faculty Support")**
- Phone: 870-680-8464

# Creating and Using Outcomes in Canvas

Canvas Outcomes allow instructors and administrators to track student mastery of learning objectives in courses through quizzes and rubrics. This guide explains how to create, import, align, and report on outcomes using Canvas’s **Improved Outcomes Management** interface.

---

## **What Are Outcomes?**

Outcomes in Canvas represent learning goals that can be tracked across multiple activities. They support mastery-based learning and can be aligned with quizzes, rubrics, and question banks.

➤ **[Canvas Basics Guide: What Are Outcomes?](https://community.canvaslms.com/t5/Canvas-Basics-Guide/What-are-Outcomes/ta-p/75)**

---

## **Creating Outcomes**

Outcomes can be created at three levels:

- **Account Level**: Managed by administrators for institution-wide use.
- **Sub-Account Level**: Managed by departments or colleges.
- **Course Level**: Created by instructors for use in individual courses.

➤ **[Admin Guide: Use the Outcomes Page in an Account](https://community.canvaslms.com/t5/Admin-Guide/How-do-I-use-the-outcomes-page-in-an-account-in-Improved/ta-p/486333)**

**[![Main Account Gen Ed Outcome Group .png](https://kb.astate.edu/uploads/images/gallery/2025-10/scaled-1680-/main-account-gen-ed-outcome-group.png)](https://kb.astate.edu/uploads/images/gallery/2025-10/main-account-gen-ed-outcome-group.png)**

### **Bulk Upload Option**

Admins can import outcomes using a formatted CSV file.  
➤ **[Admin Guide: Import Outcomes for an Account](https://community.canvaslms.com/t5/Admin-Guide/How-do-I-import-outcomes-for-an-account/ta-p/267)  
➤ [CSV Format Guide](https://canvas.instructure.com/doc/api/file.outcomes_csv.html)**

---

## **Importing Outcomes into a Course**

To use institutionally created outcomes in your course:

1. Go to **Outcomes** in the Course Navigation.
2. Click **Find**.  
    [![Find Outcomes.png](https://kb.astate.edu/uploads/images/gallery/2025-10/scaled-1680-/find-outcomes.png)](https://kb.astate.edu/uploads/images/gallery/2025-10/find-outcomes.png)
3. Browse or search for outcomes from the Account or Sub-Account. 
    1. The General Education Outcomes will be in the Arkansas State University Outcome Groups.
    2. Program-specific outcomes will be listed in an Outcome group for the program.
4. Click the + Add button for any outcome that will be assessed in your course.  
    [![Add Outcomes.png](https://kb.astate.edu/uploads/images/gallery/2025-10/scaled-1680-/add-outcomes.png)](https://kb.astate.edu/uploads/images/gallery/2025-10/add-outcomes.png)
5. Click Done to add the selected outcomes to your course.  
    [![Outcome mapped to Course.png](https://kb.astate.edu/uploads/images/gallery/2025-10/scaled-1680-/outcome-mapped-to-course.png)](https://kb.astate.edu/uploads/images/gallery/2025-10/outcome-mapped-to-course.png)

➤ **[Instructor Guide: How to use the improved Outcomes page](https://community.canvaslms.com/t5/Instructor-Guide/How-do-I-use-the-course-Outcomes-page-in-Improved-Outcomes/ta-p/486358)**  
➤ **[Instructor Guide: Find and Add Existing Outcomes](https://community.canvaslms.com/t5/Instructor-Guide/How-do-I-find-an-existing-outcome-to-add-to-a-course-in-Improved/ta-p/486363)**

---

## **Aligning Outcomes**

Outcomes can be aligned with:

- **Question Banks** (Classic Quizzes) 
    1. Go to **Quizzes**
    2. Use the **options menu** to select ****Manage Question Banks.**** [![image-1760562927557.png](https://kb.astate.edu/uploads/images/gallery/2025-10/scaled-1680-/image-1760562927557.png)](https://kb.astate.edu/uploads/images/gallery/2025-10/image-1760562927557.png)
    3. Select a Question Bank
    4. Click **Align Outcome** to open the Find Outcomes menu  
        [![Question Bank.png](https://kb.astate.edu/uploads/images/gallery/2025-10/scaled-1680-/ODZquestion-bank.png)](https://kb.astate.edu/uploads/images/gallery/2025-10/ODZquestion-bank.png)
    5. Search through the Outcomes mapped to the Course to select an outcome.
    6. Click **Import** to add that outcome to all the questions in the Question Bank.  
        [![Align Outcome to Item.png](https://kb.astate.edu/uploads/images/gallery/2025-10/scaled-1680-/align-outcome-to-item.png)](https://kb.astate.edu/uploads/images/gallery/2025-10/align-outcome-to-item.png)  
          
        ➤ **[Instructor Guide: Align an Outcome with a Question Bank](https://community.canvaslms.com/t5/Instructor-Guide/How-do-I-align-an-outcome-with-a-question-bank/ta-p/790)**
- **Quizzes** (New Quizzes)  
    <iframe allow="fullscreen *; encrypted-media *" allowfullscreen="allowfullscreen" class="kmsembed" frameborder="0" height="402" id="bkmrk--4" sandbox="allow-downloads allow-forms allow-same-origin allow-scripts allow-top-navigation allow-pointer-lock allow-popups allow-modals allow-orientation-lock allow-popups-to-escape-sandbox allow-presentation allow-top-navigation-by-user-activation" src="https://astate.mediaspace.kaltura.com/embed/secure/iframe/entryId/1_r58ygdva/uiConfId/42346671/st/0" title="Including Outcomes on Quizzes" width="608"></iframe>


    1. Go to **Quizzes**
    2. Select the Quiz
    3. Click Build  
        [![image-1760564481900.png](https://kb.astate.edu/uploads/images/gallery/2025-10/scaled-1680-/image-1760564481900.png)](https://kb.astate.edu/uploads/images/gallery/2025-10/image-1760564481900.png)
    4. Click Outcomes at the top of the Build menu.  
        [![image-1760564497950.png](https://kb.astate.edu/uploads/images/gallery/2025-10/scaled-1680-/image-1760564497950.png)](https://kb.astate.edu/uploads/images/gallery/2025-10/image-1760564497950.png)
    5. Click in the Align Outcomes to Quiz box to browse the Outcomes mapped to the Course.   
        [![image-1760564507139.png](https://kb.astate.edu/uploads/images/gallery/2025-10/scaled-1680-/image-1760564507139.png)](https://kb.astate.edu/uploads/images/gallery/2025-10/image-1760564507139.png)
    6. Select the Outcomes that should be **aligned to all questions** in the Quiz and click Confirm Alignments.  
        [![image-1760564730701.png](https://kb.astate.edu/uploads/images/gallery/2025-10/scaled-1680-/image-1760564730701.png)](https://kb.astate.edu/uploads/images/gallery/2025-10/image-1760564730701.png)
        
        <p class="callout success">The Attached Outcomes page displays course-level outcomes. You can also view account-level outcomes if they have been [added to the course](https://community.canvaslms.com/t5/Instructor-Guide/How-do-I-find-an-existing-outcome-to-add-to-a-course/ta-p/866). </p>
        
        <p class="callout success">To attach an outcome to your quiz question, browse outcomes using the Outcome Picker \[1\]. You can also search outcomes by typing in the **Search Outcomes** field \[2\].</p>
        
        <p class="callout success">Click the checkbox next to the outcome you want to attach \[3\].</p>
        
        <p class="callout success">View a list of all selected outcomes \[4\]. To remove a selected outcome, click the **Remove** icon \[5\] or deselect the outcome checkbox.</p>
        
        <p class="callout success">To apply your selected outcomes, click the **Align Selected** button \[6\].</p>
        
          
        ➤ **[Instructor Guide: Align an Outcome with a Quiz](https://community.canvaslms.com/t5/Instructor-Guide/How-do-I-align-an-outcome-to-a-quiz-in-New-Quizzes/ta-p/776)**
- **Quiz Questions** (New Quizzes) 
    1. Go to **Quizzes**
    2. Select the Quiz
    3. Click Build  
        [![image-1760564486579.png](https://kb.astate.edu/uploads/images/gallery/2025-10/scaled-1680-/image-1760564486579.png)](https://kb.astate.edu/uploads/images/gallery/2025-10/image-1760564486579.png)
    4. Edit a Question  
        [![image-1760564543691.png](https://kb.astate.edu/uploads/images/gallery/2025-10/scaled-1680-/image-1760564543691.png)](https://kb.astate.edu/uploads/images/gallery/2025-10/image-1760564543691.png)
    5. In the Align to Outcomes menu, click anywhere in the **Align to Outcomes** section to browse the Outcomes mapped to the Course.   
        [![image-1760564560532.png](https://kb.astate.edu/uploads/images/gallery/2025-10/scaled-1680-/image-1760564560532.png)](https://kb.astate.edu/uploads/images/gallery/2025-10/image-1760564560532.png)
        
        <p class="callout info">To add additional outcomes to the question use use the Plus icon to return to the Select Outcome menu.</p>
        
        <p class="callout info">[![Align Additional Outcomes.png](https://kb.astate.edu/uploads/images/gallery/2025-10/scaled-1680-/align-additional-outcomes.png)](https://kb.astate.edu/uploads/images/gallery/2025-10/align-additional-outcomes.png)</p>
    6. Select the Outcomes that should be aligned to this question, and click Confirm Alignments.  
        [![image-1760564684068.png](https://kb.astate.edu/uploads/images/gallery/2025-10/scaled-1680-/image-1760564684068.png)](https://kb.astate.edu/uploads/images/gallery/2025-10/image-1760564684068.png)
        
        <p class="callout success">The Attached Outcomes page displays course-level outcomes. You can also view account-level outcomes if they have been [added to the course](https://community.canvaslms.com/t5/Instructor-Guide/How-do-I-find-an-existing-outcome-to-add-to-a-course/ta-p/866). </p>
        
        <p class="callout success">To attach an outcome to your quiz question, browse outcomes using the Outcome Picker \[1\]. You can also search outcomes by typing in the **Search Outcomes** field \[2\].</p>
        
        <p class="callout success">Click the checkbox next to the outcome you want to attach \[3\].</p>
        
        <p class="callout success">View a list of all selected outcomes \[4\]. To remove a selected outcome, click the **Remove** icon \[5\] or deselect the outcome checkbox.</p>
        
        <p class="callout success">To apply your selected outcomes, click the **Confirm Alignments** button \[6\].</p>
        
          
        ➤ **[Instructor Guide: Align an Outcome with Quiz Questions](https://community.canvaslms.com/t5/Instructor-Guide/How-do-I-align-an-outcome-to-a-quiz-question-in-New-Quizzes/ta-p/778)**
- **Rubrics** (Assignments, Discussions, Quizzes)  
    <iframe allow="fullscreen *; encrypted-media *" allowfullscreen="allowfullscreen" frameborder="0" height="402" id="bkmrk--5" sandbox="allow-downloads allow-forms allow-same-origin allow-scripts allow-top-navigation allow-pointer-lock allow-popups allow-modals allow-orientation-lock allow-popups-to-escape-sandbox allow-presentation allow-top-navigation-by-user-activation" src="https://cdnapisec.kaltura.com/p/2389961/sp/238996100/embedIframeJs/uiconf_id/42346671/partner_id/2389961?iframeembed=true&playerId=kaltura_player&entry_id=1_iy4nkih2&flashvars%5BstreamerType%5D=auto&flashvars%5BlocalizationCode%5D=en&flashvars%5BsideBarContainer.plugin%5D=true&flashvars%5BsideBarContainer.position%5D=left&flashvars%5BsideBarContainer.clickToClose%5D=true&flashvars%5Bchapters.plugin%5D=true&flashvars%5Bchapters.layout%5D=vertical&flashvars%5Bchapters.thumbnailRotator%5D=false&flashvars%5BstreamSelector.plugin%5D=true&flashvars%5BEmbedPlayer.SpinnerTarget%5D=videoHolder&flashvars%5BdualScreen.plugin%5D=true&flashvars%5Bhotspots.plugin%5D=1&flashvars%5BKaltura.addCrossoriginToIframe%5D=true&&wid=1_rs6di8nx" title="Including Outcomes on Rubrics" width="608"></iframe>


    1. Go to **Rubrics**
    2. Create or Edit a Rubric  
        [![image-1760564836039.png](https://kb.astate.edu/uploads/images/gallery/2025-10/scaled-1680-/image-1760564836039.png)](https://kb.astate.edu/uploads/images/gallery/2025-10/image-1760564836039.png)
        
        In the Criteria Builder, use the Create From Outcome button to open the Find Outcomes menu.  
        [![image-1760564872599.png](https://kb.astate.edu/uploads/images/gallery/2025-10/scaled-1680-/image-1760564872599.png)](https://kb.astate.edu/uploads/images/gallery/2025-10/image-1760564872599.png)
    3. Search through the Outcomes mapped to the Course to select an outcome.
    4. Click Import to make that Outcome a Criterion in the Rubric.  
        [![image-1760564913702.png](https://kb.astate.edu/uploads/images/gallery/2025-10/scaled-1680-/image-1760564913702.png)](https://kb.astate.edu/uploads/images/gallery/2025-10/image-1760564913702.png)
        
        <p class="callout warning">To use the criterion for scoring, click the **Use this criterion for scoring** checkbox.</p>
    5. Use the Find Rubric option in a graded assignment to add it to the assignment, quiz, or discussion.
    6. After students have submitted the assignment, use the Rubric in the Speed Grader when grading.   
        ➤ **[Instructor Guide: Align an Outcome with a Rubric](https://community.canvaslms.com/t5/Instructor-Guide/How-do-I-align-an-outcome-with-a-rubric-in-a-course-using/ta-p/609340)**

---

## **Viewing Outcome Alignments**

Instructors can view all aligned items in a course using the **Improved Outcomes Management** interface.

[![Course Level Outcome Alignments.png](https://kb.astate.edu/uploads/images/gallery/2025-10/scaled-1680-/course-level-outcome-alignments.png)](https://kb.astate.edu/uploads/images/gallery/2025-10/course-level-outcome-alignments.png)

Admins using the Improved Outcomes interface at the account or sub-account level can view alignments across all courses within that scope.

[![Account Level Outcome Alignments.png](https://kb.astate.edu/uploads/images/gallery/2025-10/scaled-1680-/account-level-outcome-alignments.png)](https://kb.astate.edu/uploads/images/gallery/2025-10/account-level-outcome-alignments.png)

➤**[ Instructor Guide: View All Aligned Items](https://community.canvaslms.com/t5/Instructor-Guide/How-do-I-view-all-aligned-items-in-Improved-Outcomes-Management/ta-p/546237)**

---

## **Reporting on Outcomes**

### **For Administrators**

Reports are available under the **Settings tab** in the Admin panel:

[![Admin Account Select Menu](https://kb.astate.edu/uploads/images/gallery/2025-12/scaled-1680-/admin-account-select-menu.png)](https://kb.astate.edu/uploads/images/gallery/2025-12/admin-account-select-menu.png)

[![Account Reports - Outcomes.png](https://kb.astate.edu/uploads/images/gallery/2025-10/scaled-1680-/account-reports-outcomes.png)](https://kb.astate.edu/uploads/images/gallery/2025-10/account-reports-outcomes.png)

- **Outcome Export Report**: Lists all outcomes in the account.
- **Outcome Results Report**: Shows student performance on each outcome.

➤ **[Admin Guide: View Reports for an Account](https://community.canvaslms.com/t5/Admin-Guide/How-do-I-view-reports-for-an-account/ta-p/109)**

### **For Instructors**

To view student progress on outcomes:

1. Go to **Settings** in your course.
2. Under the **Feature Options** tab, enable the **Learning Mastery Gradebook**.
3. Go to **Grades** and change from the default **Gradebook** view to the **Learning Mastery Gradebook** view.  
    [![image-1760559769517.png](https://kb.astate.edu/uploads/images/gallery/2025-10/scaled-1680-/image-1760559769517.png)](https://kb.astate.edu/uploads/images/gallery/2025-10/image-1760559769517.png)
    
    [![image-1760559807933.png](https://kb.astate.edu/uploads/images/gallery/2025-10/scaled-1680-/image-1760559807933.png)](https://kb.astate.edu/uploads/images/gallery/2025-10/image-1760559807933.png)

The Learning Mastery Gradebook is organized like the assignments gradebook, with the student names and sections on the left \[1\]. Similar to the assignments gradebook, you can click a student's name to link to their Grades page. Each column consists of a course outcome and the outcome grade for each student \[2\]. Also, like the assignments gradebook, the columns can be sorted, resized, and reordered. Click an outcome column heading to sort the outcome by score \[3\].

The Learning Mastery Gradebook also contains a sidebar that shows the outcome levels for the course \[4\]. The sidebar can be minimized and expanded by toggling the gray arrow icon at the top of the sidebar. You can filter outcomes or students that have no outcome results \[5\]. You can also export a report of student outcomes \[6\].

The Learning Mastery Gradebook displays 20 students per page. Use the numbered page navigation buttons to view additional students on other pages \[7\].

➤ **[Instructor Guide: Use the Learning Mastery Gradebook](https://community.canvaslms.com/t5/Instructor-Guide/How-do-I-use-the-Learning-Mastery-Gradebook-to-view-outcome/ta-p/775)**

---

# Quiz Question Analysis

Understanding how students perform on individual quiz questions can help identify confusing questions, ineffective distractors, gaps in instruction, and opportunities to improve future assessments. Canvas provides quiz statistics and analysis reports for both Classic Quizzes and New Quizzes.

> **Why use item analysis?**
> 
> After a quiz has been taken by students, item analysis can help you:
> 
> - Identify questions that were unexpectedly difficult or easy.
> - Determine whether answer choices (distractors) are functioning as intended.
> - Find questions that may be ambiguous or misleading.
> - Evaluate whether quiz items align with course outcomes and learning objectives.
> - Improve future versions of quizzes and exams.

## Understanding Common Metrics

Before reviewing your reports, it is helpful to understand several common measures used in quiz analysis.

### Difficulty Index

The difficulty index (also known as a p-value) represents the percentage of students who answered a question correctly. The values range between 0 and 1.

<div id="bkmrk-higher-values-indica">- Higher values indicate easier questions.
- Lower values indicate more difficult questions.
- Extremely high or low values may suggest that a question should be reviewed.

</div>Canvas makes this calculation with a point-biserial correlation.

### Point Biserial

A point biserial is a correlation coefficient that relates observed item responses and is especially used when one set of data is dichotomous, meaning it can take multiple values based on correct and incorrect responses. In addition to the point biserial of the correct answer, the same calculation is created for the distractors/incorrect answers (also known as a distractor efficiency). Ideally, all incorrect answers to the question should be equally appealing to students who miss it. Scores for this range from -1 to 1.

### Discrimination Index

Quiz statistics for True/False and Multiple Choice quiz questions include an item discrimination index, which attempts to look at a spread of scores and reflect differences in student achievement. This metric provides a measure of how well a single question can tell the difference (or discriminate) between students who do well on an exam and those who do not. It divides students into three groups based on their score on the whole quiz and displays those groups based on who answered the question correctly. Student groups are generally divided into the top 27%, the middle 46%, and the bottom 27%. Ideally, students who did well on the exam should get the question right.

Generally:

<div id="bkmrk-0.25-or-higher%3A-good">- **0.25 or higher:** Good discrimination
- **0.24 or lower:** May warrant review

</div>An ideal discrimination index shows students who scored higher on the quiz getting the quiz question right, students who scored lower on the quiz getting the quiz question wrong, and students in the middle range on either side. A discrimination index of zero shows all students getting the quiz question right or wrong.

Questions with poor discrimination may be unclear, miskeyed, or assessing something different from the rest of the quiz. This is especially true if students do well on the overall exam but not on questions with poor discrimination indices.

### Reliability (Cronbach's Alpha)

Reliability estimates how consistently the quiz measures student learning. This is a measure of the test's internal consistency, meaning that if several questions are designed to measure the same information, the test-taker will answer them in a similar way. For example, if a test is given to measure the enjoyment of ice cream, students who like ice cream should agree with statements such as "I like ice cream" and "I've enjoyed eating ice cream in the past". Those students should also disagree with statements such as "I hate ice cream".

Higher reliability values generally indicate that the assessment is measuring a common set of concepts or skills. Canvas calculates this value using Cronbach's Alpha when sufficient data are available.

[View Instructure Guide: Classic Quizzes Quiz Item Analysis](https://community.instructure.com/en/kb/articles/387082-classic-quizzes-quiz-item-analysis)

## Classic vs New Quizzes

<details id="bkmrk-classic-quizzes-you-"><summary>Classic Quizzes</summary>

You can view quiz statistics for classic quizzes that have been published and have at least one submission. You can also download comma-separated value (CSV) files to view Student Analysis or Item Analysis for each quiz question. The item analysis comma-separated values (CSV) file download will help instructors and course designers gauge the effectiveness of their quiz questions. Quiz analysis estimates reliability, difficulty, and discrimination for multiple-choice and true/false questions. For more detailed information about item analysis limitations and calculations, please refer to the [Item Analysis resource document](https://community.instructure.com/en/kb/articles/387082-classic-quizzes-quiz-item-analysis).

For optimal course performance in the Canvas interface, quiz statistics will only be generated for quizzes with 100 or fewer unique questions or 1000 total attempts. For instance, a quiz with 200 questions will not generate quiz statistics. However, a quiz with 75 questions will generate quiz statistics until the quiz has reached 1000 attempts. Results greater than these maximum values can be viewed by downloading the Student Analysis report and viewing the CSV file.

Item analysis may not generate results within specific quizzes. Here are a few limitations to consider within analysis reports.

- Currently, the analysis is designed to work with quizzes that deliver the same questions to all students. Therefore, if you generate the item analysis CSV for quizzes that pull from a question group, the CSV will generate a line representing each version of the quiz.
- The Quiz Item Analysis report currently only supports Multiple Choice and True/False quiz questions.
- If a quiz allows multiple attempts, the calculations will only consider the student's first attempt (to rule out practice effects).
- Questions that are left blank or not answered count as wrong when determining the total score for the exam, but they are excluded from question-level calculations.
- Statistics only include data for students who attempted to take the quiz.

Canvas Quiz item analysis generates scores based on Cronbach’s alpha. Cronbach's alpha measures the internal consistency of how closely related a set of items are as a group. Canvas generates an alpha score so long as there are two or more questions in the quiz and the test variance is greater than zero. A variance greater than zero implies two or more submissions produce different scores.

**Notes:**

- Editing a quiz with student submissions may affect quiz statistics. If the Question Breakdown charts no longer correctly display the information you expect after you edit a quiz, the Student Analysis report can provide the correct data.
- Media items do not display in quiz statistics.
- Answers that were edited or created in the Rich Content Editor for a Multiple Answers quiz question do not display in quiz statistics.

---

### Accessing the Quiz Statistics

#### Open Quizzes
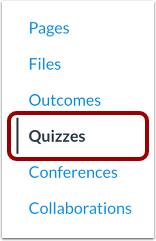
<div id="bkmrk--2">![Open Quizzes](https://us.v-cdn.net/6038536/uploads/migrated/YZ76DPVSSO5Y/b66ff3ea-71d5-4d45-97d8-16e062e57c46.png)</div>In Course Navigation, click the **Quizzes** link.

#### Open Quiz
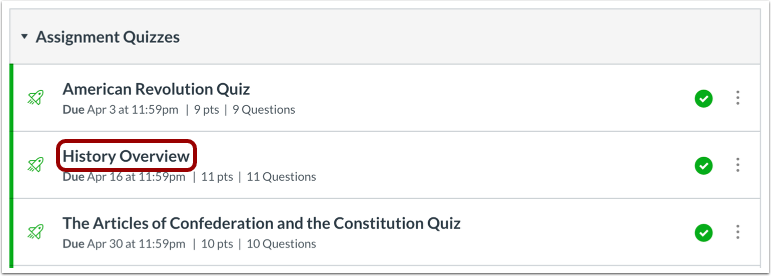
<div id="bkmrk--3">![Open Quiz](https://us.v-cdn.net/6038536/uploads/migrated/FTPAC9FADBJT/4520e7c9-3555-4660-b26b-3b1e2685eb71.png)</div>Click the title of the quiz you want to open.

#### Open Quiz Statistics
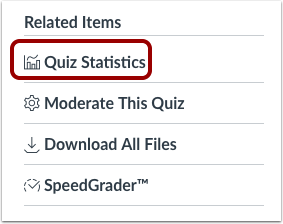
<div id="bkmrk--4">![Open Quiz Statistics](https://us.v-cdn.net/6038536/uploads/migrated/CWKNQMBAL1E2/202b1074-a769-41f0-b48d-df55a6c404e1.png)</div>Click the **Quiz Statistics** link.

**Note:** Quiz Statistics will not be available until at least one student has completed the quiz.

#### View Statistics
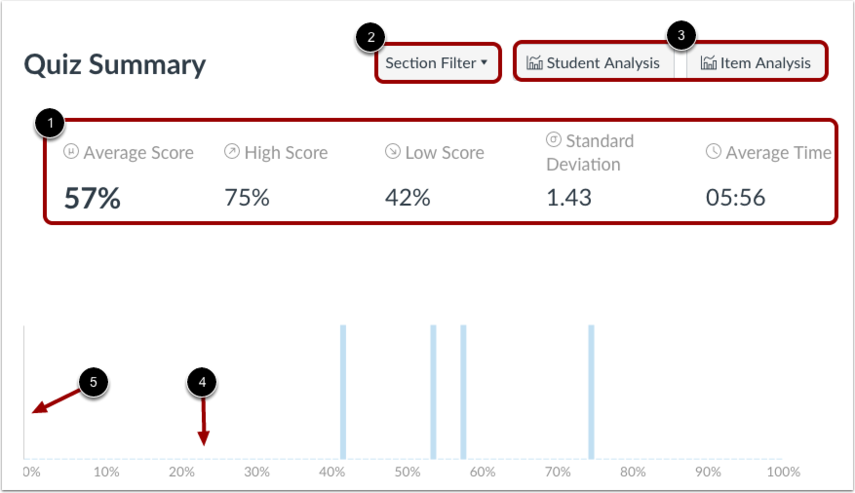
<div id="bkmrk--5">![View Statistics](https://us.v-cdn.net/6038536/uploads/migrated/NB5Z6FQBVR3C/e71c47a7-dadb-4092-a9db-07e923773c84.png)</div>By default, the quiz summary shows statistics for all sections, including the quiz average score, high score, low score, standard deviation (how far the values are spread across the entire score range), and average time of quiz completion \[1\].

To view quiz statistics for a section, click the **Section Filter** drop-down menu \[2\]. To access additional survey results, generate a Student/Item Analysis report \[3\].

In the summary graph, the x-axis indicates the quiz score percentages \[4\], and the y-axis indicates the number of students who received each percentage \[5\].

If a student had multiple assignment attempts, you can [view past attempts](https://community.instructure.com/en/kb/articles/661161-how-do-i-view-the-details-of-a-submission-for-a-student-in-speedgrader) in SpeedGrader. Quiz stats will only display the kept score for the student (highest score or latest score). To view the score setting for multiple attempts, edit your quiz and view the multiple attempts settings option. If necessary, you can give your students an [extra attempt](https://community.instructure.com/en/kb/articles/661033-once-i-publish-a-quiz-how-can-i-give-my-students-extra-attempts).

#### View Analysis Reports
<div id="bkmrk--6">![View Analysis Reports](https://us.v-cdn.net/6038536/uploads/migrated/LNFWGBYZUAA8/8176b361-12f4-4304-bb01-3e2a838f2fa4.png)</div>Download CSV files to view Student Analysis or Item Analysis for each quiz question to count all student attempts in the statistics. For more detailed information about item analysis limitations and calculations, please refer to the [Quiz Item Analysis resource document](https://community.instructure.com/home/leaving?allowTrusted=1&target=https%3A%2F%2Fcommunity.canvaslms.com%2Ft5%2FCanvas-Resource-Documents%2FCanvas-Quiz-Item-Analysis%2Fta-p%2F387082).

When you generate an analysis report, Canvas shows the last time the report was generated. If there is an error with the report, you can retry the option or cancel the analysis completely.

The Student Analysis report includes a tabular representation of each student's answers and the grade awarded for each answer.

**Notes:**

- By default, the submitted time in the Student Analysis report is shown in UTC, not your set time zone.
- The Item Analysis report only displays statistics for Multiple Choice and True/False questions.
- If you have permission to read SIS data in the course, the sis\_id column is included in the CSV download.

#### View Question Breakdown
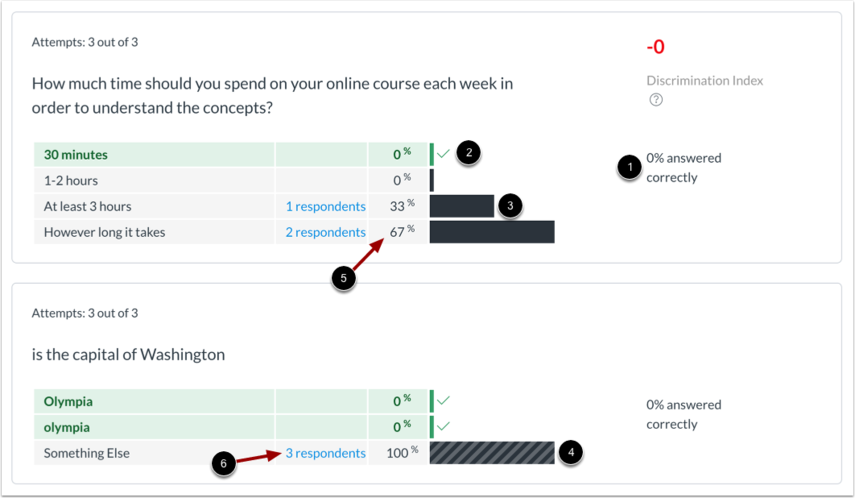
<div id="bkmrk--7">![View Question Breakdown](https://us.v-cdn.net/6038536/uploads/migrated/CCQ2A2VJIRPN/9122249b-eeb4-42c2-ab9b-ece6b887243a.png)</div>Each quiz question shows the total percentage of students who answered it correctly \[1\].

Each question includes a breakdown of each answer choice. Correct answer response(s) are shown in a green bar with a check mark \[2\]; incorrect responses are shown in a black bar \[3\]. Question types that do not have set answer choices, such as Fill-in-the-Blank questions, display entries other than the correct answer in a black striped bar \[4\]. The horizontal bars are scaled according to the answer response percentage \[5\].

Each response also displays the number of respondents who selected the answer \[6\]. To view the names of the students who selected an answer choice, click the **\[xrespondents\]** link.

#### View Manually Graded Questions
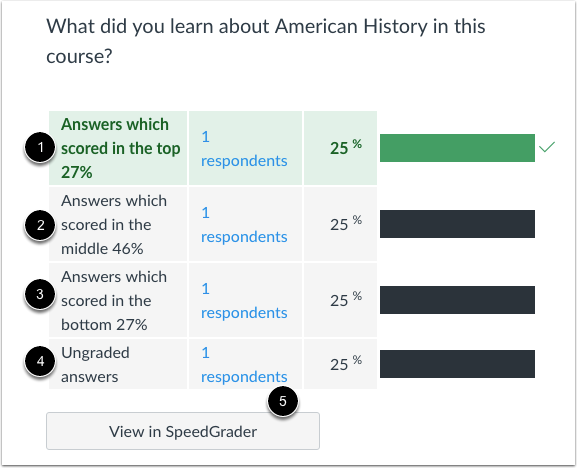
<div id="bkmrk--8">![View Manually Graded Questions](https://us.v-cdn.net/6038536/uploads/migrated/HWOZYRXZG3V1/b4bc2eb5-3591-4016-afd6-7b65bf0474c3.png)</div>Quiz statistics also show relative grade performance for manually graded essay and file upload quiz question types. Manually graded question types are shown in the same table format as other quiz types.

A manually graded quiz type is marked as correct if it contains a student score greater than or equal to the question points possible.

Grade breakdown responses are shown as the top 27% \[1\], middle 46% \[2\], and bottom 27% \[3\]. The statistics also show submissions that have not yet been graded \[4\]. However, if all scores are identical, a response category may show more than the percentage number of students (e.g., all students score 100%).

Manually graded questions also include access to SpeedGrader for quick reference \[5\].

#### View Discrimination Index
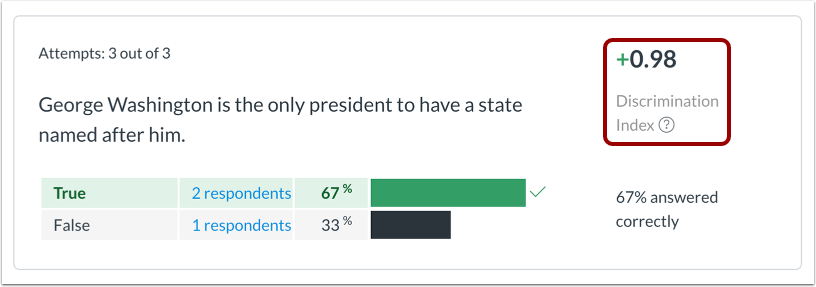
<div id="bkmrk--9">![View Discrimination Index](https://us.v-cdn.net/6038536/uploads/migrated/B3GJDQ13JGLP/81ef4ee2-5f5b-496a-9f5c-3a01d788ba8f.png)</div>True/False and Multiple Choice quiz questions include an item discrimination index, which provides a measure of how well a single question can tell the difference between students who do well on an exam and those who do not.

It divides students into three groups based on their score on the whole quiz: the top 27%, the middle 46%, and the bottom 27%. The number of correct answers from the bottom group is subtracted from the number of correct answers in the top group, then the total is divided by the size of the group.

Lower discrimination scores are scored +0.24 or lower; good scores are +0.25 or higher. An ideal discrimination index shows students who scored higher on the quiz getting the quiz question right, students who scored lower on the quiz getting the quiz question wrong, and students in the middle range on either side. A discrimination index of zero shows all students getting the quiz question right or wrong.

Ideally, students who did well on the exam should get the question right. If students do well on the overall exam but not on the question, the question itself may need to be revised.

[View Instructure Guide: Once I publish a quiz, what kinds of quiz statistics are available?](https://community.instructure.com/en/kb/articles/661032-once-i-publish-a-quiz-what-kinds-of-quiz-statistics-are-available)

</details><details id="bkmrk-new-quizzes-you-can-"><summary>New Quizzes</summary>

You can view and download 3 reports for a quiz created in [New Quizzes](https://community.instructure.com/en/kb/articles/662768-what-is-new-quizzes). The reports available in New Quizzes are the Quiz and Item Analysis, Outcomes Analysis, and the Student Analysis report. The Quiz and Item Analysis reports include statistics for the entire quiz and for individual items. The Outcomes Analysis report includes outcome mastery statistics for all students who took the quiz. The Student Analysis report provides a clearer insight into students' grasp of course materials and concepts to better support students in improving comprehension and test-taking strategies.

**Notes:**

- For details on the calculations used in the Quiz and Item Analysis report, refer to the [New Quizzes Quiz and Item Analysis](https://community.instructure.com/en/kb/articles/580197-new-quizzes-quiz-and-item-analysis) resource document.
- Outcomes associated with questions from Item Banks do not display in the [Outcomes Analysis report](https://community.instructure.com/en/discussion/560761/canvas-deploy-notes-2023-03-29/p1#toc-hId-317370413) unless those Outcomes are [added to a course](https://community.instructure.com/en/kb/articles/660927-how-do-i-find-an-existing-outcome-to-add-to-a-course).
- If you edit a quiz after students have already attempted the quiz, the Outcomes Analysis report includes results from before you edited the quiz.
- If you edit a quiz after students have already attempted it, the Outcomes Analysis report includes results from attempts made prior to the edit.
- To generate a report, there must be at least three quiz submissions.

### Accessing the Quiz Statistics

#### Open Quizzes

<div id="bkmrk-">![Open Quizzes](https://us.v-cdn.net/6038536/uploads/migrated/YZ76DPVSSO5Y/b66ff3ea-71d5-4d45-97d8-16e062e57c46.png)</div>In Course Navigation, click the **Quizzes** link.

In Course Navigation, click the **Quizzes** link.

**Note:** You can also access quizzes from the Assignments page.

### Open Build Page
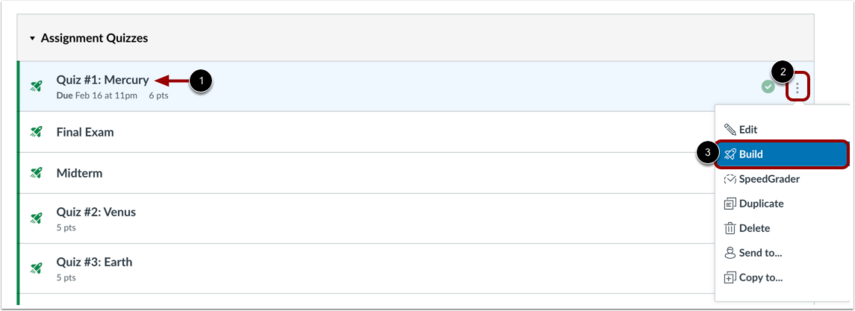
<div>![Quizzes Index page with a quiz, its Options icon, and Build link highlighted](https://us.v-cdn.net/6038536/uploads/migrated/HH9MO7L72DQG/169ae1d1-7308-4179-858e-644be4dea333.png)</div>Find the quiz you want to open \[1\]. Click the **Options** icon \[2\], and then click the **Build** link \[3\].

### Open Reports
<div>![Build page with the Reports tab highlighted](https://us.v-cdn.net/6038536/uploads/migrated/PN41J4W4D0CN/3b569ce8-fbd6-4d4c-baf1-8ff9ef51d634.png)</div>Click the **Reports** tab.

### Open Quiz and Item Analysis
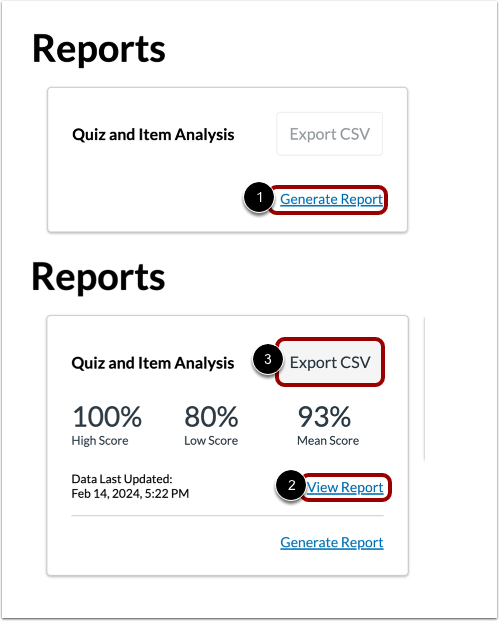
<div>![Reports tab with the Generate Report link, View Report link, and Export CSV button highlighted](https://us.v-cdn.net/6038536/uploads/migrated/J2V4RSHLFQE1/3b4c0c4d-0c12-46e0-b79f-64b97520aacc.png)</div>To generate the improved Quiz and Item Analysis report for the quiz, click the **Generate Report** link \[1\].

To open the generated report, click the **View Report** link \[2\].

To download the [Quiz and Item Analysis](https://community.instructure.com/en/kb/articles/580197-new-quizzes-quiz-and-item-analysis) report as a CSV file, click the **Export CSV** button \[3\].

#### View Quiz Analysis
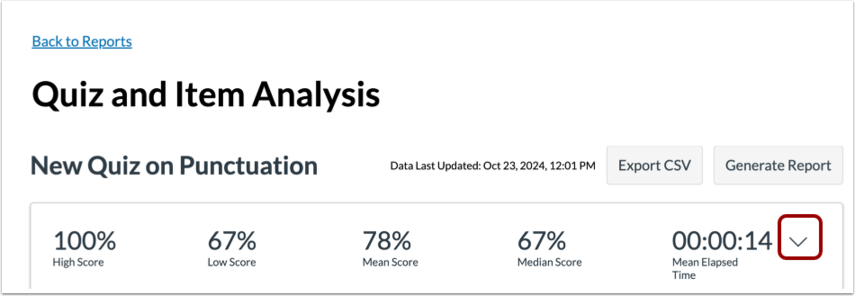
<div>![Quiz Analysis report with the Expand icon highlighted](https://us.v-cdn.net/6038536/uploads/migrated/A0JFE5PX2IZD/d8001206-3868-4d80-b0f0-0204bc4b18a1.png)</div>The Quiz and Item Analysis report includes two sections: Quiz Analysis and Item Analysis.

The Quiz Analysis includes statistics for overall quiz scores. To view all Quiz Analysis details, click the **Expand** icon.
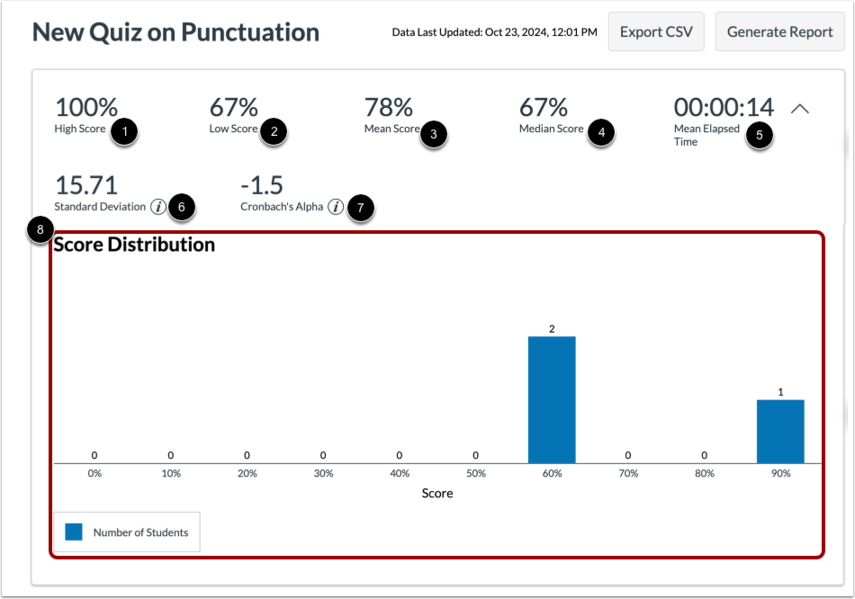
<div>![Quiz Analysis details with the high score, low score, mean score, median score, and other statistics highlighted. More information in the step text.](https://us.v-cdn.net/6038536/uploads/migrated/0ORGDKBE2MSO/be0e2c7b-a145-490c-9e48-abcaa7ba846f.png)</div>The following statistics are available:

- **High Score** \[1\]: displays highest percentage score
- **Low Score** \[2\]: displays lowest percentage score
- **Mean Score** \[3\]: displays average percentage score
- **Median Score** \[4\]: displays median percentage score
- **Mean Elapsed Time** \[5\]: displays average time to complete the quiz
- **Standard Deviation** \[6\]: represents the amount of variation from the mean score in percentage
- **Cronbach’s Alpha** \[7\]: is an internal consistency measure that estimates the reliability of a quiz
- **Score Distribution Chart** \[8\]: represents the distribution of earned scores for the quiz

For more information, visit the [New Quizzes Quiz and Item Analysis](https://community.instructure.com/en/kb/articles/580197-new-quizzes-quiz-and-item-analysis).

#### View Item Analysis
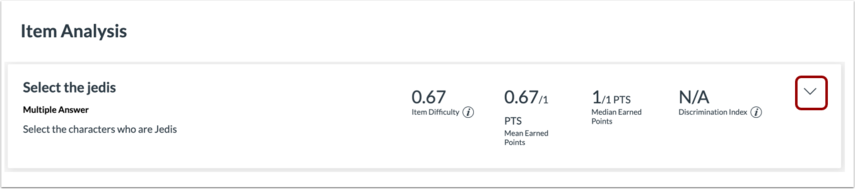
<div>![Item Analysis report with the Expand icon highlighted](https://us.v-cdn.net/6038536/uploads/migrated/LGZTDMVLQJPZ/d3ee5468-48c8-481a-8124-a394466bc504.png)</div>The Item Analysis includes [statistics for items](https://community.instructure.com/home/leaving?allowTrusted=1&target=https%3A%2F%2Fcommunity.canvaslms.com%2Ft5%2FCanvas-Resource-Documents%2FNew-Quizzes-Quiz-and-Item-Analysis%2Fta-p%2F580197%23toc-hId--814298943) in a quiz and their correlation to the overall quiz score. To view Item Analysis details, click the **Expand** icon.
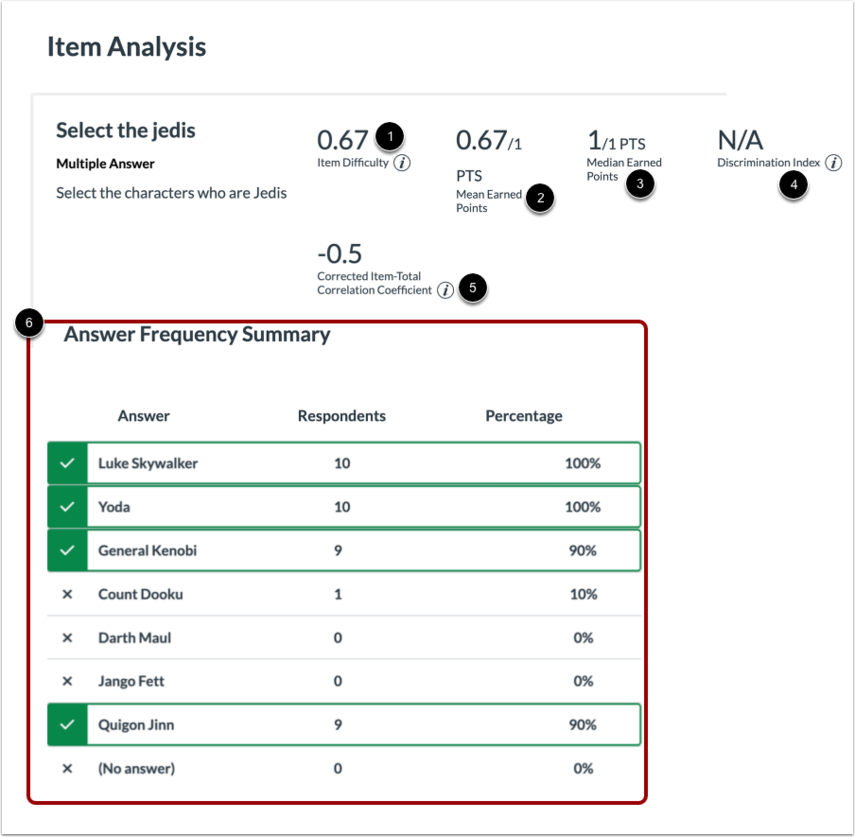
<div>![Item Analysis details with the item difficulty, earned points, discrimination index, and other statistics highlighted. More information in the step text.](https://us.v-cdn.net/6038536/uploads/migrated/OBOIZC8GYJTD/073c9ca0-c243-4dc9-8ac5-5133ef442f58.png)</div>The following statistics are available:

- **Item Difficulty** \[1\]: measures the proportion of students who answered the question correctly
- **Mean Earned Points** \[2\]: displays average point score out of the maximum possible points
- **Median Earned Points** \[3\]: displays mean point score out of the maximum possible points
- **Discrimination Index** \[4\]: assesses the ability of an item to differentiate between the highest scoring and lowest scoring students
- **Corrected Item-Total Correlation Coefficient** \[5\]:measures the correlation between a given item and the total score
- **Answer Frequency Summary Chart** \[6\]: displays the number and percentage of students who selected each answer choice

**Note:** The Answer Frequency Summary charts display the total number of correct responses, incorrect responses, and no responses for the following question types: Categorization, Fill in the Blank, Formula, Hot Spot, Matching, Multiple Answer, Multiple Choice, Numeric-Answer, Ordering, and True or False.

#### Return to Reports
<div>![Quiz and Item Analysis report with the Back to Reports link highlighted](https://us.v-cdn.net/6038536/uploads/migrated/E8U844DOM618/559fb02f-dbb0-4bc7-9a21-9730b20d23bb.png)</div>To return to the Reports page, click the **Back to Reports** link.

### Open Outcomes Analysis
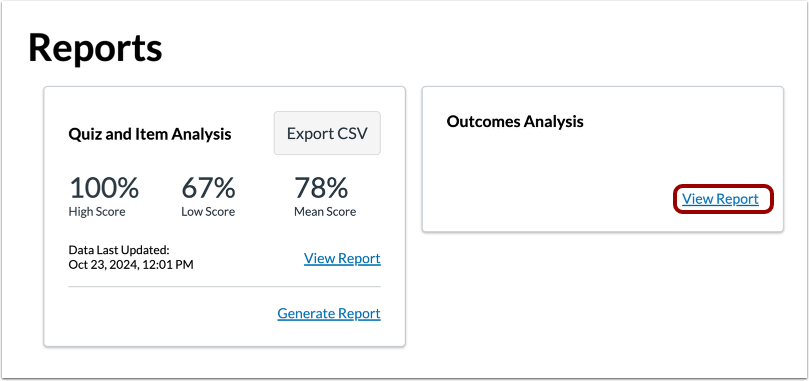
<div>![Reports tab with the View Report link highlighted](https://us.v-cdn.net/6038536/uploads/migrated/MJNB6OO3PUKO/9147f270-697c-45b5-9844-b0019cb0da8f.png)</div>To open the Outcomes Analysis, click the **View Report** link.

#### View Outcomes Analysis
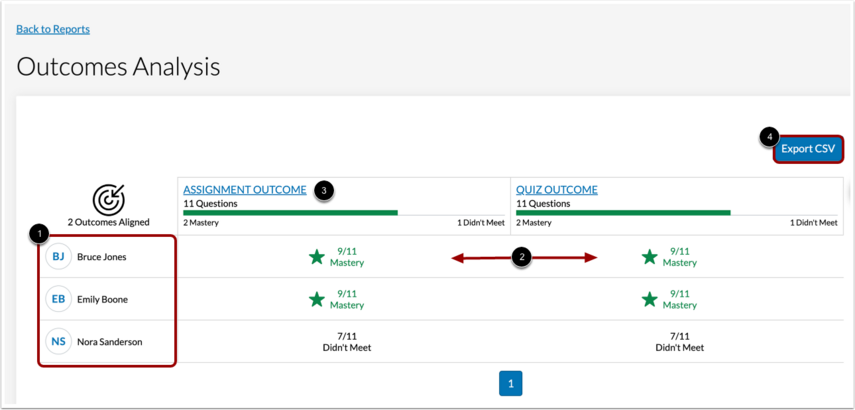
<div>![Outcomes Analysis report with a student's mastery results, an outcome name, and the Export CSV button highlighted](https://us.v-cdn.net/6038536/uploads/migrated/EAGWSEW23TPB/69f14b89-a4c8-453d-9df9-23801bb71179.png)</div>The Outcomes Analysis includes each student who has completed a quiz \[1\] and their mastery results for each outcome \[2\].

To view more details for an outcome, click the name of the outcome \[3\].

To download the CSV file of the Outcomes Analysis report, click the **Export CSV** button \[4\].

**Note:** Outcomes may take up to 48 hours to display in New Quizzes after they have been added to an account.

#### View Outcome Detail
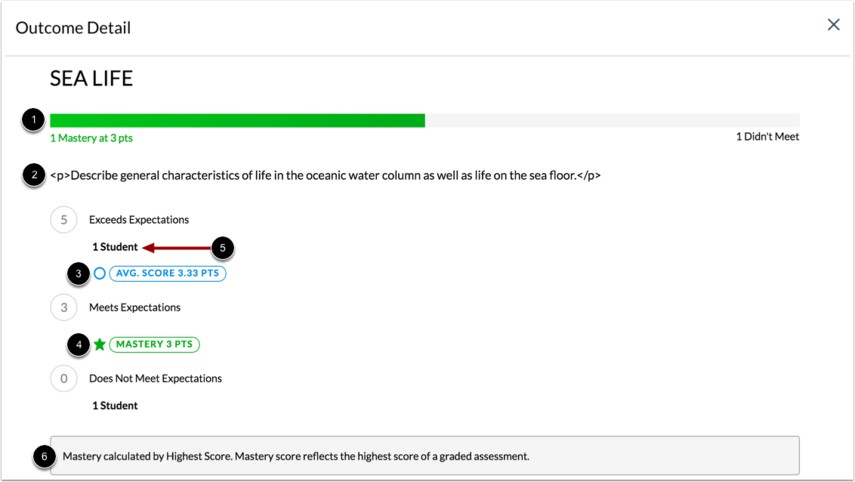
<div>![Outcome Detail page with the mastery count, description, average score, and other performance statistics highlighted. More information in the step text.](https://us.v-cdn.net/6038536/uploads/migrated/NBVPP5PN43TW/8134d7dd-cd0a-46e5-8b86-c750cdbcca31.png)</div>The Outcome Detail page contains performance information for a specific outcome, including number of students who reached mastery \[1\], description \[2\], average score \[3\], and score required to earn mastery \[4\].

You can also view the number of students who score within each criteria level \[5\] and how mastery is calculated \[6\].

### Open Student Analysis
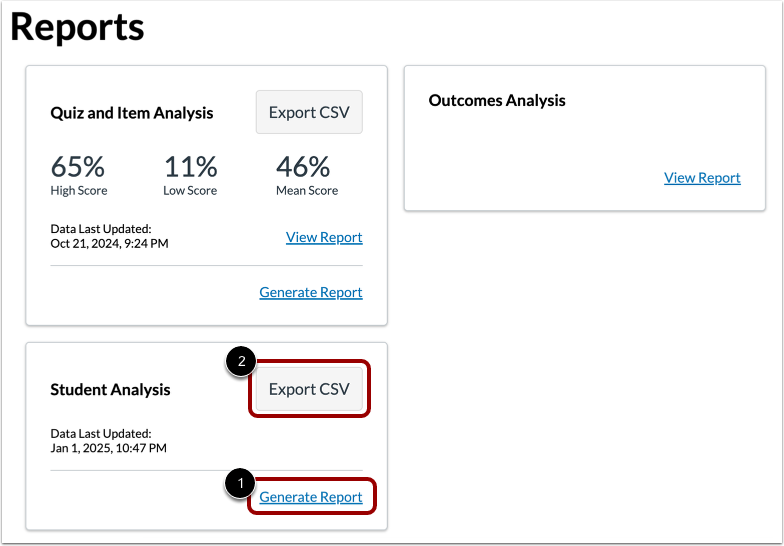
<div>![Reports tab with the Generate Report link and Export CSV button highlighted](https://us.v-cdn.net/6038536/uploads/migrated/0TBARSURD8J0/35cbbc29-d9ef-4bf2-bc3a-92e377eb4cbb.png)</div>To generate a Student Analysis report, click the **Generate Report** link \[1\], then click the **Export CSV** button \[2\].

#### View Student Analysis Report

<div>![Student Analysis Report CSV showing the report's column headers](https://us.v-cdn.net/6038536/uploads/migrated/TXA9H44O39EJ/9a05a772-2961-4c3f-8c17-06ead3b318de.png)</div>The report includes:

- SISID (when permission is enabled)
- SectionSISID (when permission is enabled)
- Time Elapsed
- Submission Attempts
- Item Type
- Student Response
- Points Earned
- Number of Correct
- Number of Incorrect
- No Response
- Overall Score
- Status

**Note:** The Student Analysis Report CSV includes data on each student's individual attempt.

#### View Status Item Values
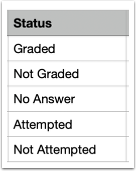
<div>![Student Analysis Report showing the Status column's item state values](https://us.v-cdn.net/6038536/uploads/migrated/2IPJ793ZI82A/1c09261a-11d7-4610-a58e-56807704dff6.png)</div>The Status column includes the following item state values:

- Graded: The student answered the question, either correctly or incorrectly.
- Not Graded: The question is awaiting grading (applies only to Essay or File Upload questions).
- Not Attempted: The question was not included in the students quiz.
- No Answer: The student did not answer the question, but it was part of the quiz.
- Not Supported: The question type is not supported by the Student Analysis Report.
- N.A.: An error state indicating missing important data from the modal.

</details>## Best Practices for Quiz Improvement

After reviewing quiz statistics:

<div id="bkmrk-revise-unclear-wordi">- Revise unclear wording.
- Remove implausible distractors.
- Align questions more closely with learning objectives.
- Add instructional support for concepts with consistently poor performance.
- Review questions with low discrimination values.
- Compare analysis results across multiple semesters before making major changes.

</div>> Quiz analytics should be used as a starting point for investigation rather than as the sole basis for changing assessment questions.