Editing Videos in Kaltura
The Kaltura video editor is a simple yet powerful tool for editing any video uploaded to Kaltura. You can trim, clip, chop, and splice your videos.
Combining two videos isn't supported in the video editor—use Media Stitching for that.
You can’t change a video’s title directly from the video editor unless you’re saving your changes as a new copy.
Accessing the Editor
Option 1: From the Media Page
- Click the three dots menu under the player.

- Select Launch Editor.


Option 2: From the Edit Media Page
- Access the My Media page.
- Choose one of the following methods:
- Click the pencil icon next to the desired media.
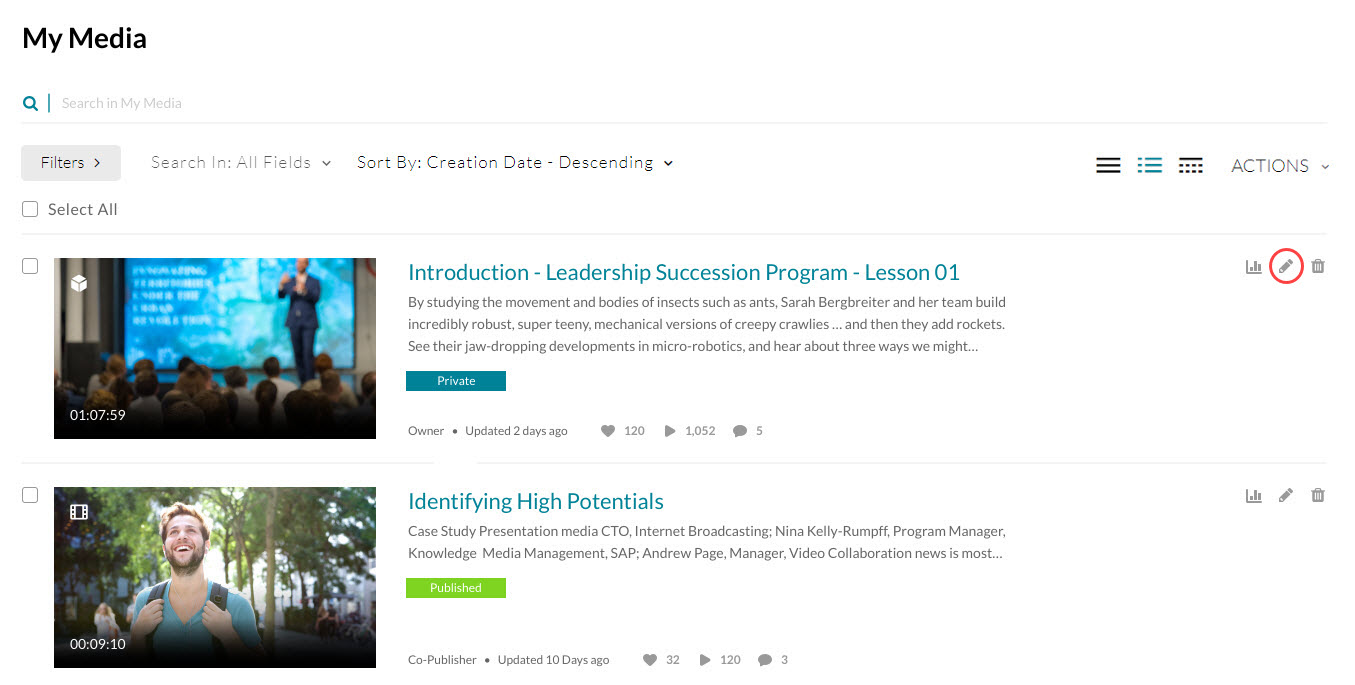
- Click on the thumbnail or title of the desired media, then choose Edit from the ACTIONS drop-down menu.
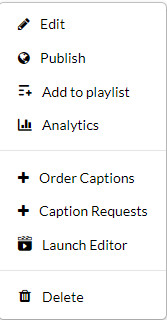
- Click the pencil icon next to the desired media.
- Click the Launch Editor button.


Editor Layout
The editor has three main areas:

-
Left pane – Displays your media details. You can minimize it by clicking the open/close button (1).
-
Right pane – Includes the following:
-
Player (2) to preview your timeline changes
-
Real-time input field (3)
-
Play, pause, skip to start, and skip to end buttons (4)
-
Bottom pane – Contains the timeline and its tools and functions, including:
-
Total video duration (5)
-
Trash icon (6) for deleting segments
-
Fade in / out icon (7) for setting fade cue points on your selected segment
-
Real-time marker (8) for tracking your video on the timeline. When you hover on the marker, arrows display, and you can drag it forward and backward. The marker has tools for splitting and setting in / out as follows:
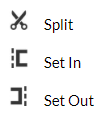
Split (scissors icon) allows you to cut the video at the point where the real-time marker is placed.
Set In / Set Out lets you crop your video from the start or end, for example, wherever the marker is placed, clicking Set In will set that as the new starting point.
-
Handlebars (9), which you can drag to create a specific range
-
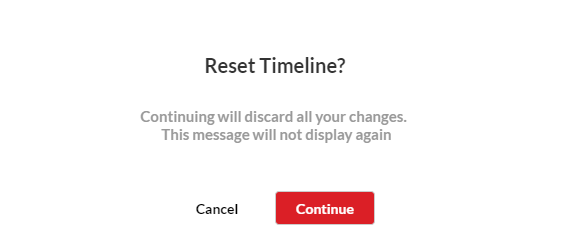
Reset icon (10) for reverting to the last saved state. The first time you click it, a message displays: Continuing will discard all your changes. This message will not display again.
-
Redo/undo icons (11)
-
Show/hide audio (12) to show or hide the audio track on the timeline (audio displays by default). If there are multiple audio tracks, you can display them either individually or overlaid.
Audio levels provide a visual guide for where to trim or clip the entry, such as during silent moments or pauses between sentences.
-
Zoom function (13) for adjusting your view of the timeline. Once you zoom in, a scroll bar is introduced underneath, which you can use to scroll through your video, as shown in the image below:

-
Keyboard Shortcuts
- Right arrow (→): 1 second forward
- Left arrow (←): 1 second backward
- Alt + →: 10 seconds forward
- Alt + ←: 10 seconds backward
Trim or Clip
Trimming edits the original video’s start or end and saves the change permanently. While clipping a video creates a new copy of the video with a different start or end, it keeps the original intact. The procedures are the same, but to Trim you Save the video, and to Clip you instead Save a Copy.
Only the owner or co-editor of a media entry can create clips.
➤ Transfer media ownership or add collaborators
Set the start and end times using any of the methods listed below:
Use the zoom function to enhance display granularity. Adjust the segment's length with the handlebars to set the exact points you want.
- Click on the timeline to activate the handlebars, then drag the handlebars to the start and/or end point with your mouse.

- Enter a start or end time in the real-time input field, and then press Enter. The real-time marker will position itself on the timeline at that time. You can then click the set in / set out icon.

- Move the real-time marker to the desired position. Drag the handlebars to snap to the real-time marker.

- Play the recording, and pause at the desired time. The real-time marker will automatically position itself at that time. Either drag the handlebars to snap to the real-time marker or click the set in / set out icons to select the beginning and end of the range.

- Once you're happy with the start and end times, preview your edits by clicking the play button below the video.


Trim
- To trim the video, click Save.
- A confirmation message displays: You are about to permanently change this media entry. This action cannot be undone. This Process may take a while. Are you sure you want to continue?

- Click Save to continue.
- A confirmation message displays: You are about to permanently change this media entry. This action cannot be undone. This Process may take a while. Are you sure you want to continue?

Don't forget that Save will alter the original media permanently, and any deleted segments are gone for good.
If you wish to preserve the original file, use Save a Copy. This will save all your edits as a new Clip.
Clip
- To clip the video, click Save a Copy
-
A window displays. You can either use the suggested title (indicating that this video is a clip) or enter a new title for your clip.

-
Click Create.
A success message displays: Your media, [title of media], has been saved in My Media. Go to Media Page / Go to My Media
-
Click OK.
You can go to My Media to confirm the clip has been created.


Saving may take some time, especially for longer videos. You can leave the browser window or tab open and check back later. Your edited video will be saved in My Media.
For very long uploads, you may get logged out of your computer before the upload finishes. This can cause the upload to fail. Make sure to monitor your computer during the upload process to prevent this from occurring.
Chop and Splice
Chopping cuts and removes a section in the middle of a video. Splicing joins the remaining sections together, and Kaltura does this automatically, so you don't need to move the cut segments yourself.
The timeline always reflects the original video's timespan. White gaps show where content was removed but do not indicate pauses.
- Click the timeline and drag the real-time marker to where you want to cut the video.
- Click the scissors icon to split the video.
- Drag the real-time marker to where you want your cut section to end and click the scissors icon again.
- Click on the section you want to remove (it will have a yellow border around it. If it doesn’t, click on it). Click either the trash icon or press the delete key to remove it.
The section disappears. Kaltura automatically splices the remaining segments, so you don't need to drag them together on the timeline.

Fade Effects
-
Click on the segment that you want to apply a fade effect to.
-
Click the fade in / out icon and enter the seconds you want to fade in or out of the segment.

-
Click anywhere outside the window or press Enter to confirm your changes and close the fade-in/out window.

Fade markers are indicated at the point of the segments to show where the fade-out and fade-in points begin.


Editing Media with Multiple Streams
When the editor displays content with multiple streams (for example, both screen and video capture), the timeline is loaded with the primary stream.
You can adjust how the content is displayed on the player using the screen icons that appear when you hover (see image below). Changing the display won't affect the timeline.

- Click the Content Selector icon under the play button and choose the stream you want to edit from the pop-up menu.

The timeline will display the stream you selected and allow you to view where you will clip or trim the media simultaneously for each stream. - Set the range using any of the methods listed above.
- When satisfied with your edits, click Save or Save a Copy.

Exit Editor
When you have finished editing, click the exit arrow in the bottom left corner to close the editor.

If you ever want to start over during editing, just click the exit arrow and then return.
Media Stitching: Combining Multiple Videos
Would you like to combine multiple videos and images into one video? It's very easy with Kaltura's Media Stitching tool. This tool allows you to easily create new, original videos by stitching together existing content.
- Only videos that you are either the owner or co-editor of will appear in the stitch video menu.
➤ Transfer media ownership or add collaborators - Only VOD videos and images can be stitched.
- The duration of a stitched image is 5 seconds.
- Media Stitching is currently unavailable for multi-stream videos.
- Go to My Media and click +Add New → Stitch Videos
The Stitch video page displays.

- Enter a name in the New Video Name field (default is “My Combined Video” + date)
- In the Choose media to stitch section, select media to stitch:
- Click the Add (+) button next to each item
- Use Search to locate items
- Selected items show a checkmark and move into the stitching list
- Click again to remove an item


You must select 2–5 items. The total duration of all stitched videos must be under 5 hours.
-
Reorder or manage items:
- Drag the two-line icon to reorder

- Use the three-dot menu to move or remove items.

- Drag the two-line icon to reorder
-
Click Create
- You’ll be taken to the Edit Entry page to add metadata.


Captions are retained from each of the stitched videos.
Once saved, stitched items cannot be changed. You will need to use the Editor to make any changes to the stitched video once it has been saved.
If you delete a media entry after it has been added to a stitched video, it will remain in the stitched video.
Timeline breaks are visible between stitched videos. Fade transitions are planned for future releases.
For cleaner stitching of videos with transitions, you may want to consider the Adobe Creative Cloud tools.