Kaltura Capture: Recording and Managing Videos
Kaltura offers two distinct tools for recording video content: Kaltura Capture and Express Capture. Each serves different needs depending on your device setup, recording goals, and available permissions.
-
Kaltura Capture is a downloadable desktop application ideal for creating detailed instructional videos. It supports multiple input configurations (camera, screen, audio), includes built-in annotation tools, and allows for local management of recordings before uploading.
-
Express Capture is a browser-based alternative that requires no installation or administrator access. It’s perfect for quick webcam recordings and simple screen captures, though it does not support annotation tools or advanced configurations.
If you need screen annotations or multiple inputs, use Kaltura Capture. For quick webcam recordings, try Express Capture.
This page will guide you through:
- Installing and launching Kaltura Capture
- Recording configurations (camera, screen, audio, etc.)
- Using annotation tools
- Managing recordings (library, settings, upload)
- Using Express Capture as a lightweight alternative
Installing and Launching Kaltura Capture
- Go to My Media or Media Gallery in Canvas.
- Click Add New → Kaltura Capture.

- The application will then launch on the computer for you to start your recording. If it is not installed, you’ll be prompted to download the application.


Supported Platforms
Follow the installation instructions
- Windows: ➤ Install Capture for Windows
- Mac: ➤ Install Capture for Mac
Kaltura Capture is not supported on mobile, tablet, Chromebook, or virtual desktop environments (e.g., Citrix, VMware).
Mac users: Make sure your system's privacy settings allow the app to access your screen, camera, and microphone.
Windows users: If you encounter error messages, you may need to adjust system access settings.
If the download fails, contact the IT Help Desk to check the firewall or security settings.
Recording with Kaltura Capture
Once installed, Kaltura Capture opens with a simple interface showing:

Step-by-Step Recording Configurations
✅ Record Camera and Screen
- Camera: Enabled by default. Click the arrow next to the camera icon to open input settings. Select your desired camera from the drop-down menu.
- Screen: Enabled by default. Click the arrow next to the screen icon to choose your screen. To record a specific area, follow the steps in “Record Specific Area of Screen.”
- Audio: Click the microphone icon to mute/unmute. Click the arrow to select your audio source.
✅ Record Camera and Audio Only
- Set up your camera and audio as above.
- Click the screen icon to disable screen recording.
✅ Record Two Cameras
- Click the arrow next to each input icon.
- Select different camera sources from the drop-down menus.
✅ Record Two Screens
- Set up your first screen.
- Click the arrow next to the camera icon and select your second screen.
✅ Record Audio Only
- Disable both screen and camera inputs.
- Click the arrow next to the microphone icon and select your audio source.
✅ Record Specific Area of Screen
- Click the arrow next to the screen icon.
- Select your screen from the drop-down menu.
- Choose Select Area.
- A cropping window appears.
- Resize and position the frame over the area you want to record.
- Click Confirm. The frame turns red.
- Begin recording.
To cancel and return to full screen, toggle Full Screen under screen selection.
Get to Know the Recording Tool
When you click the Record Button, the interface changes. It now provides the following options.

- Stop - When you stop, a warning message displays: Are you sure you want to stop this recording? Choose 'Yes, Stop it' to stop the recording and go to the entry page. Choose 'No' to return to the previous state (paused or recording).
- Pause / Resume - Click to pause or resume your recording at any time.
- Cancel - Click the 'X' to cancel your recording. A warning message displays: Are you sure you want to discard this recording? Choose 'No' or 'Yes, Discard'. Cancelling will delete your recording.
- Duration - As you record, the timer counts up from 00:00:00 so you can track your time.
- Microphone - The microphone icon displays the sound levels.
- Minimize - Click the underscore to hide the recording menu. The Capture icon with a red dot indicates recording.
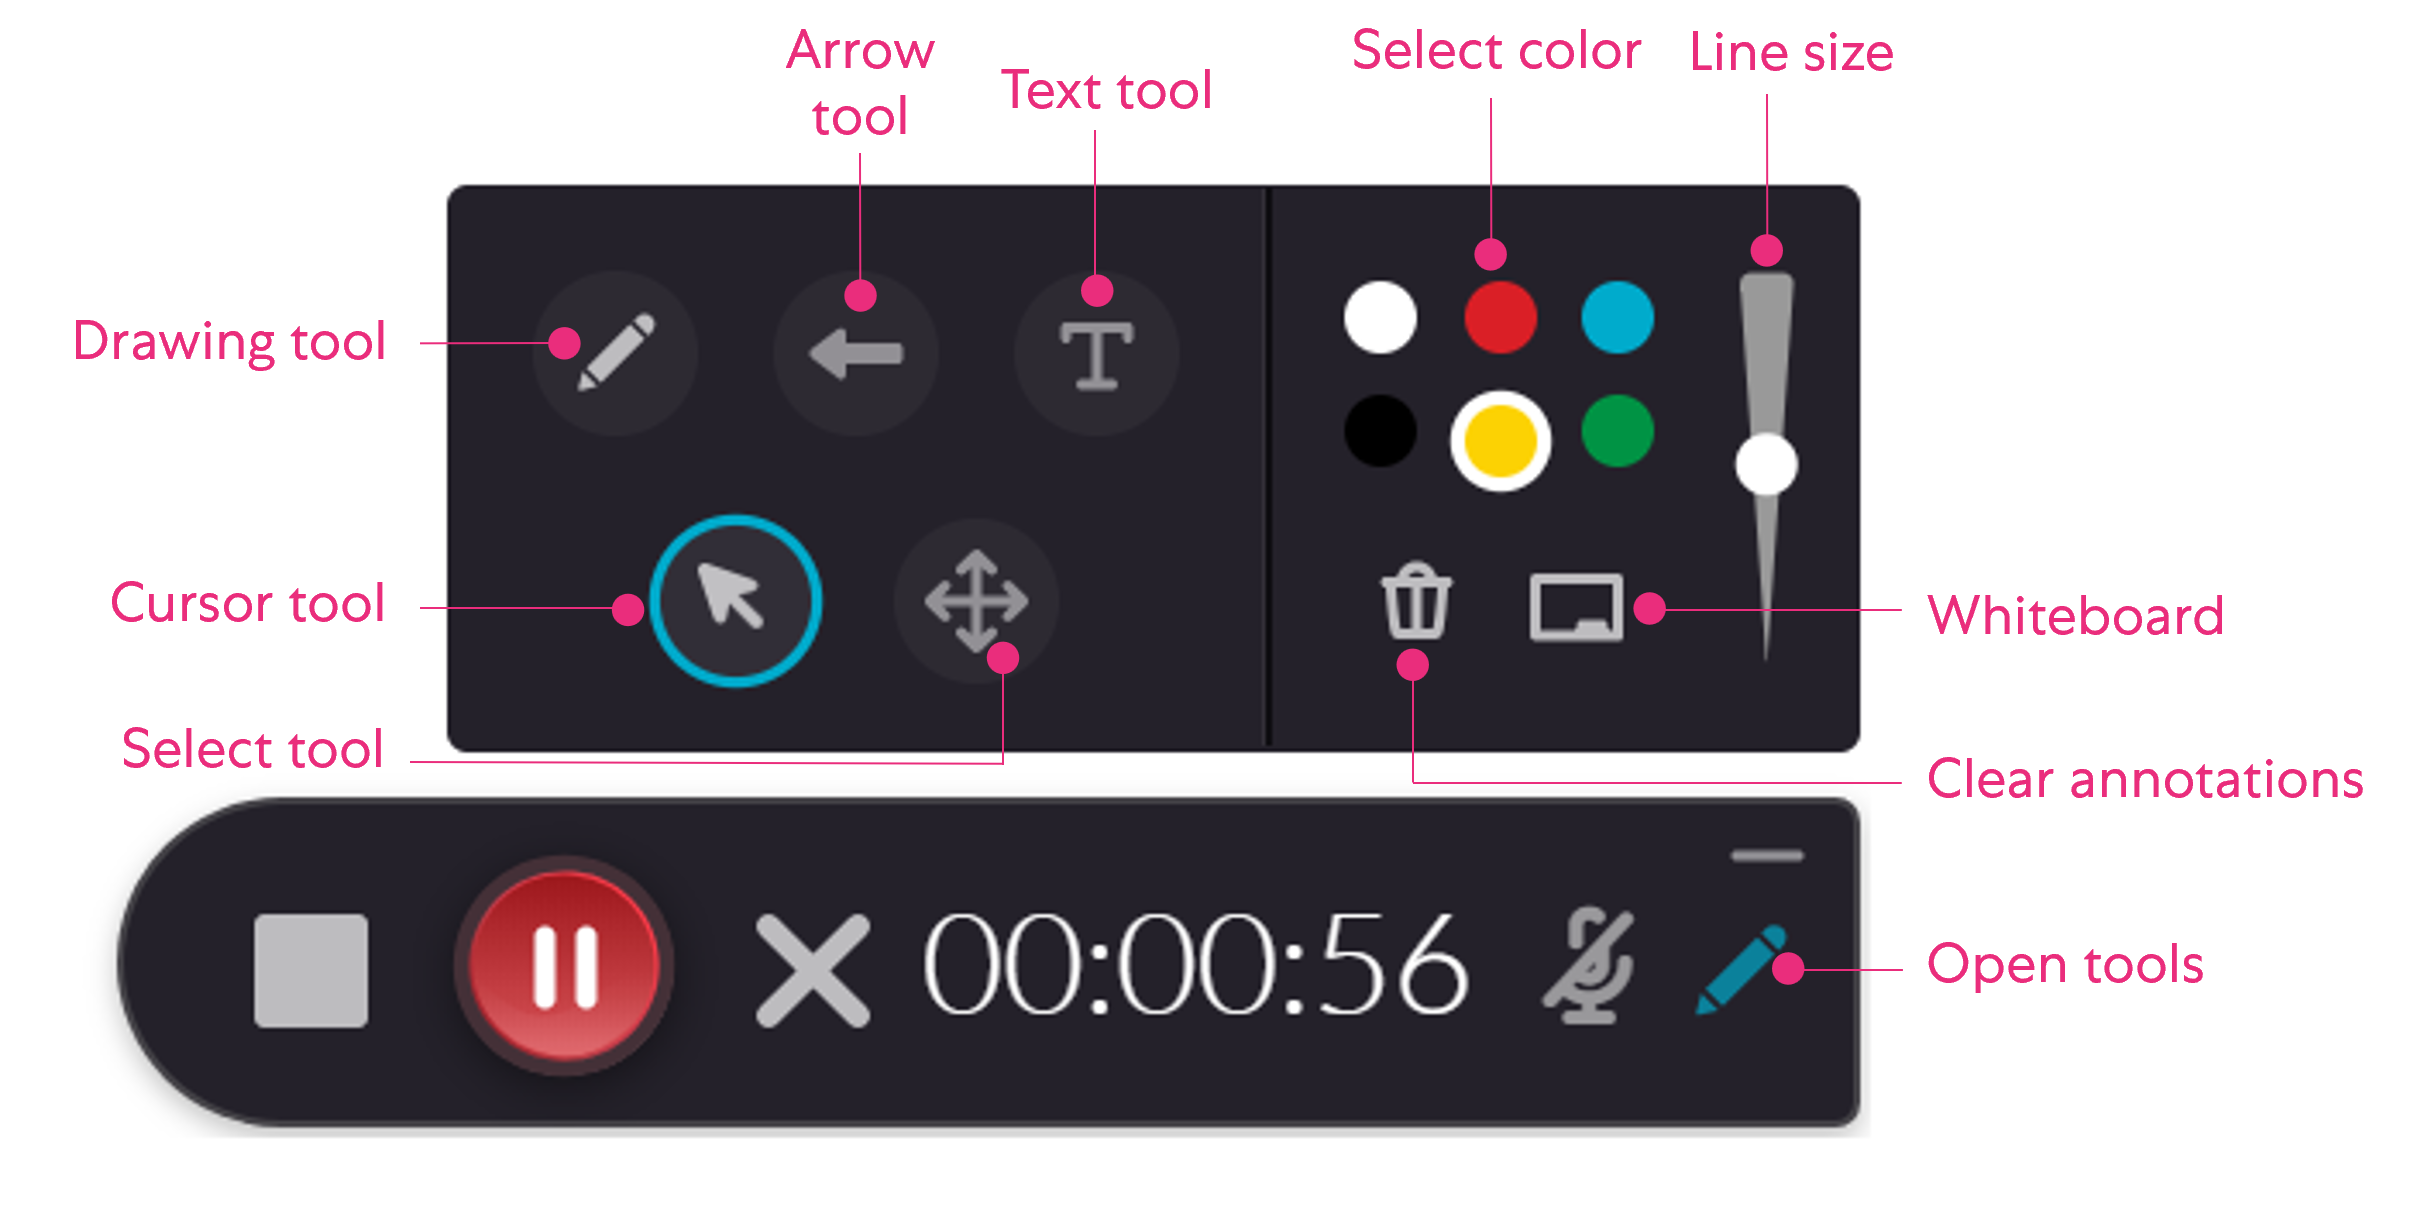
- Annotations - Use the various tools to annotate your screen during recording.
✏️ Using Annotation Tools During Recording
Kaltura Capture includes built-in annotation tools that allow you to draw on your screen during a recording. These tools are especially useful for highlighting key concepts, guiding attention, or emphasizing specific areas of your presentation.
The Annotations toolbar can be accessed by clicking the pencil icon in the Recording Tool after you start a screen recording. It remains visible until you click the icon again to close the annotations menu.
Annotation tools are only available when screen recording is enabled. If you are recording only your camera or audio, the toolbar will not appear.
If you do not need the Annotation tools, consider using Express Capture instead. It is browser-based and does not require all the setup for Kaltura Capture.
Annotation Tool Options
- Arrow tool - Use to draw an arrow to point out a specific element on your screen.
- Text tool - Use to type text anywhere on your screen (maximum 500 chars). You can type special characters, add links, use different languages, and copy/paste text.
- Select color - Select pencil color: white, red, blue, black, yellow, and green.
- Line size - Increase or decrease the line size of the annotation.
- Drawing tool - Use to draw freely on your screen.
- Cursor tool - Switch your cursor back to normal after using the notation tools.
- Select tool - Select an area on the screen or select an annotation you created to move it on the screen.
- Whiteboard - Open a new whiteboard for additional annotations.
- Clear annotations - Clear all the annotations on the screen.
Best Practices for Using Annotations
- Plan: Know which parts of your screen you want to annotate and keep your notes concise.
- Avoid clutter: Use annotations sparingly to maintain clarity.
- Use contrasting colors: Ensure your annotations stand out against your background.
- Practice beforehand: Familiarize yourself with the tools to avoid fumbling during a live recording.
Important: Annotations are recorded as part of the video and cannot be removed after recording. To chop and splice out the entire section with annotations.
➤ See: Editing Videos in Kaltura.
If you need editable overlays or advanced effects, consider using Adobe Premiere Pro or After Effects after exporting your video. To learn how to download your Kaltura recordings, edit them in an external tool, and then upload them back to My Media.
➤ See: Downloading, Advanced Editing and Uploading of External Media
Managing Your Recordings
Once Kaltura Capture is installed and launched, you can access the Recording Management window, which helps you organize and edit your recordings.
You will also be automatically directed to the Edit Page for the video in the Library when you finish a recording to set the title, description, and tags.
Accessing the Recording Management Window
On the recorder user interface, click Manage.

The window has three main tabs:

Library Tab
In the Library, you have the following options:
- Delete media from your library.
- Start a new recording and return to the Capture recorder.
- Click on an entry to open the Edit page in the Management window. If the recording has already been uploaded, you won't be able to edit it on this page.
- Click the link to open the media in My Media if it has been uploaded.
- Delete all uploaded media files from your local storage.
- Re-upload media: If a file was corrupted during upload or deleted from the portal, you can re-upload it. The re-uploaded file is treated as a new entry.

For very long uploads, you may get logged out of your computer before the upload finishes. This can cause the upload to fail. Make sure to monitor your computer during the upload process to prevent this from occurring.

Edit Page
From the Edit page, you can:
- Edit the title, description, and tags (only if the recording hasn’t been uploaded).
- Delete media from your local library.
- Access your media in your video portal using the provided link if the media was uploaded.
- Playback the video.
- Save or Save & Upload the video with the title, description, and tags you set.
- Click Save & Upload if you want to immediately upload the entry to My Media.
- Click Save if you want to save the entry in the recording library (and then upload or delete later).
- Click Delete if you don't want to save the recording.
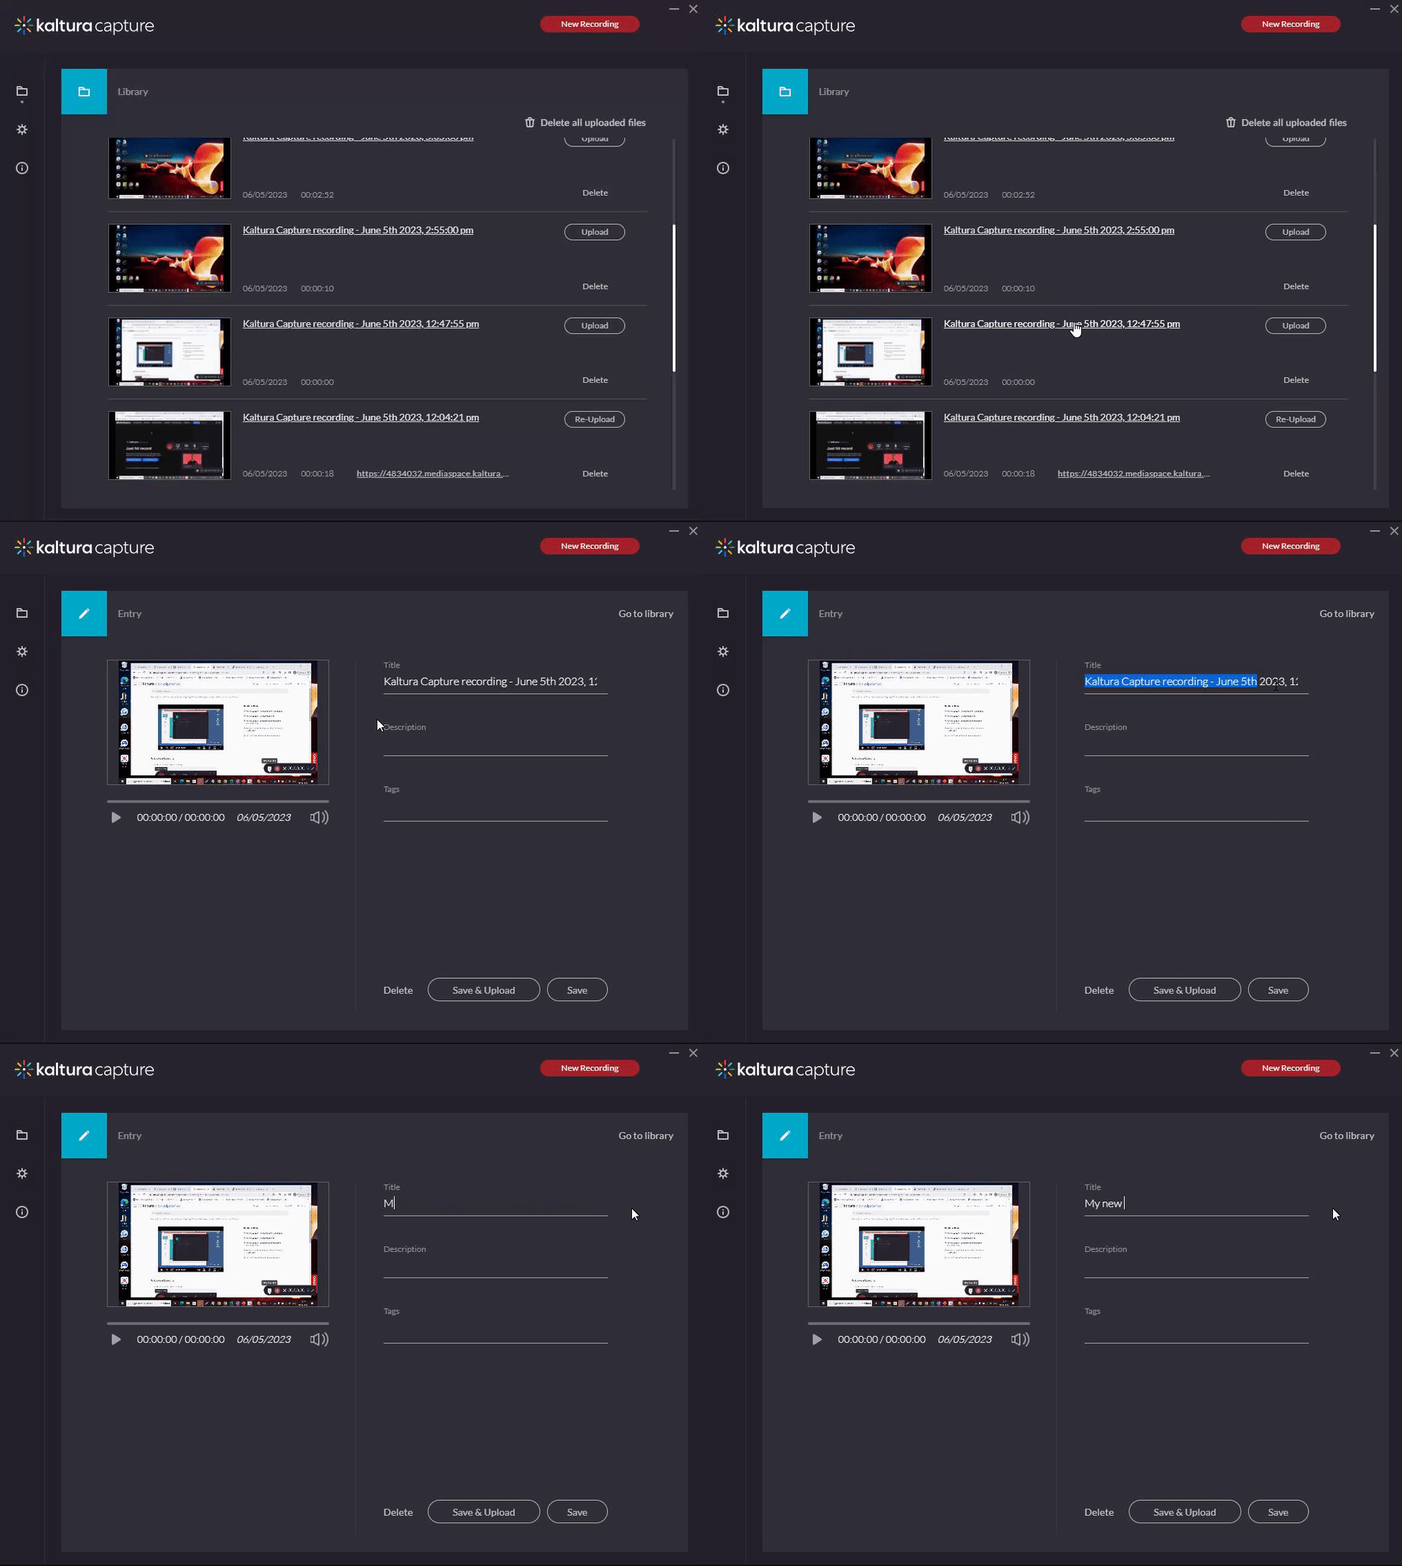
By Default, the titles for all new Recordings will start with Kaltura Capture recording and then contain the date and time of the recording. To make your recordings easier for you and your students to search, please give the videos more descriptive titles.
Finalizing a Recording
When you click Save & Upload, the new video will appear at the top of the Library tab of the recording management window. It will remain there until you delete it. After clicking to upload a video, a pending status will display next to the entry.

When the upload has started, a message displays: Started uploading to your media.
When the upload has finished, a message displays: Recording was successfully uploaded to your media.
You can close the application during an upload, and your recording will continue uploading in the background as long as you're logged into the computer. You can lock the computer, but don't sign out. Uploading will pause if you log off.
The video will now be in your My Media, and you can click on the link to navigate to the entry in your video portal.

To learn how to embed and share these videos,
➤ See: Using Kaltura in Canvas.
Settings Tab
From the Settings tab, you can:
- Change the camera recording quality.
- Change the screen recording quality.
- Enable or disable system audio (Windows only).
- Change the recording name prefix.
- View the current recording directory where recordings are saved locally.
- Enable cursor highlighting during recordings.
- Set auto-minimize behavior when recording starts.
- Upload app logs for troubleshooting. A token is generated for support tickets.

If your camera or screen resolution is lower than the selected recording quality, Kaltura will automatically adjust to the highest supported resolution.
Information Tab
From the Information tab, you can:
- View the version information.
- View the connected user.
Important Note for Shared Computers: If more than one instructor uses Kaltura Capture on the same computer, another instructor may be signed in. Always check the Connected User setting to ensure your videos are uploaded to your account. If needed, sign out and relaunch the app.
- Sign out and reconnect to your account.
- View the connected site URL.

Using Express Capture
To use Express capture, first make sure your browser supports WebRTC.
The common WebRTC-supported browsers are Chrome, Firefox, and Opera. To check your browser, see: Express Capture supported browsers & devices.
Express Capture is not supported on mobile iOS devices, and you may see an error after recording or be unable to save your video.
For best results, use Express Capture on a desktop browser. Then follow these steps.
- Go to My Media or Media Gallery in Canvas.
- Click Add New → Express Capture.

- The Record Media page will appear.

- Your browser will request access to your webcam and microphone.
- Chrome

- Edge

- Firefox

- Chrome
-
Select Allow.
If you accidentally block access to your camera or microphone, Express Capture won’t load. Refer to, What to do if you get locked out of Express Capture, if you blocked the camera or microphone for this web application.
- Your browser will request access to your webcam and microphone.
-
Next, Select Your Devices

By default, Express Capture uses your computer’s webcam and microphone.
- Click the arrow next to the camera or audio icon to:
- Choose a different device (if available).
- Toggle the camera or microphone on/off.
You cannot turn off both the camera and audio at the same time.
- Enable Screen Capture (if needed)
- Screen capture is only available when both camera and audio are enabled.
- Click the arrow next to the screen icon to:
- Select the screen to share.
- Toggle screen sharing on/off.
- Click the arrow next to the camera or audio icon to:
- Start Recording
- Click the red record button.
- A 3-second countdown will begin.
- A timer will appear on the left side of the screen during recording.

-
Stop Recording
- Click the red stop button to finish.
- A preview window will appear with the following options:
- Record Again – Discard and re-record.
- Use This – Upload the video to Kaltura.


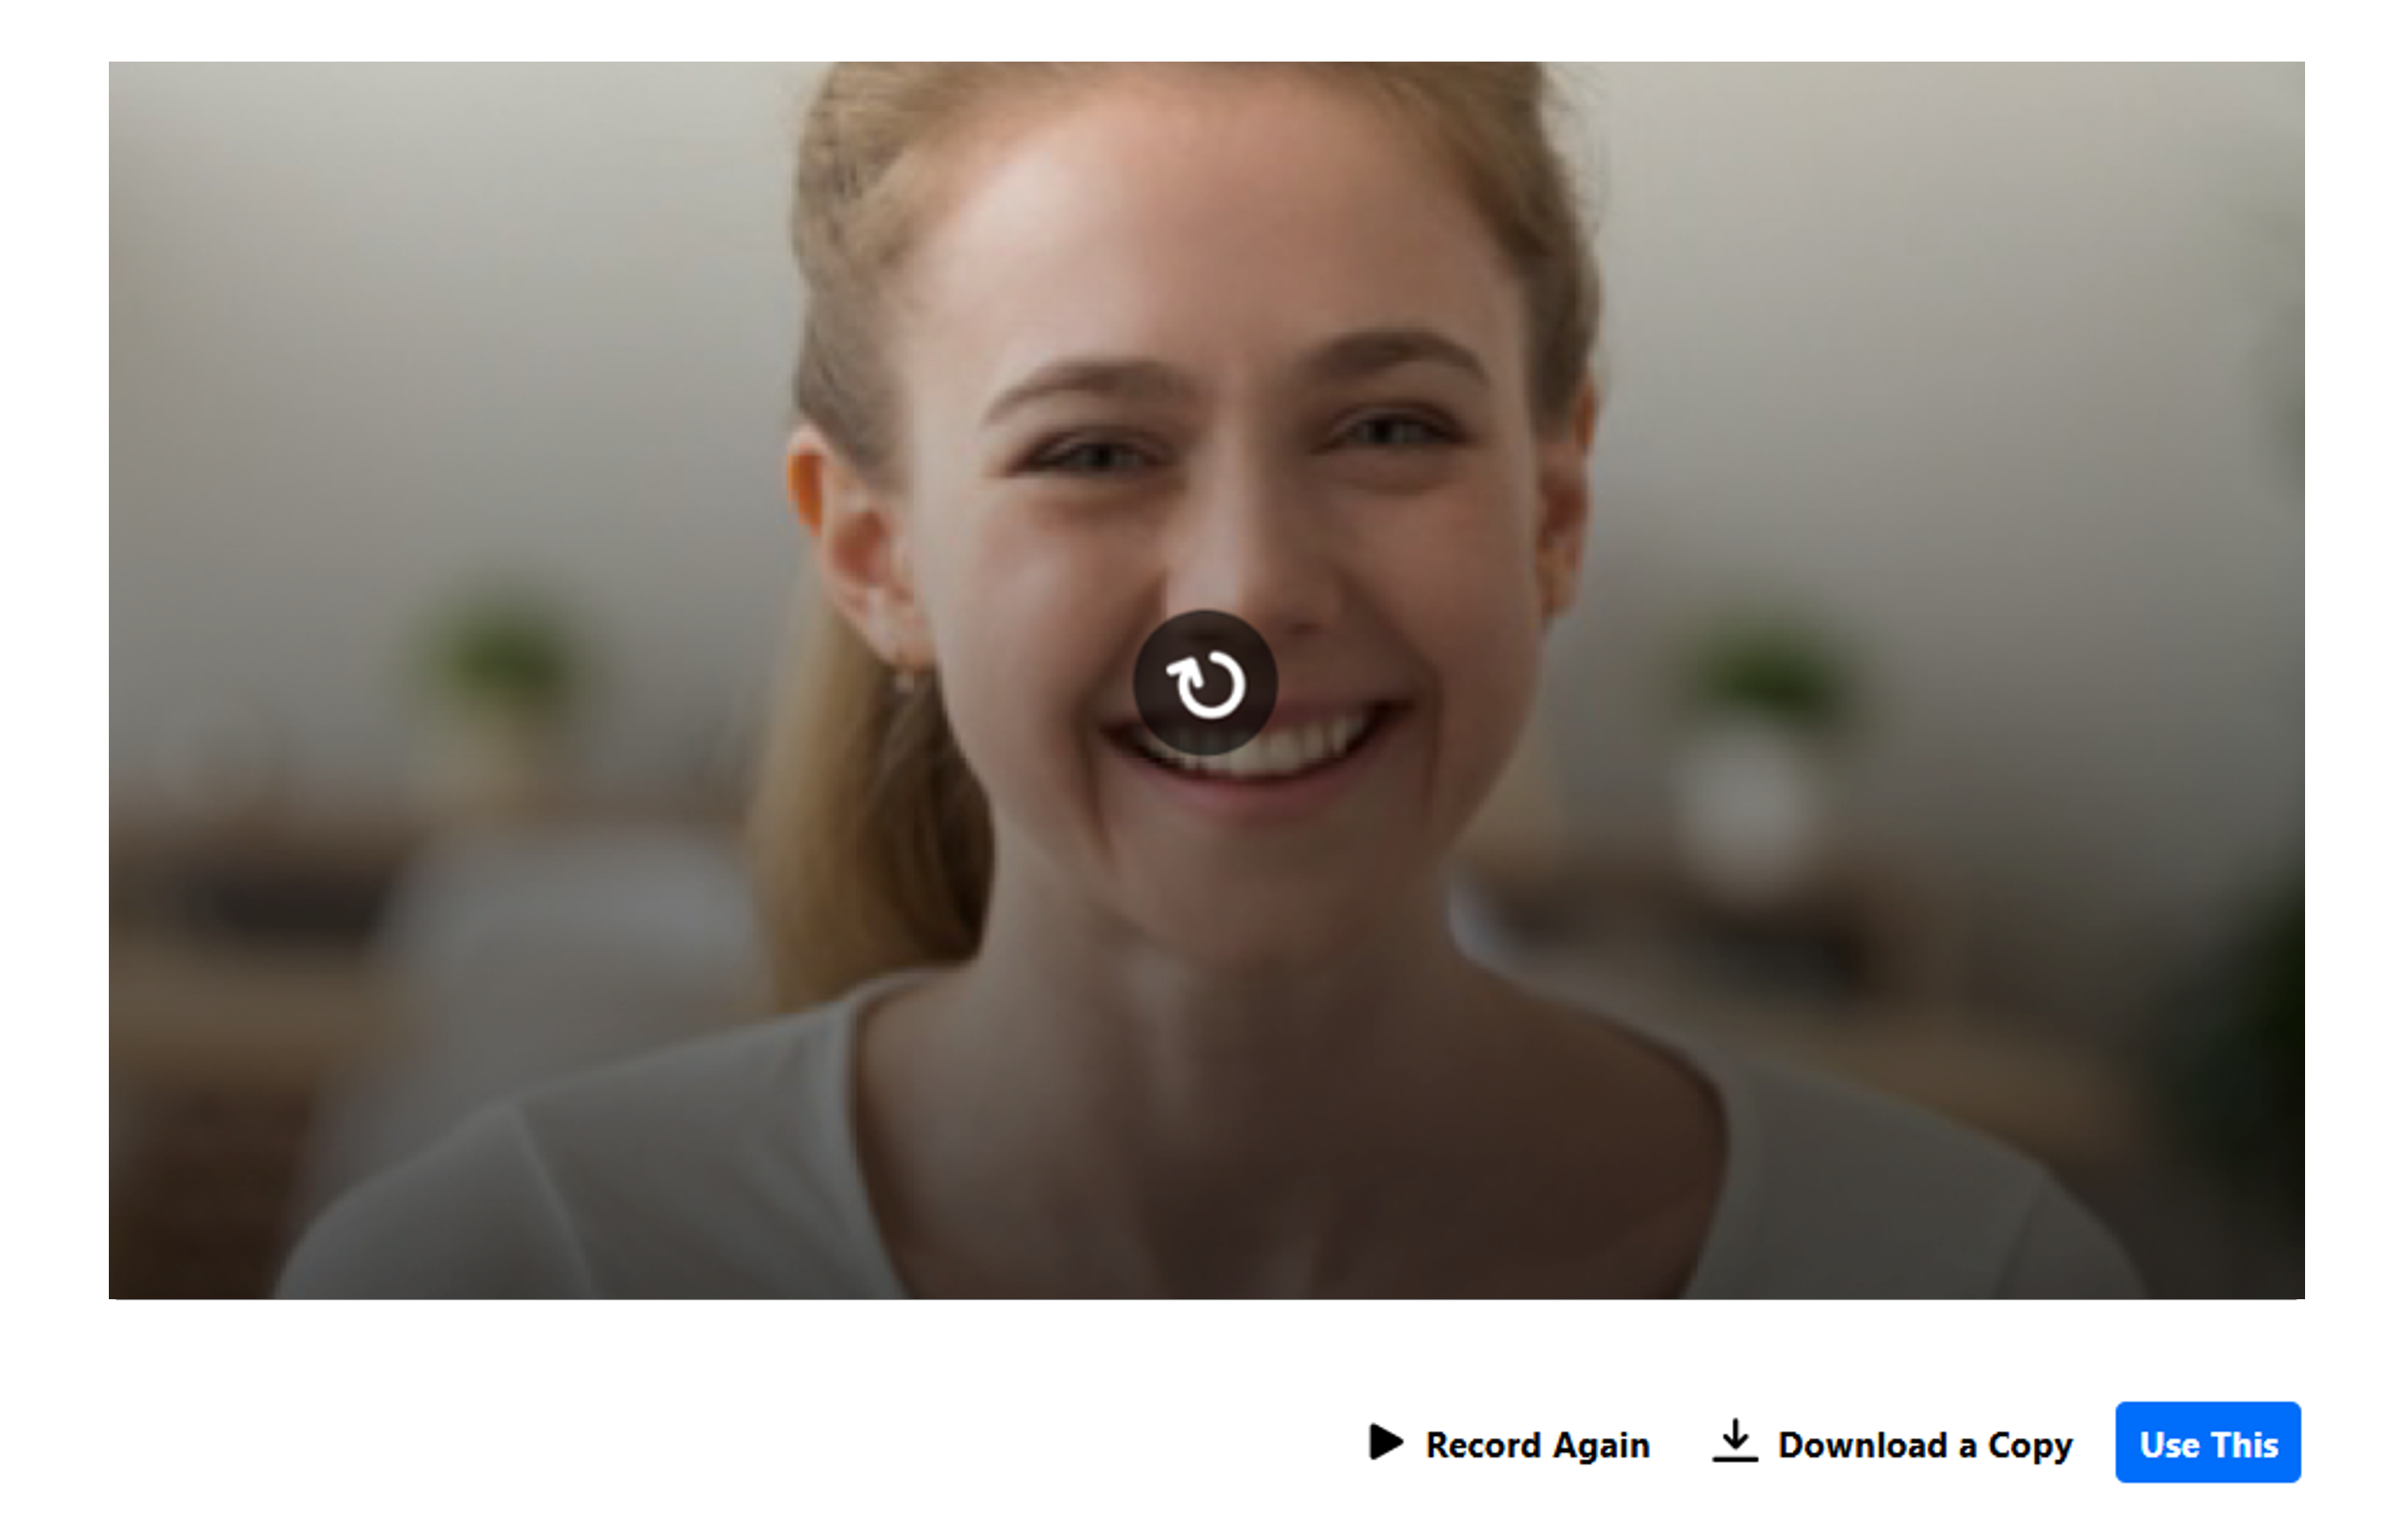
If you recorded both your camera and screen, the preview will show each stream stacked vertically with identical playback controls.
➤ See also: Create a recording with Express Capture
To learn how to embed and share these videos,
➤ See: Using Kaltura in Canvas.