Slate - Training and Resources
- Slate - Monthly Training
- Slate Resources - Internal and Vendor
- Slate - Submit Request
- Slate - Advising PTO/Holiday Settings
- Slate - Appointment Portal Calendar Intergration
- Slate Random Help
Slate - Monthly Training
Description
We hold a virtual 1 hour training session each month that covers Slate basics, new features, and open discussion. Topics covered include; general overview of Slate navigation, NOA processing, Communications, Queries, Advising Appointment management, and new features recently added.
The sessions typically have a 30 minute crash course in Slate followed by 30 minutes of open discussion covering use cases, errors/issues, inefficiencies, or anything else Slate related.
Schedule (All sessions start at 2 p.m. CT)
August 20th
Meeting Link
September 17th
Meeting Link
October 22nd
Meeting Link
November 19th
Meeting Link
December 17th
Meeting Link
Slate Resources - Internal and Vendor
Slate Vendor Resources
Slate Knowledge Base - Large database of Slate articles. You can find just about everything here.
Slate Community - Upload or search for user generated questions on features, use cases, and issues. Official user social group.
Slate Feedback - Do you wish Slate had a feature its lacking? Search or request for features to be added to Slate.
Slate Super Friends Facebook Group - Just like Slate Community but in an unofficial Facebook form.
A-State Internal Slate Resources
PDF Articles
Slate Overview Reference - Overview of Slate navigation and basic features
Slate Messaging Guide - Guide to sending messages, email and text, and setting up mass message mailings.
Instructions for Setting up External Email Gateway
Slate Instructional Videos
Student Tutorials
Applying to the HOWL or ATLAS Programs
Faculty and Staff Tutorials
Processing NOA's (Notice of Admission Form)
Advising Appointment Managing Availability
Slate - Submit Request
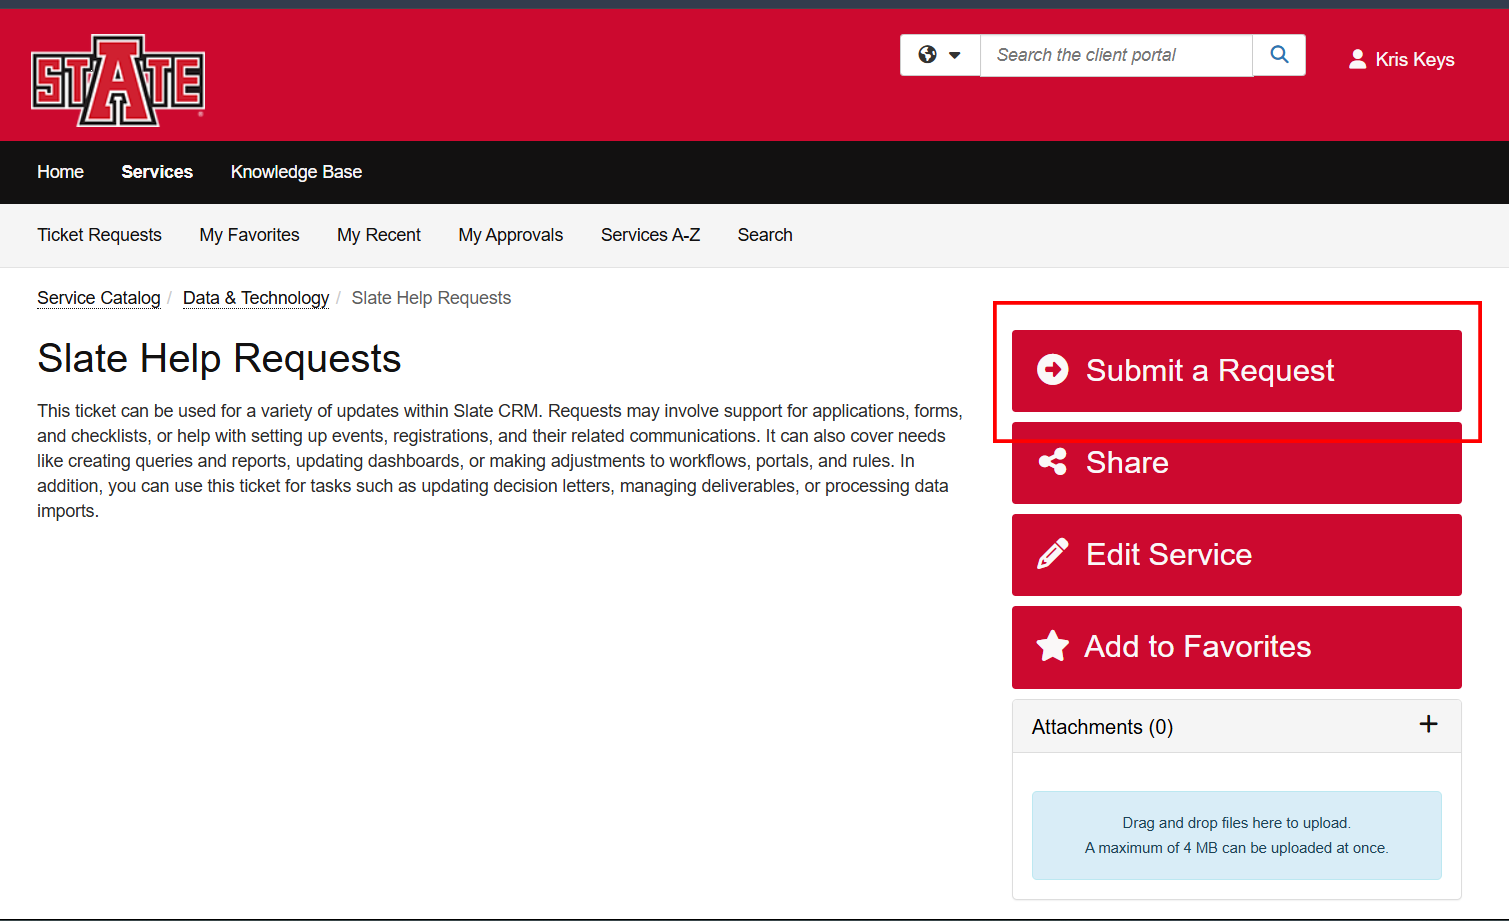
Submit a Ticket Service - Slate Help Requests
We strive to have fastest turn around time as possible but please note some requests like Mailings and Events take longer than Access and Query requests. Please allow for up to 2 weeks turnaround time for larger requests such as Mailings and Events. This gives us time to build, implement, test, and review while also being able to still manage our other tasks and requests.
How to:
- Follow above link and click 'Submit a Request'

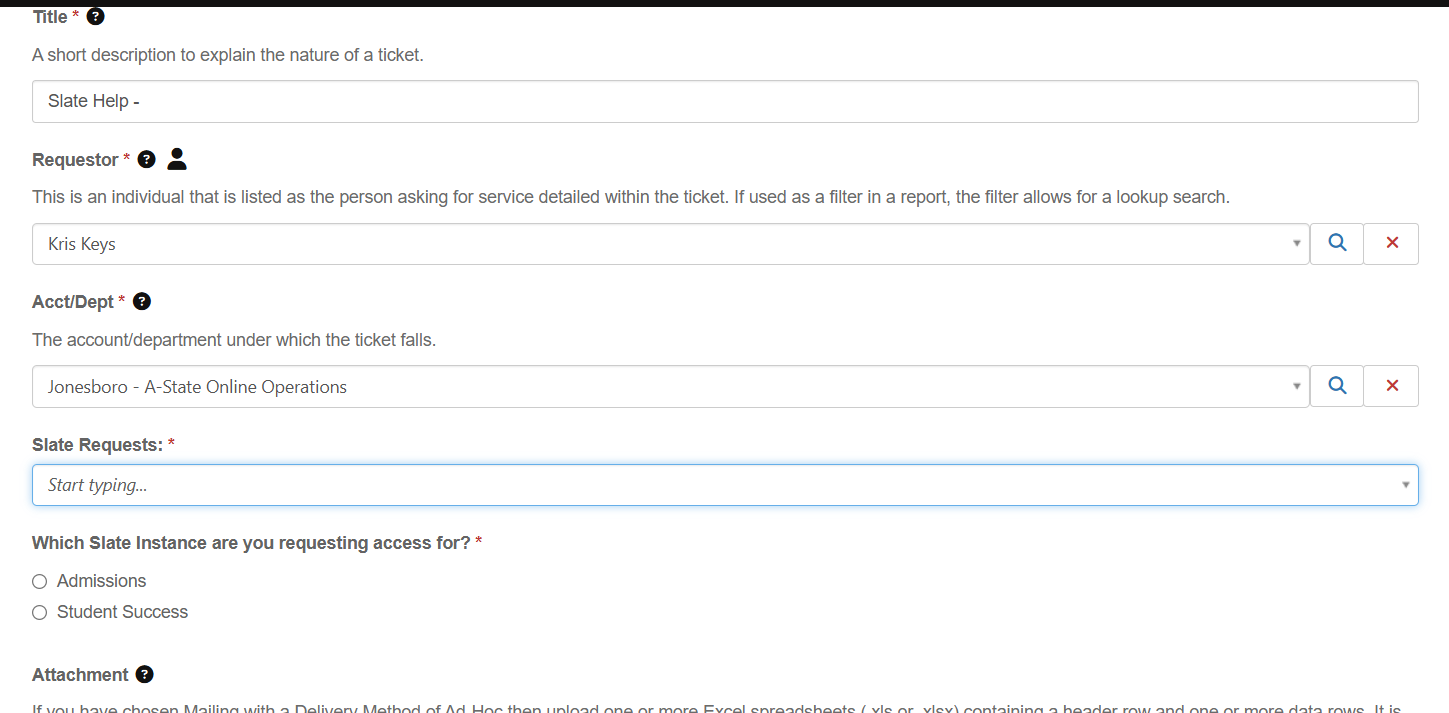
- Enter basic information regarding the request. Title - Short description of the request; Requester and Department should default to your information.

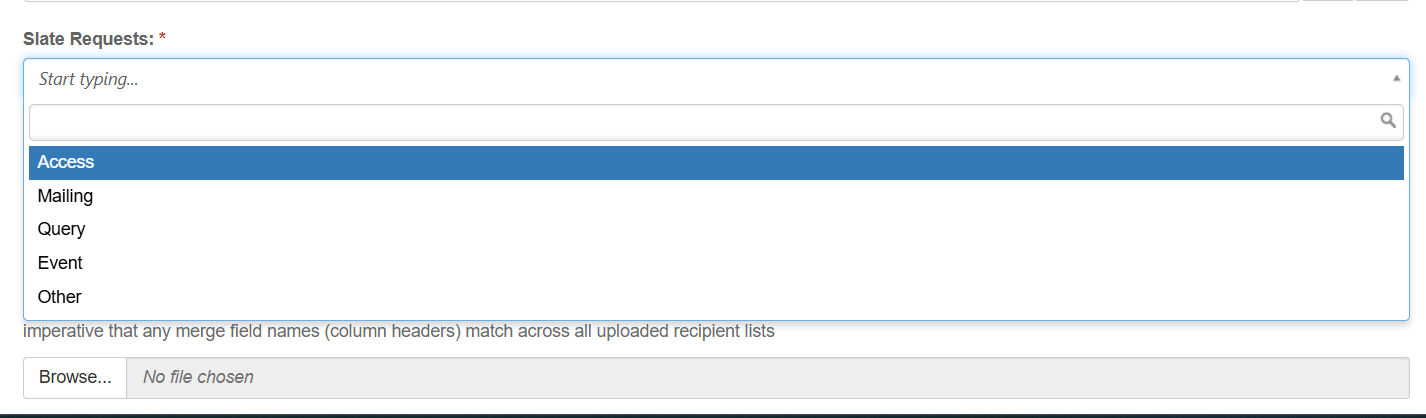
- Select a Request Type
- Access - Use for New Access Request to Slate. Requirements: New Employee Name, ID, Email, FERPA completion. List of jobs/duties or other existing account to mirror permission from.
- Mailing - Use to request a One-off or Reoccurring automated email(s). Please submit a new ticket for each unique message. Requirements: List of recipients, Message Body, Sender information, Schedule of deliver.
- Query - Use to request a Query/Report of data from Slate.
- Event - Use to request an Event or Series of Events to be created. Requirements: Date/Time, Location, Event Description, and Event Title.
- Other - Use for any request that do not fit the above criteria.

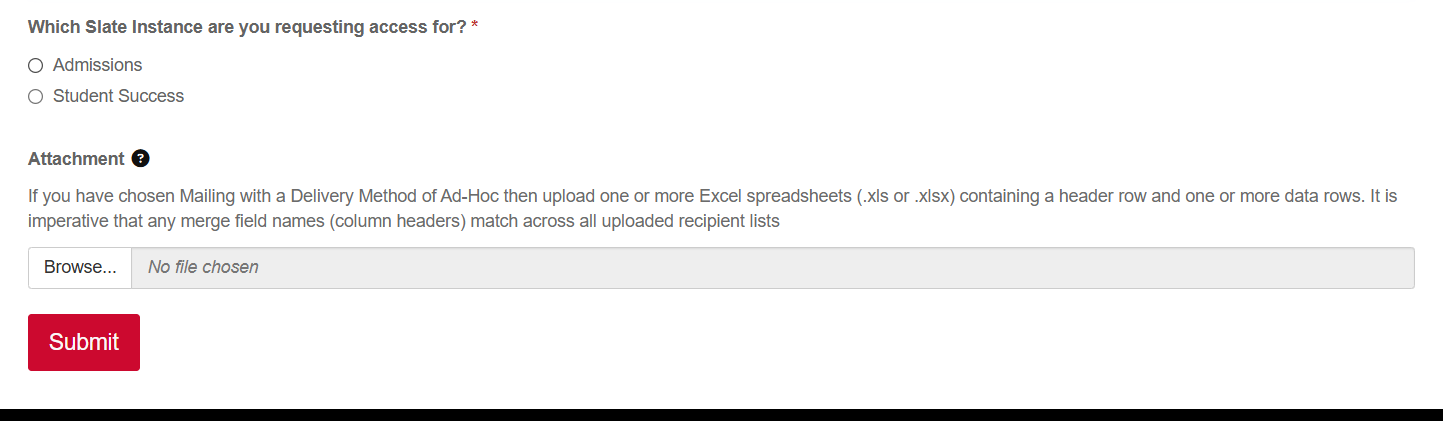
- Select which instance the request is for (Admissions or Student Success) and attach any file/documents via the uploader. Click Submit

Slate - Advising PTO/Holiday Settings
There are a couple different ways you can control your time off and holidays for your Slate advising appointments.
Please note that University holidays and closing are not automatically applied to your appointments.
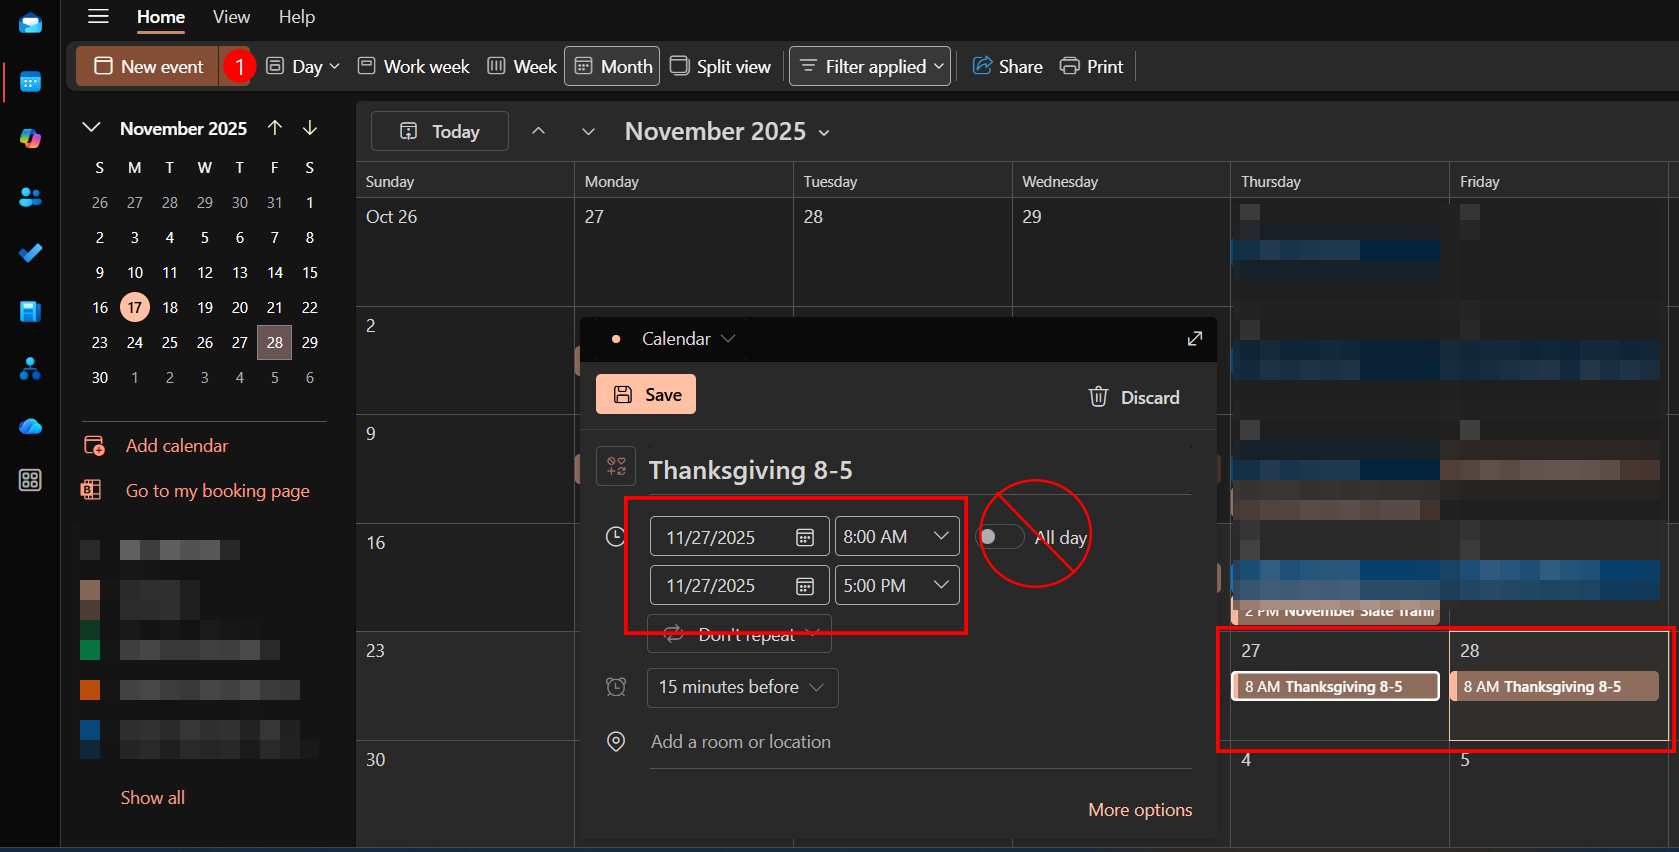
Option 1 - Setting your PTO and Holidays as Events in your Outlook Calendar. For example, Thanksgiving Thursday 8-5. This will block your calendar in Slate as well. You must enter the calendar event as a set time.
Selecting 'All Day' will not block out the time on your appointment calendar in Slate.
Open Outlook > Click on the day or 'New Event' > Set the time frame > Save. You must do this for each day your are not available.
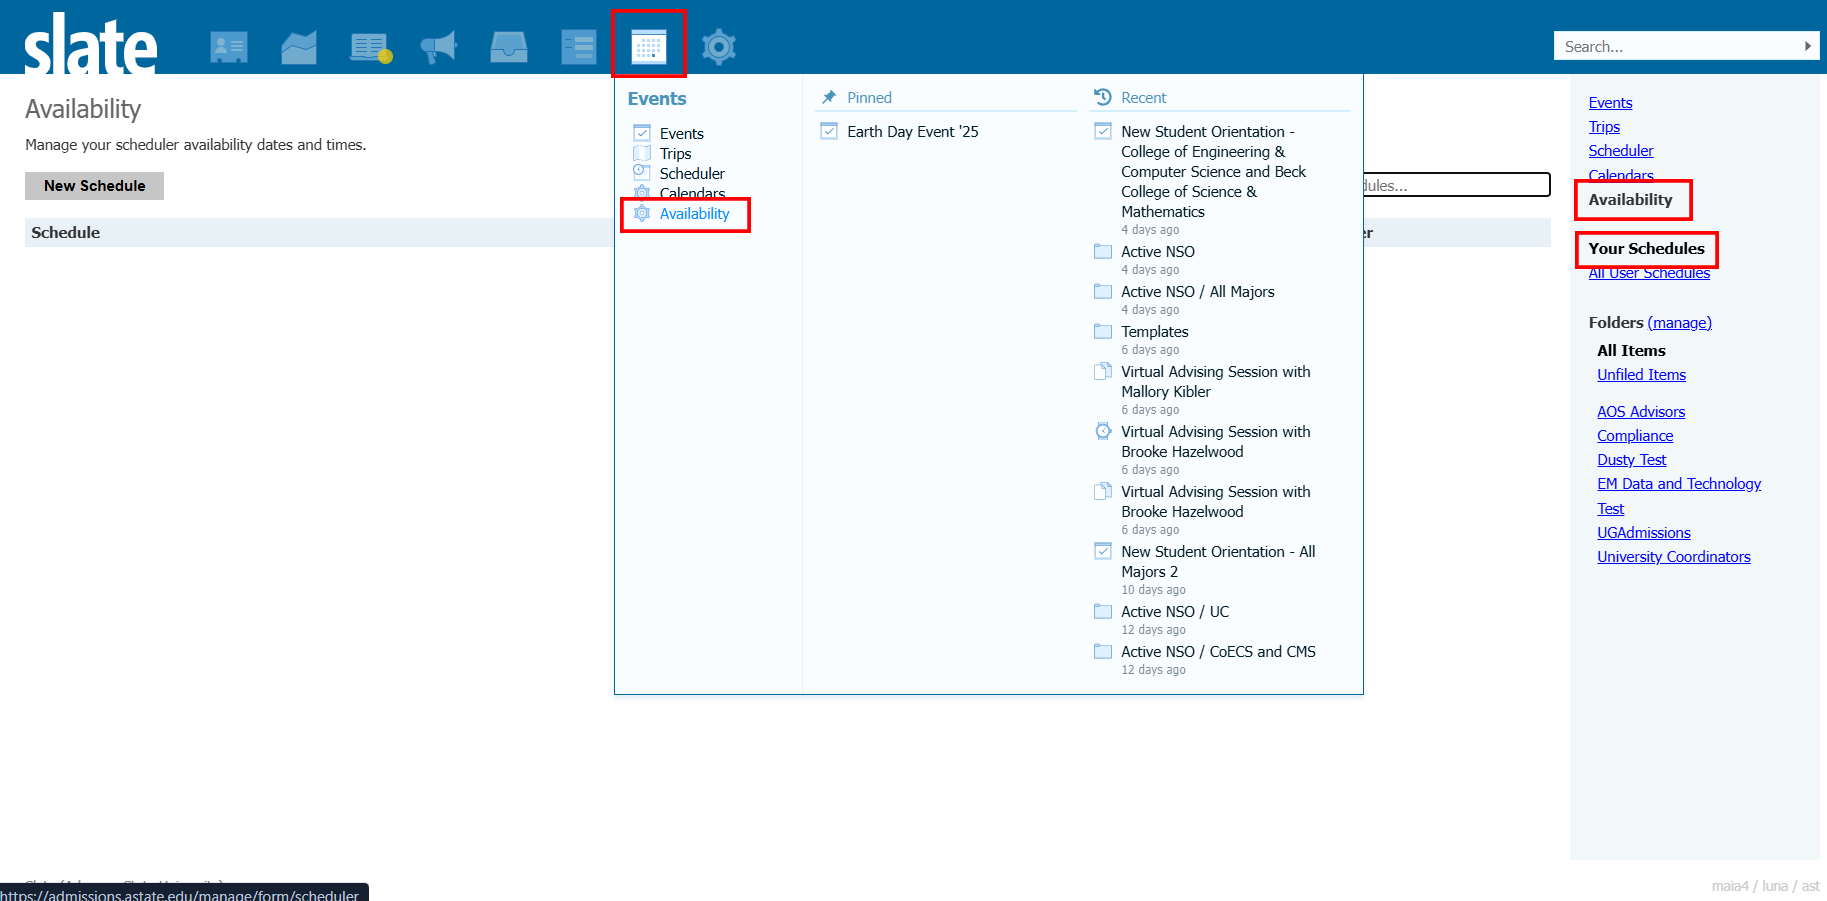
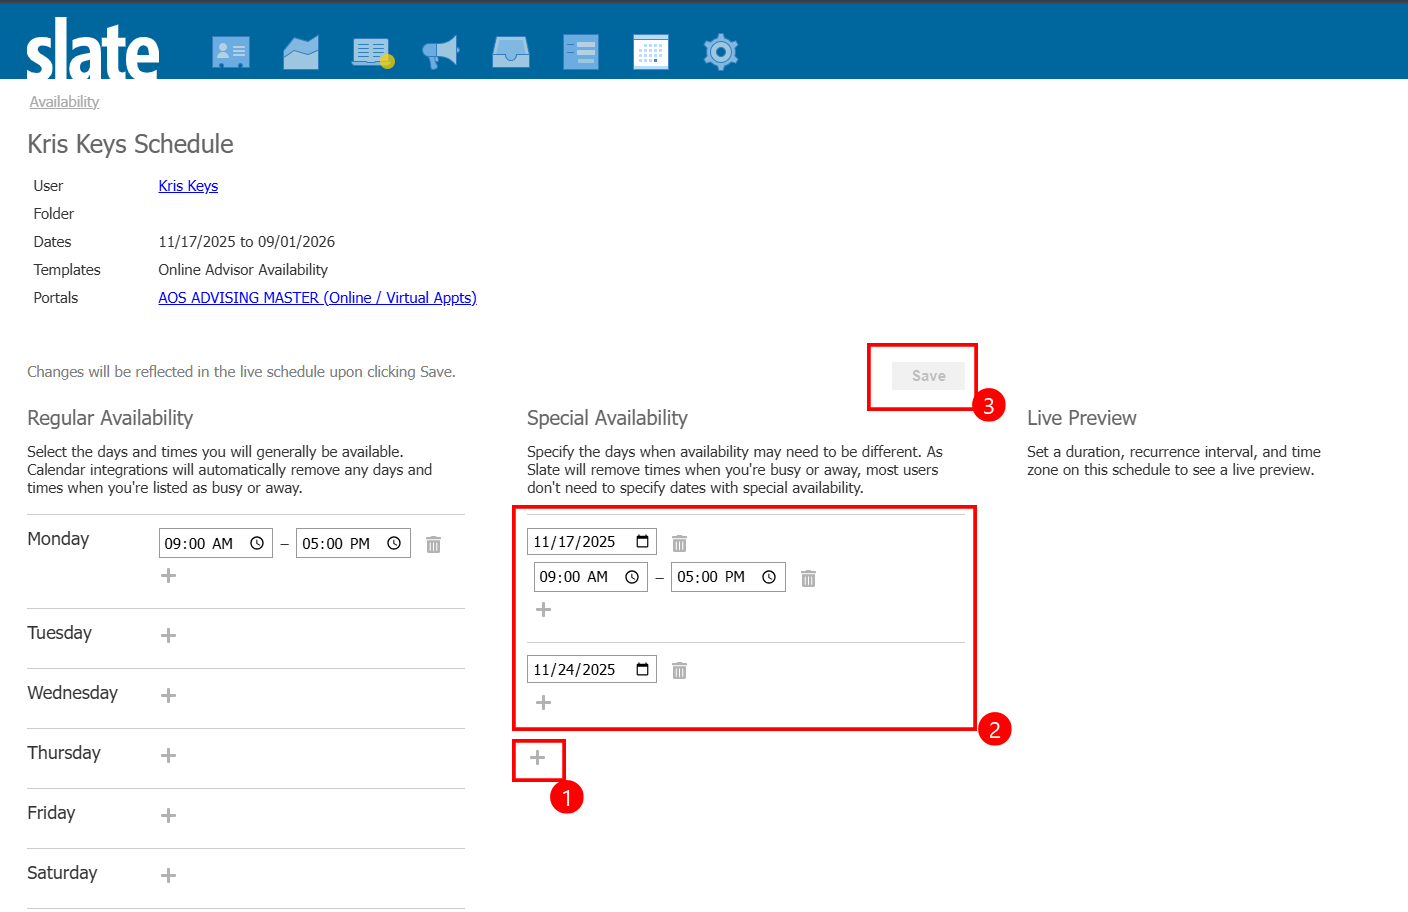
Option 2 - Setting alternative date availability within Slate.
You must click 'Save' for the changes to update.
Slate - Appointment Portal Calendar Intergration
Linking Your A-State Email Calendar with Slate
Follow the steps below to link your A-State email calendar with Slate and vice versa.
Get Your Calendar Link
-
Log in to your email calendar.
-
Click the Settings button (gear icon in Outlook).
-
Click Shared Calendars.
-
Under Publish a Calendar, select the appropriate calendar and permission level.
-
Click Publish.
-
Copy the generated ICS link.
Share Your Calendar with Slate
-
Log in to Slate and navigate to Events > Calendars.
-
Click Add New Calendar.
-
Select ICAL Feed as the service, then click Continue.
-
Enter a name (for example, First Last Calendar).
-
Choose a folder.
-
Confirm that you are listed as the user.
-
Paste the ICS link into the URL field.
-
Set the appropriate time zone.
-
Click Save.
Share Your Slate Calendar with Your External Calendar
-
Log in to Slate and navigate to Events.
-
Scroll down until you see iCal Subscribe in the right-hand menu.
-
Click Your Events under iCal Subscribe.
-
A dialog box will open prompting you to open your external email calendar.
-
Click OK.
-
Once your email application opens, click the Calendar icon to display the Subscribe from Web page.
-
The subscription link will be automatically populated but is missing one component.
-
Add
webcal:to the beginning of the link. -
Click Import to complete the subscription.
Your A-State calendar appointments will now appear in Slate and will affect your appointment availability. Likewise, your Slate appointments will appear on your external calendar.
For more information about availability settings and configuring PTO, click here.
Slate Random Help
Update Form/Query Permissions
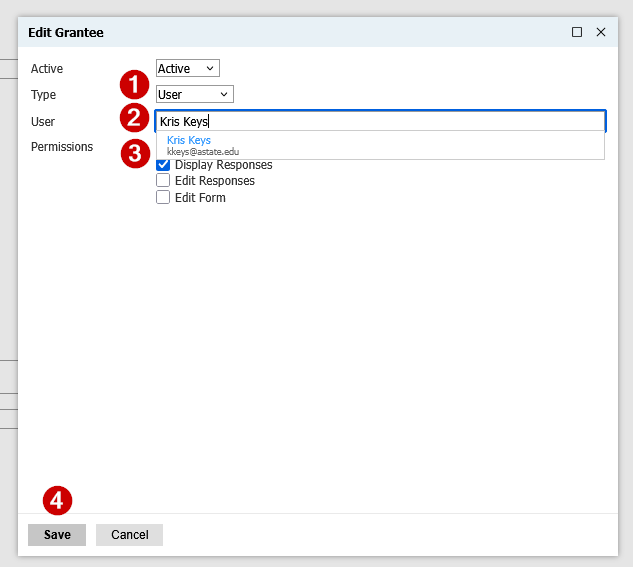
Steps to add users as grantees on Forms, Events, and Queries
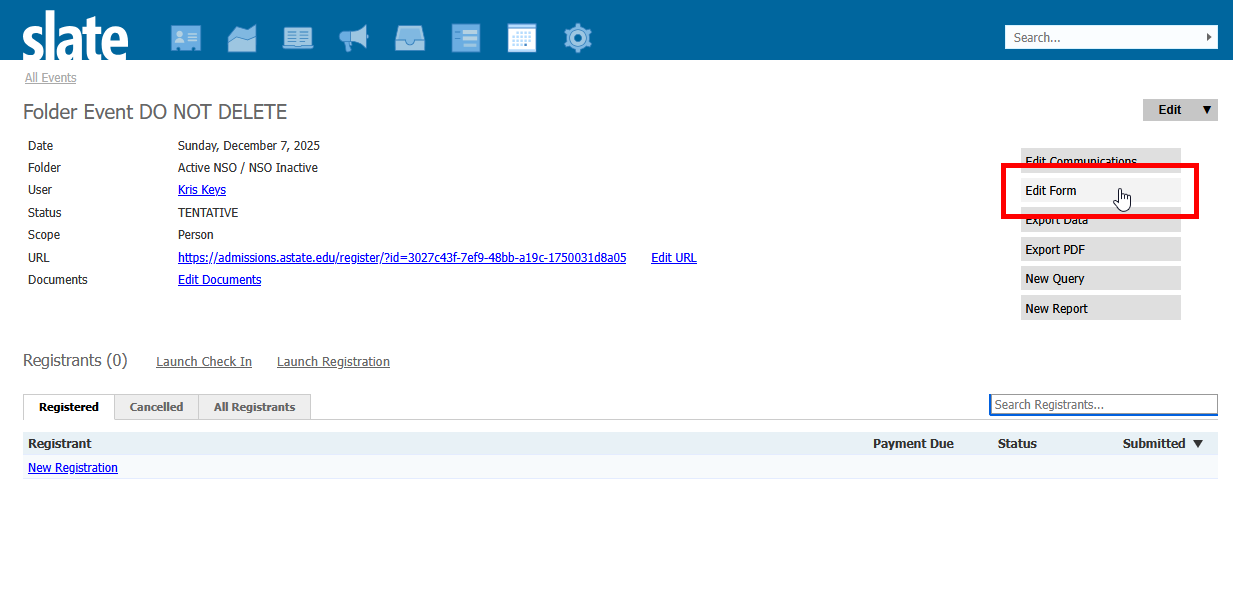
Step 1 - Open Form, Event, or Query
Step 2 - Click 'Edit Form' if in Form or Event. Query skip to step 3
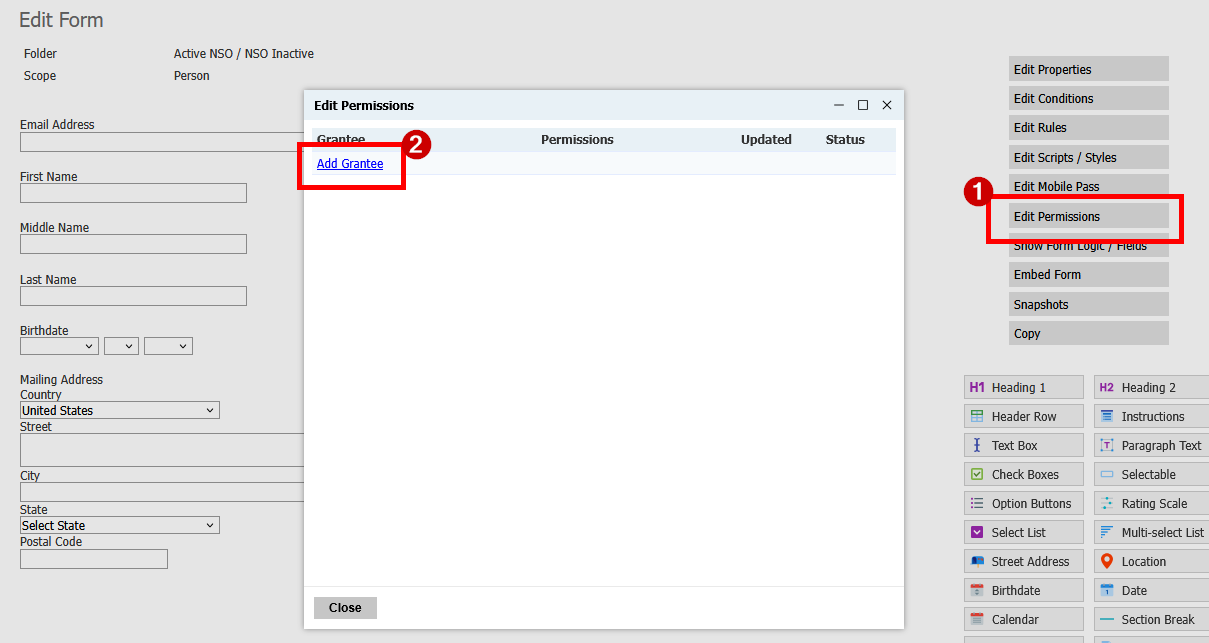
Step 3 - Click 'Edit Permissions'
Step 4 - Click 'Add Grantee'
Step 5 - Choose Type: User, Role, Permission
Step 6 - Select specific User, Role, or Permission
Step 7 - Select Permission Level