Entra ID Join Procedure - Remote Assets
Before completing the steps in this document be sure that you have backed up all files from your current local profile to OneDrive. At the end of this joining process you will no longer be accessing the managed asset using a local account. For additional information on OneDrive, please see the following KB Articles: https://kb.astate.edu/books/microsoft-365/chapter/onedrive
1. Purpose
This procedure establishes the necessary steps for an institutionally owned and managed asset to be joined to A-State’s Microsoft Entra ID tenant. To ensure compliance with university standards and a consistent experience for users, all technology resources shall be configured to meet a minimum standard. Remote devices that are not joined to the on-premise domain must be manually joined to Entra ID to ensure compliance with these standards.
2. Scope
This standard applies to all Arkansas State University (A-State) owned technology resources and users of those resources.
3. Definitions
Entra ID – Entra ID is Microsoft’s cloud-based identity and access management (IAM) service, parallel to on-premise Active Directory.
4. Responsibilities
IT Security Team – Responsible for the technical configuration of device joining settings in Entra ID, including the permissions of who is able to join devices.
ITS Endpoint Technician – Responsible for assisting users in their area of support with the Entra join process.
User – Responsible for enrolling their remote assets into Entra ID and ensuring all necessary files are backed up prior to this enrollment.
5. Entra ID Join Steps
Need assistance with these steps? You can request support with this process from your assigned zone technician in completing these steps. https://kb.astate.edu/books/endpoint-technicians-team/page/its-zone-structure
- On your A-State owned asset, sign in and go to system settings.
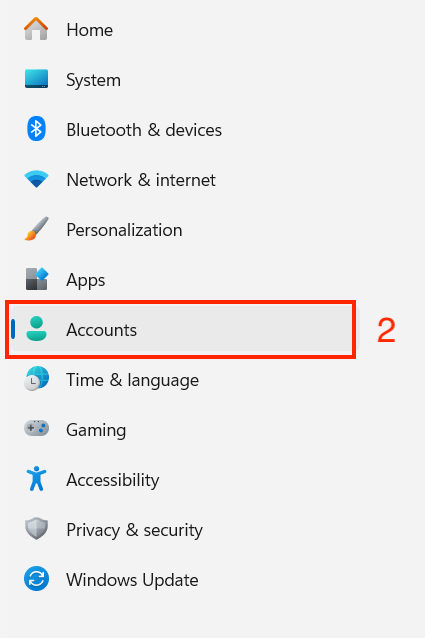
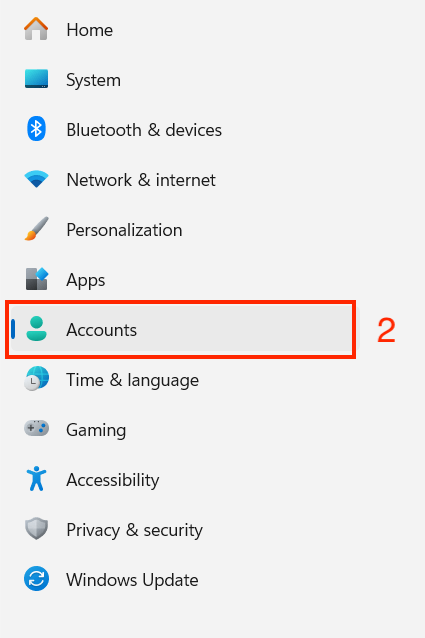
- On the left, select “Accounts”.
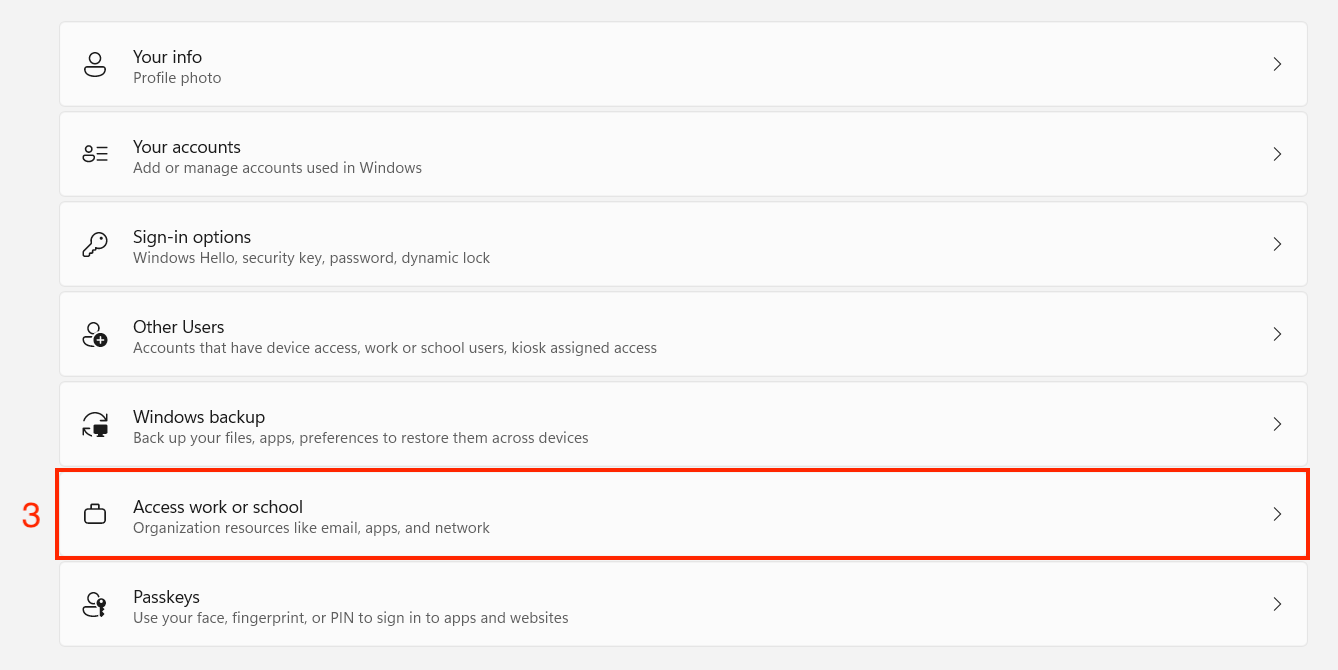
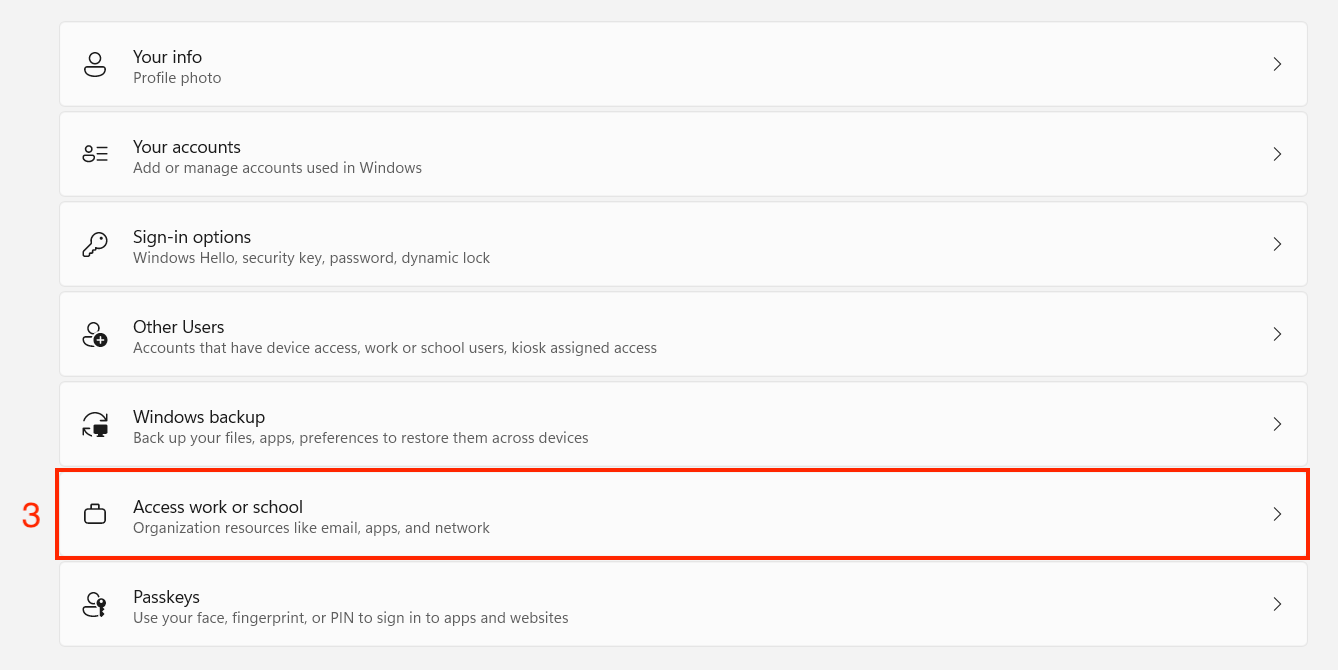
- Find and select “Access work or school”.
- In the “Add a work or school account” section, click “Connect”.

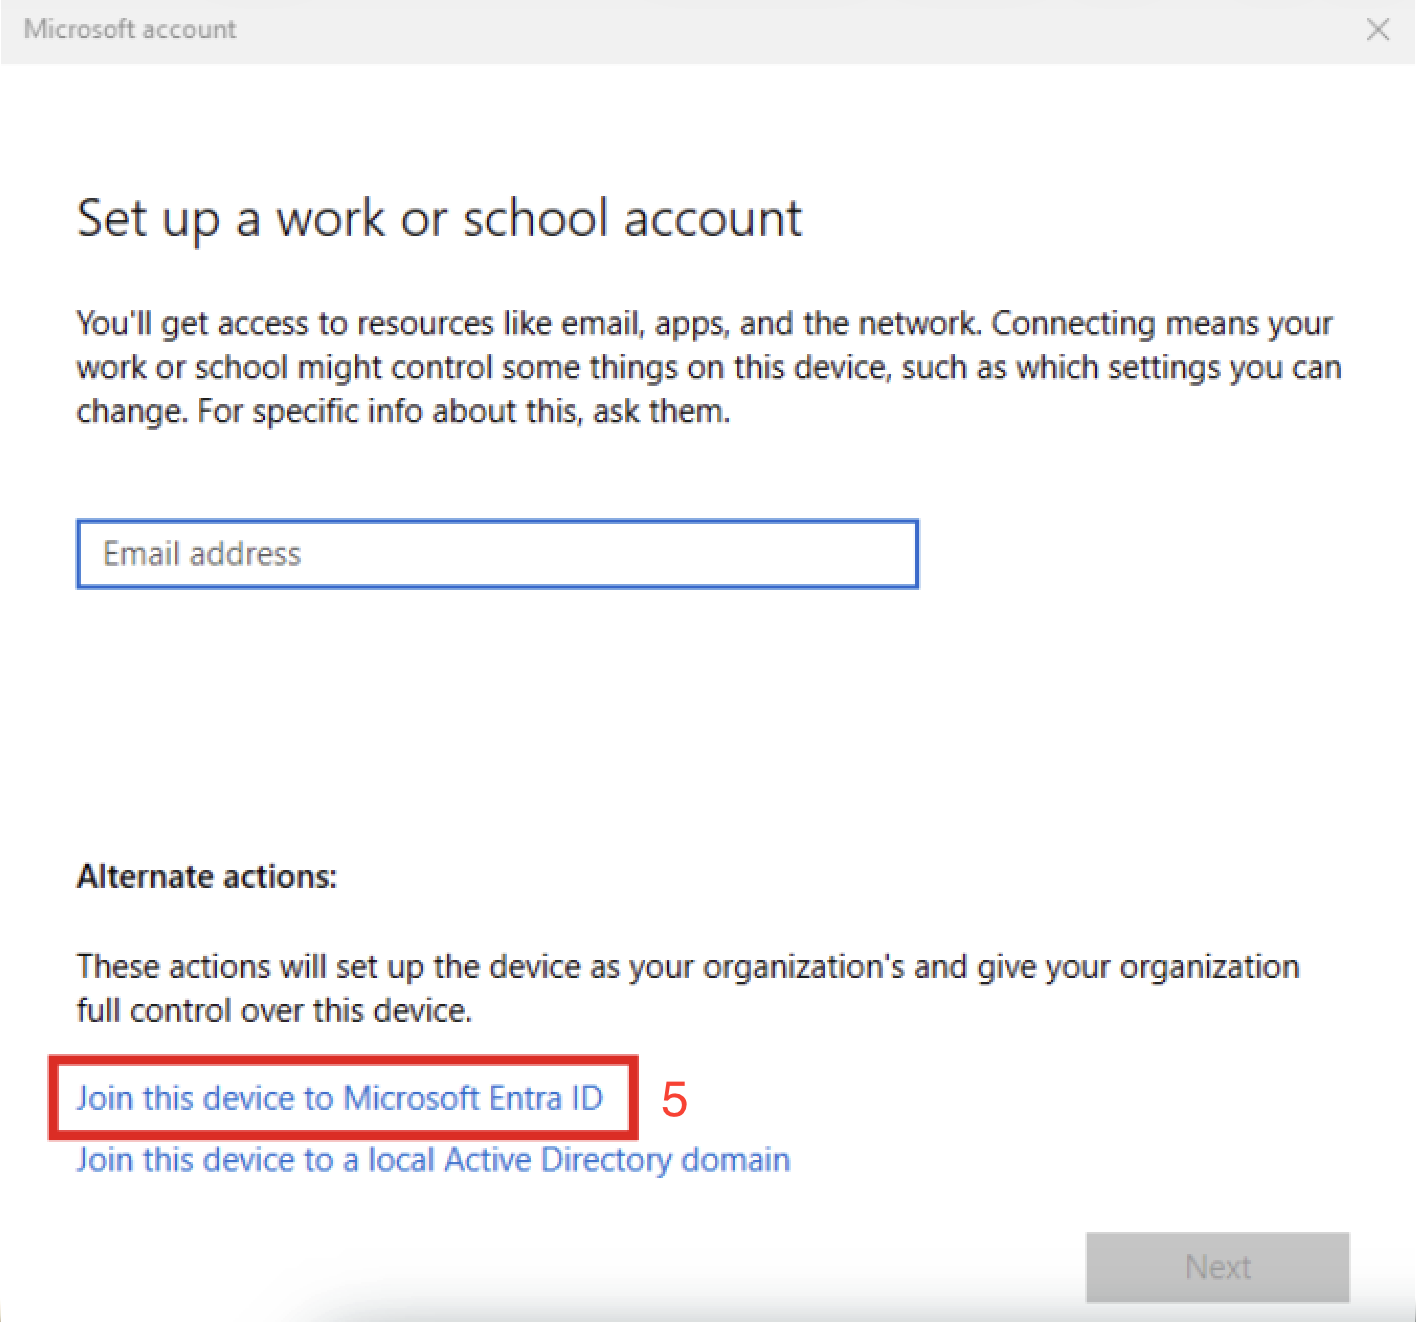
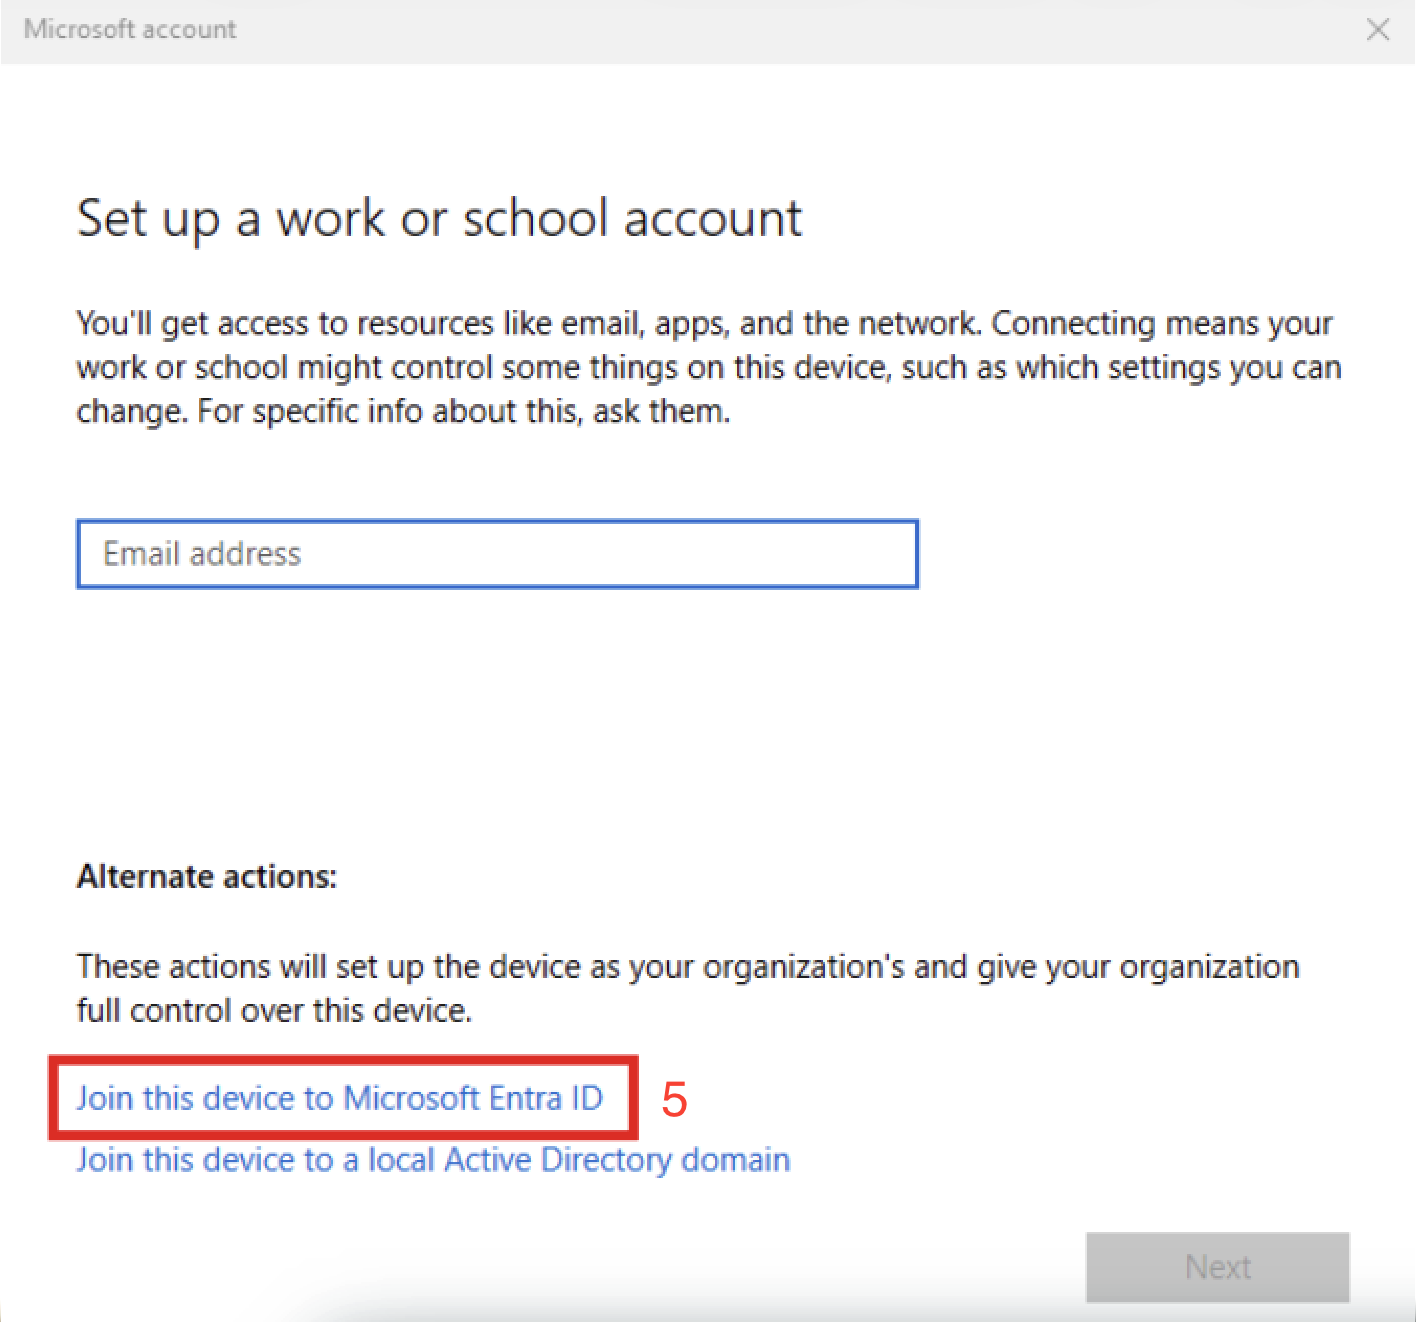
- At the bottom of the window, there is text that says, “Join this device to Microsoft Entra ID”. Click on that text.
- A Microsoft credential window will pop-up, enter your A-State email and password.
- A window should pop up asking you to accept, and/or a confirmation window asking you to “Make sure this is your organization”. Hit Accept/Join.
- You should receive a message stating that your device has been connected to A-State.